
I will show you how to create a SALES FUNNEL for FREE with just one tool. It’s a great ClickFunnels alternative that will save you at least $1164 per year.
So let’s just jump into the tutorial.
👉 Go to Systeme.io
(The tool we will use to build the sales funnel).
Below is the comprehensive, step-by-step video tutorial:
We will create an entire sales funnel including everything you need the Squeeze page, emails, sales page, and checkout so people can pay you.
Related links: What is a sales funnel?
Sales funnel flow
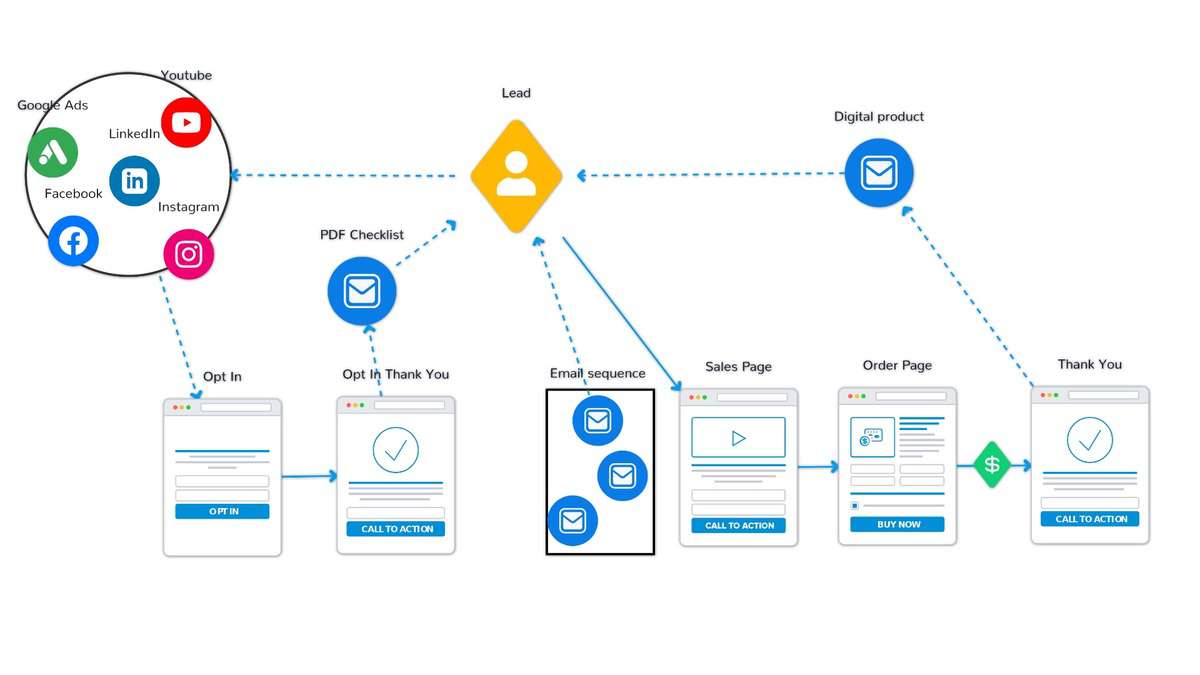 Above, you can see the whole flow for this tutorial. We are going to start this course by creating an opt-in page. Or some also call it a squeeze page. The goal of this page is to get visitor’s email addresses in exchange for a freebie (a.k.a. lead magnet) that we will provide.
Then we will build a thank you page for those that signed up, and we will provide simple steps on how they can receive their freebie. After we send them an email with the freebie, this is done automatically as soon as they signup.
Then we will create a sales page, where we describe the offer and the value of the product or service.
If a visitor is interested, they will go to an order page, leave their details and pay for the product. Then there will be a thank you page, where they can download the product.
In the end, we will create a sales email that will be automatically sent out to the contact.
Step 1: Create an account
As mentioned earlier, we will be using Systeme.io as our tool. So just create an account with Systeme.
The process is pretty simple. Enter your email, and you will get an email to verify your email.
After you can set the password, and in just minutes, you will have an account.
Step 2: Build a squeeze page / opt-in / landing-page
Our funnel starts with a squeeze page, or some call it an opt-in page or a landing page.
The goal of this page is to offer something to the visitor in exchange for their contact details, usually an email address.
This can be achieved by going in the navigation to “funnels.”

And then click on the “create” button.

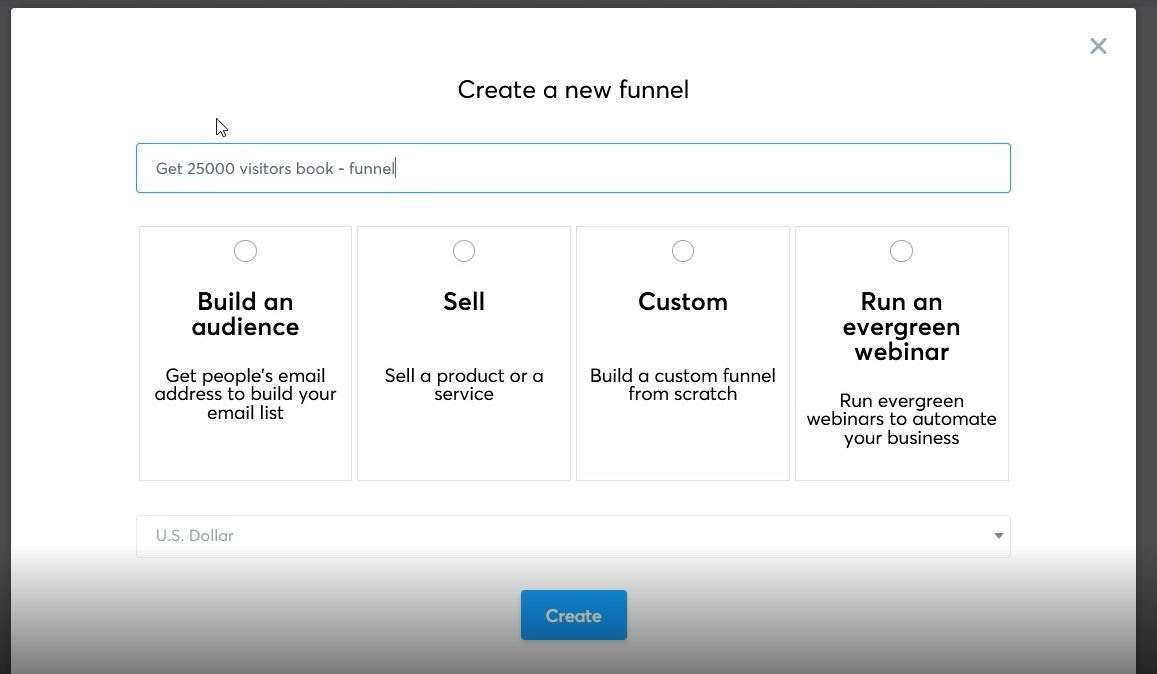
Give the funnel a name.
Then you can choose what type of funnel you are building. The only difference between these options is that Systeme will preset the funnel slightly differently depending on the option.
We need to build an audience so let’s choose that option.
In addition, choose the currency you want to sell your product or service.
The next step is to choose a template for your opt-in page. As you can see, there are a bunch to choose from. If you hover over the templates, you can either preview or select them.
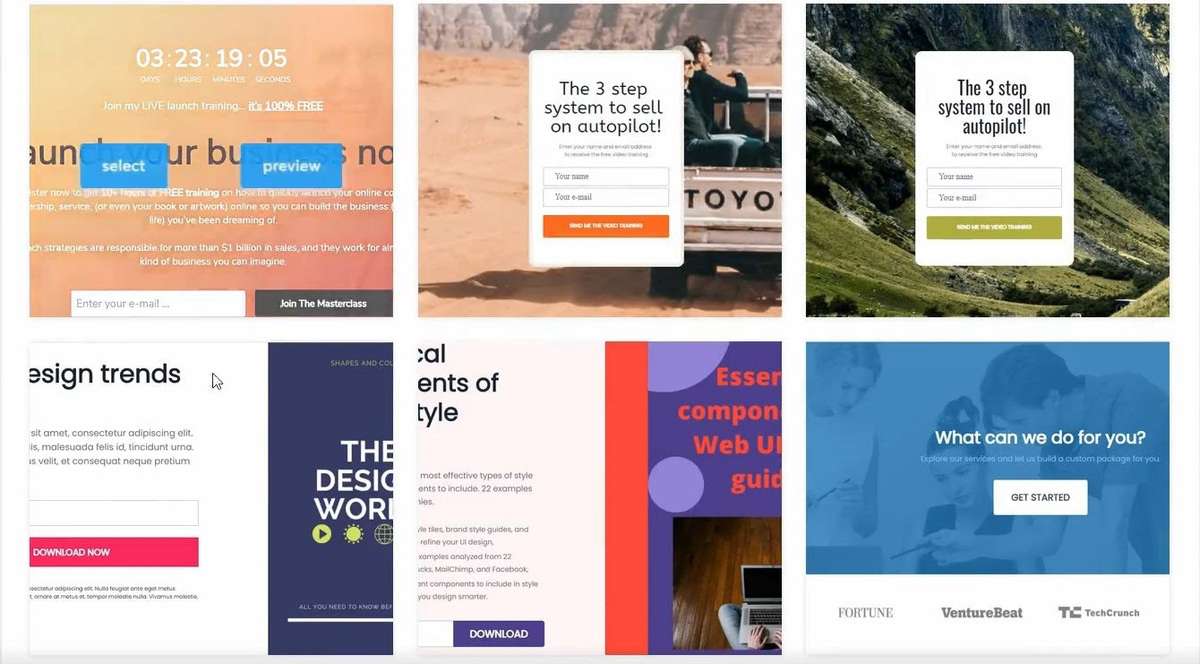
Just remember, start simple. Don’t go for anything fancy if this is your first sales funnel. Just pick the one that fits your needs the most!
Once you’ve selected the template, you will see the funnel overview page again.
Just give your funnel a name and then add a URL path. Btw. for the URL path, replace spaces with dashes. So “sales funnel page” becomes “sales-funnel-page,” also keep all the letters lowercase.
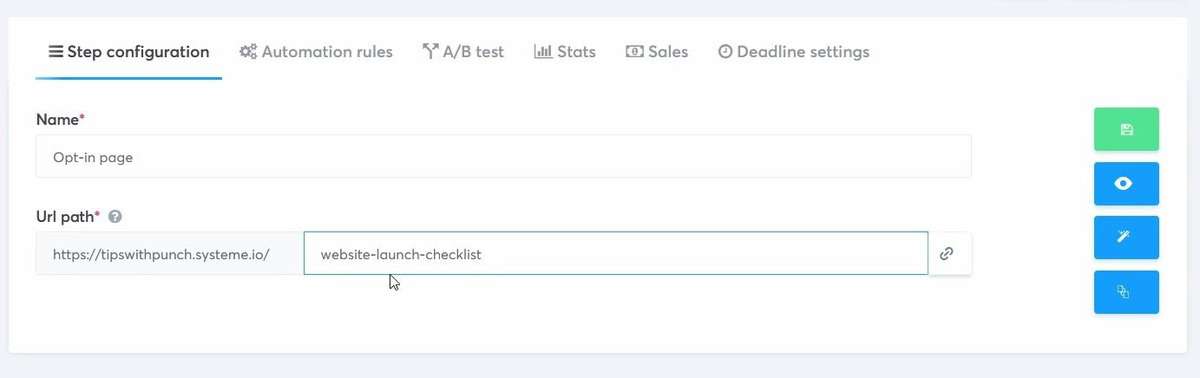
Then hit the green save button on the right.
And now, you can go ahead and click on the pen icon on the right to edit the template.
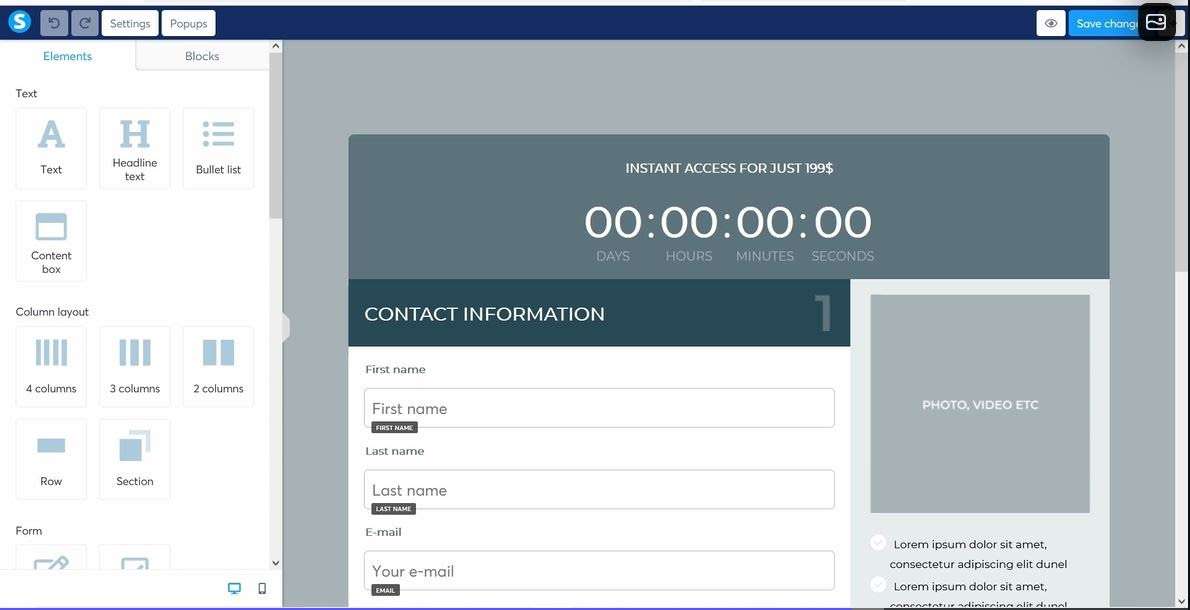
And you will land in the Sales funnel builder. Here, you will adjust the layout, change the elements, and add your text, images, & videos. Systeme’s builder works similar to most other page builders.
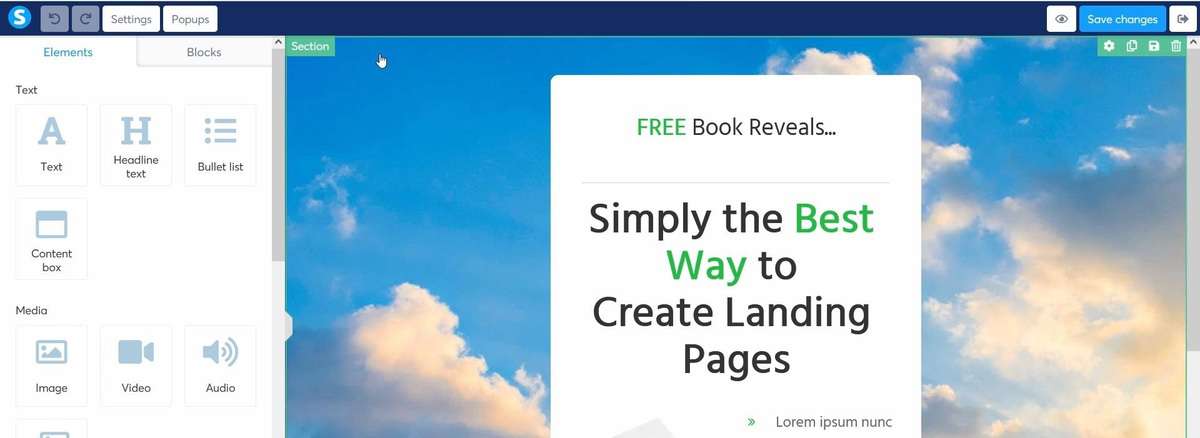
On the left, you have the elements & row structures.
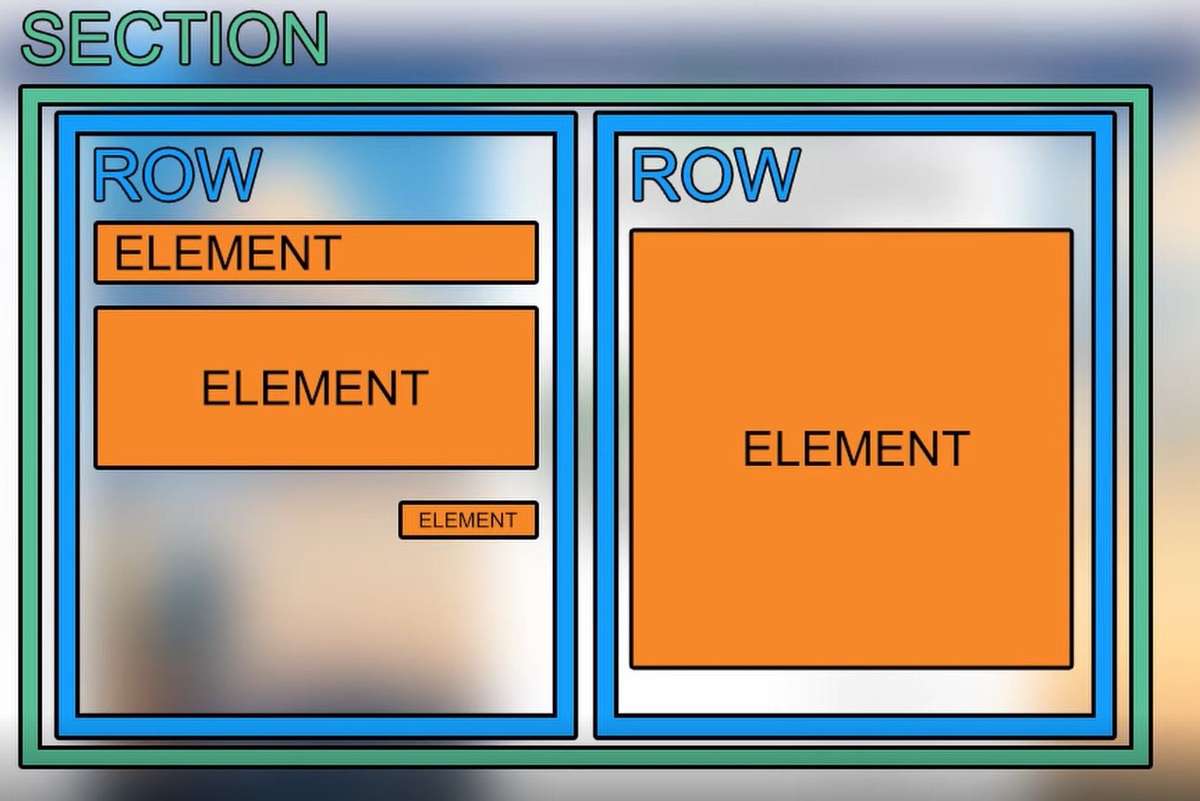
Oh, and keep in mind that the builder has the following structure:
First, you have sections. Inside the sections, you can place multiple rows. And inside a row, you can place elements (images, videos, text, etc.) and other rows.
You can adjust things like background color or image, margin, padding, and other parameters for each of these. For a detailed description, it’s easier to watch the video at the beginning of this article.
Just style the page how you see fit and change the text to fit your product or service.
Other settings in the page builder
There is also a separate page settings section. These are where you can set all the defaults for the page, such as color & font. And also, you can disable the “Powered by Systeme.io” logo.
This is an affiliate link, so if anyone clicks on this logo and signs up for a paid plan at Systeme, you will get a commission.
Another important thing in the page settings is the SEO details. DON’T SKIP THIS!
Fill in the title, description and add an image. This is what search engines and social media websites use to show your page. Make sure that you have this filled in.
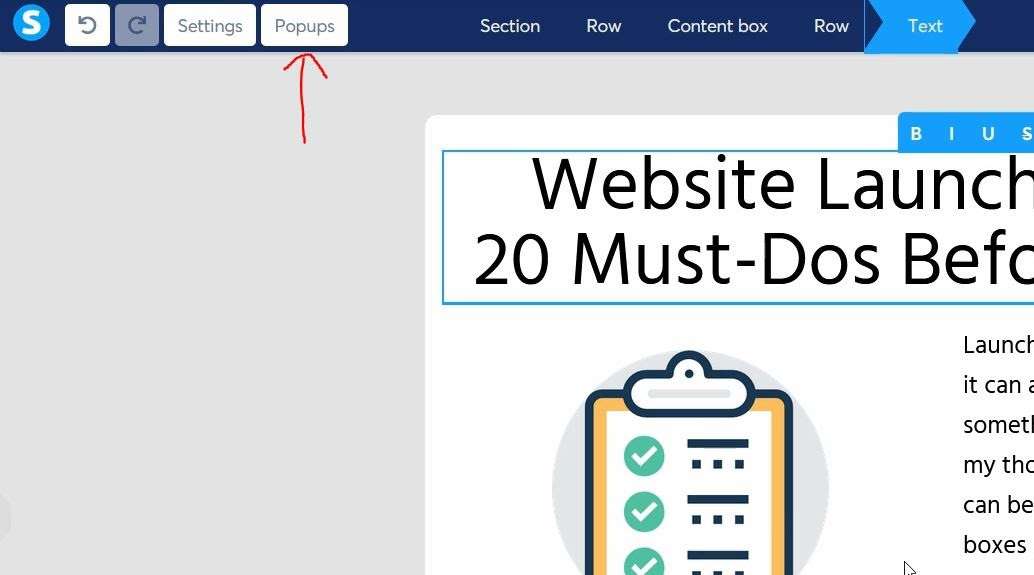
To collect the email address, we will use a popup. This can be adjusted by clicking on the “popups” button in the top left corner.
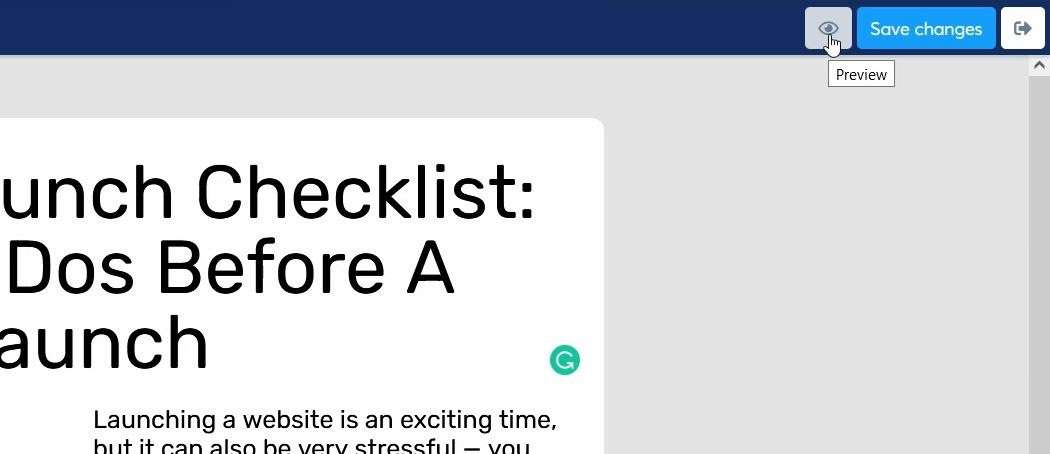
Once you are happy with everything, don’t forget to save the changes. And then, you can preview everything by clicking on the eye icon at the top right.
Finally, when you are done, just go back to the funnel overview page.
Step 3: Opt-in thank you page
Next, we need to create a thank you page for the people who signed up for the freebie.
Again the steps are similar to the opt-in page. The page builder works in the same way.
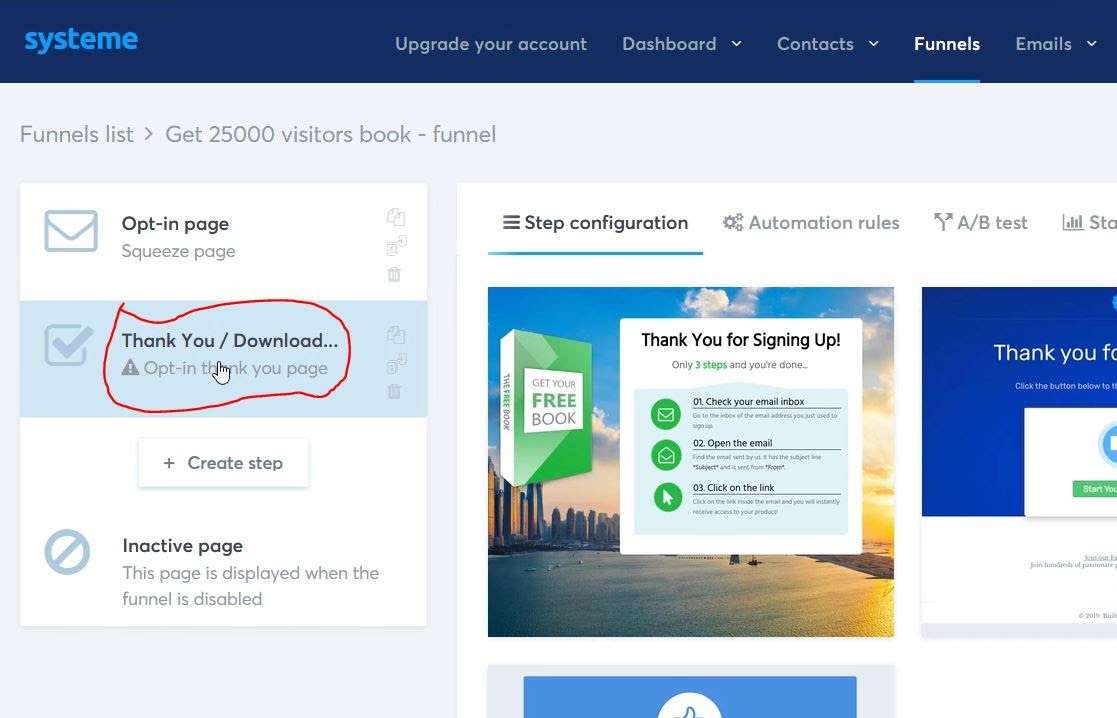
Just remember to pick “opt-in thank you“ as the step type dropdown (should be already preselected)
Few things to keep in mind for the squeeze thank you page.
- Thank them for signup
- Mention the following steps (they will receive an email with a download link to the freebie, etc.)
- Keep it simple
Upload a PDF (lead magnet) to Systeme
To upload a PDF (lead magnet to Systeme, simply add a text block.
Then make any text to a link.
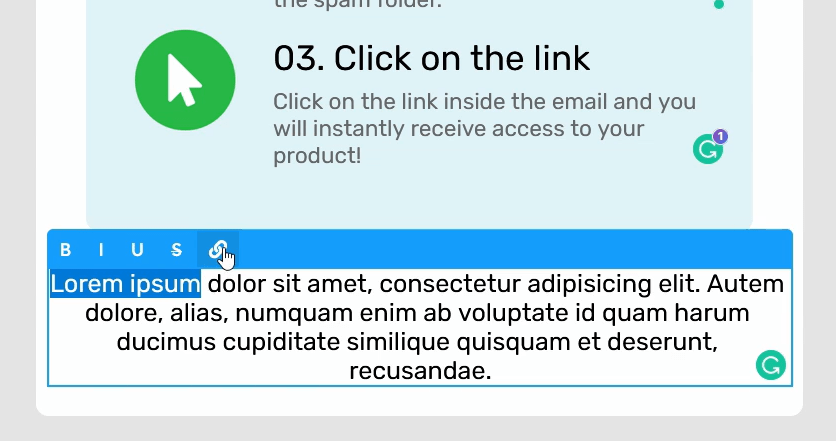
Then you should see an upload icon, like the one in the below screenshot.
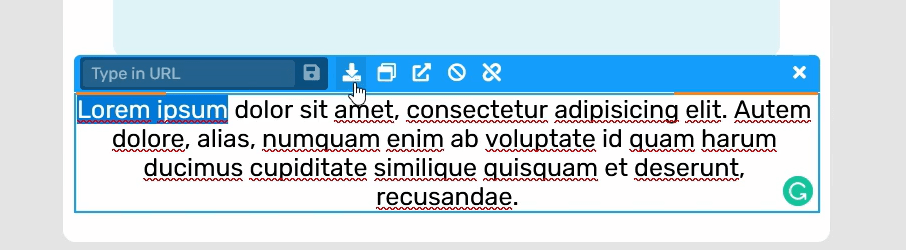
Click on the upload icon, and upload the freebie to Systeme.io.
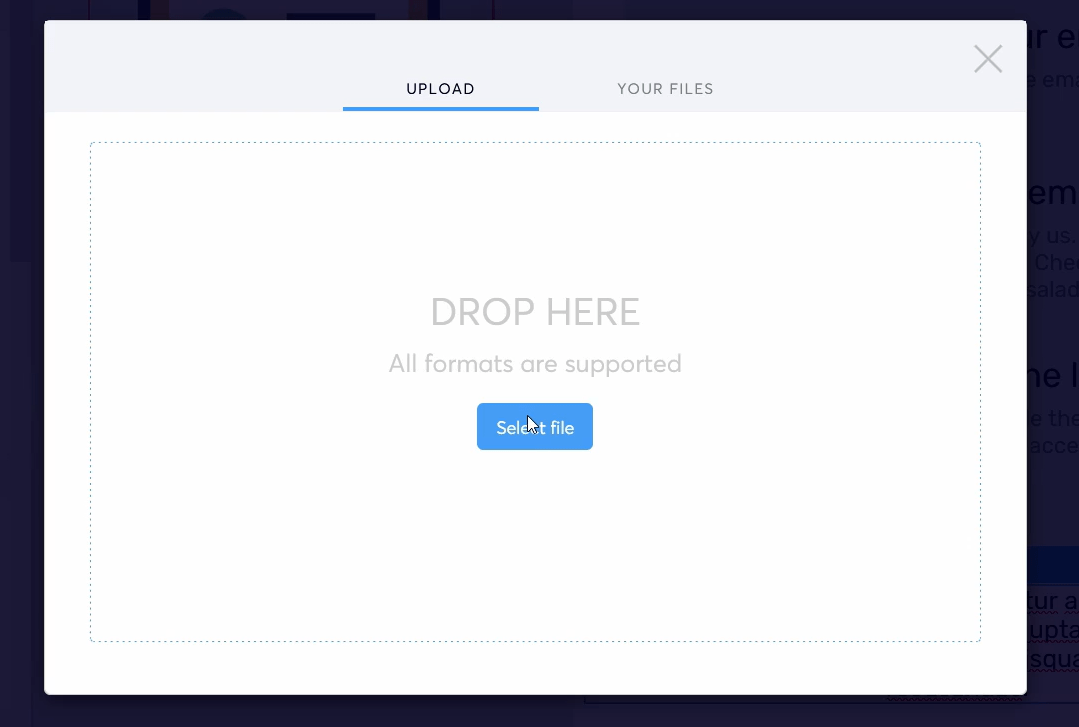
Unfortunately, there is no option to view your file library or anything like that. So you will have to use this method until the feature is added.
Systeme will generate an URL to the PDF file that you can now place anywhere.
Make sure to save this URL somewhere. You will need it later.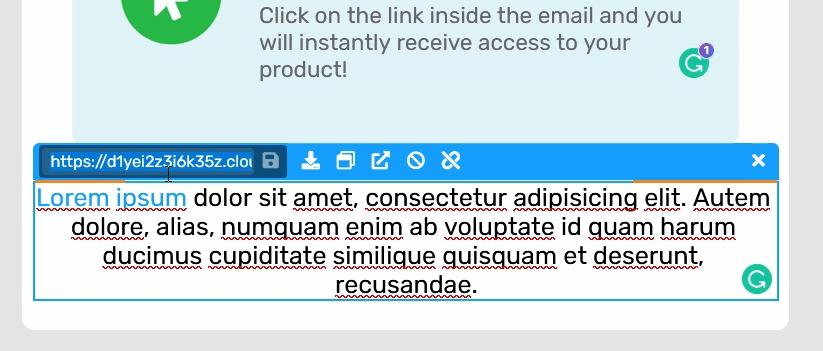
Adjust Systeme.io Subdomain
If you want to change the subdomain of your pages, you can adjust the subdomain to your liking, as long as the subdomain is available.
BTW subdomain just refers to the “yourPages” of the following example: yourPages.systeme.io
To achieve this, you need to head to the Systeme settings.
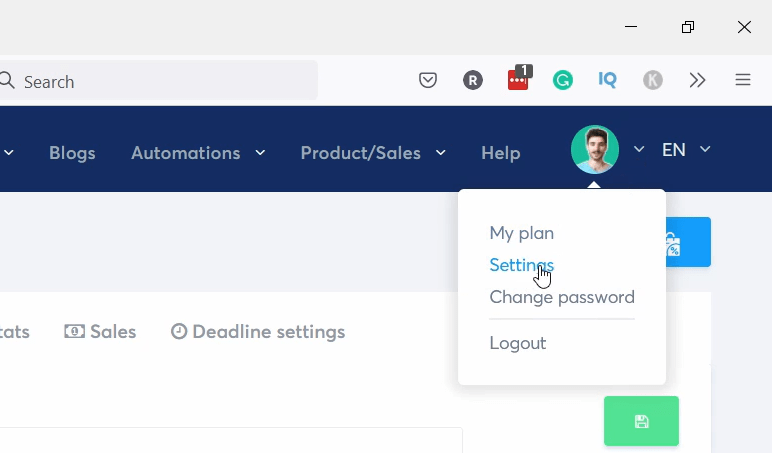
Click on Account settings.
And at the top, you can change the subdomain. Plus, there are a bunch of other settings on the page.

Systeme Mailing settings
In the mailing settings, you can set things like the sender name, sender email, and double-opt-in email.
A double opt-in means that a user who signs up for an email marketing list then receives a confirmation email which includes a link to click and confirm the subscription.
Until they confirm, they are not added to the mailing list. This means you will have higher quality leads but a lower sign-up rate.

But the most important setting is “domain authentication.”
This allows Systeme to send an email on your behalf but as your domain.
I recommend getting this done before running a more extensive campaign, as if you don’t do it, your emails will have a higher chance of going straight to the receiver’s spam box.
For example, Systeme removes the default authentication information ( “via mcsv.net” or “on behalf of mcsv.net”(. It shows up next to your email’s “From name.” I recommend using your domain name for newsletters, both for deliverability and to look more professional.
Step 4: Deliver the lead magnet with an email
Okay, after the visitor signups to receive the freebie, we need to deliver it to them, so let’s set up an email that will have a link to the PDF file (the one we created earlier).
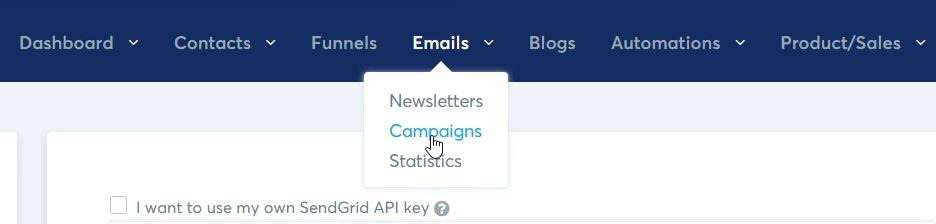
In the navigation, go to emails and click on campaigns.

Then create a new campaign by clicking on the blue “create” button on the right.
A popup will appear. Just add a name to the campaign and click on the “Save campaign” button.
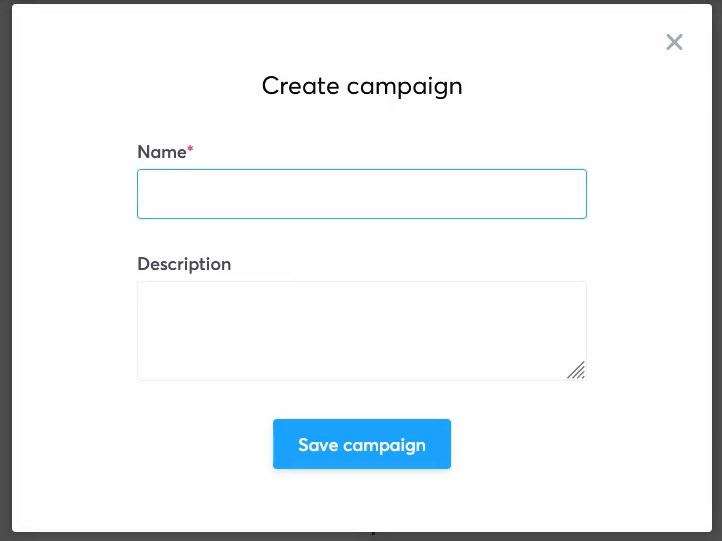
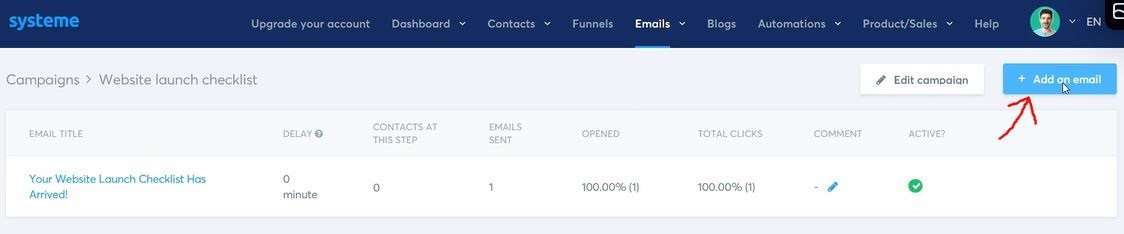
This is your campaign overview. You can add multiple emails to one campaign (this is how you can create automated email sequences)
So on the right, you will have an option to add an email. Let’s do it!

A popup to create an email will appear.
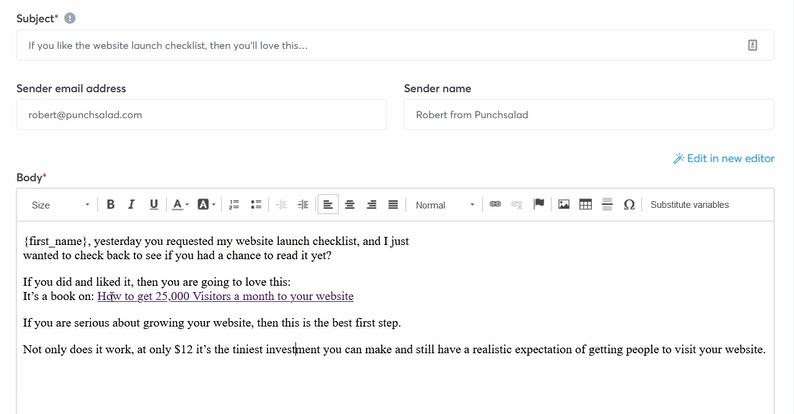
Here you can adjust the sender name & sender email address.
Then add the email subject line and choose the “Use classic editor.”
Most email marketing professionals advise you to use the classic editor, which will create fundamental emails without much styling. It seems that the more you style your emails, the more likely they will end up in the “promotions” tab of email providers like Gmail & Outlook.

Then you get to compose an email, which works like any email software.
HERE IS THE COOL THING!
You can add variables to the email. So in the below example, I have “Hello {first_name}.”
Once the email gets sent out, the first_name will be replaced but the person’s real first name. This only works if you collect the first name when people signup to your email list.
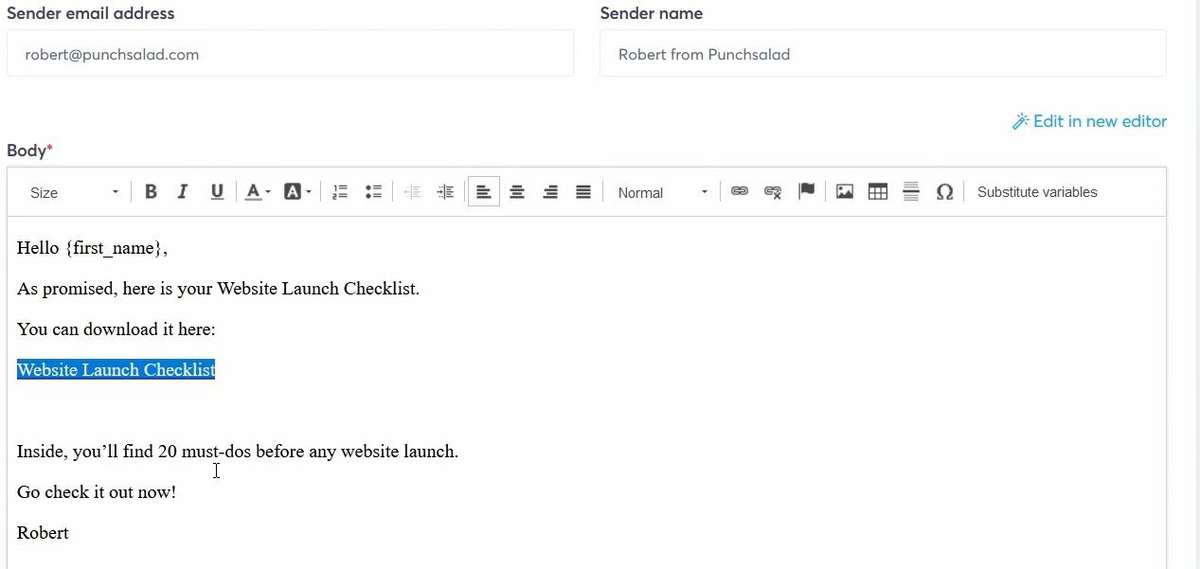
Don’t forget to add a link to the email, where you place the URL of the freebie we uploaded earlier in this tutorial.
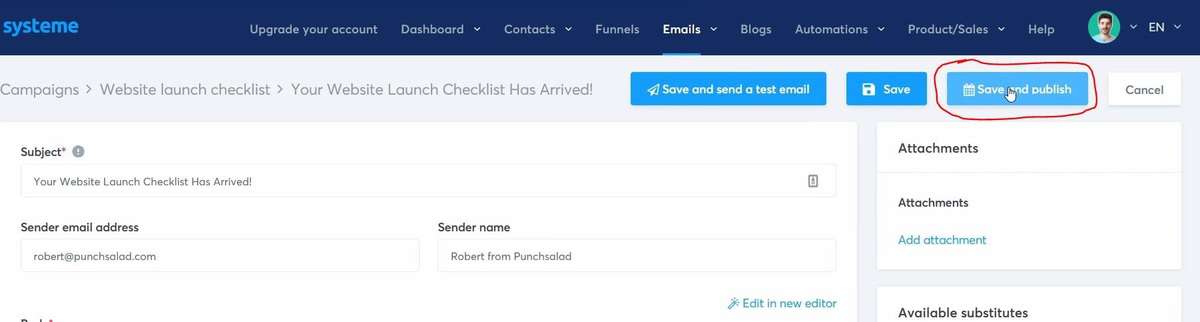
Once you are happy with everything, click on “Save and publish.”
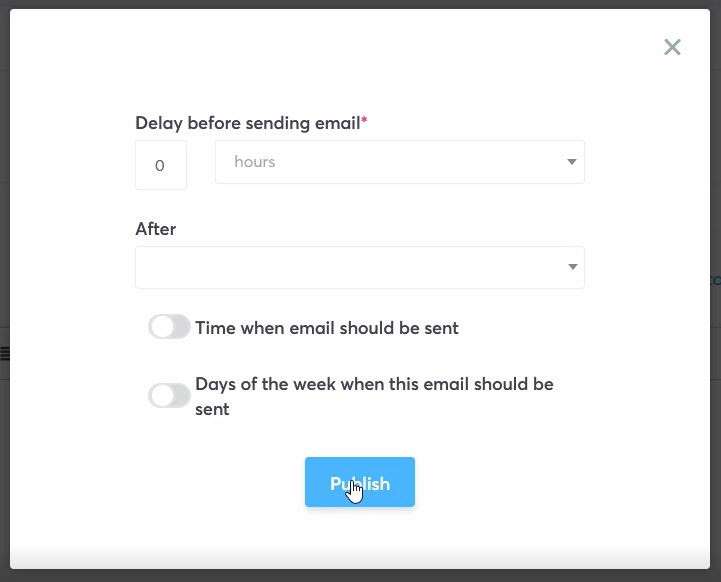
This will open a popup with delay options. This means you can delay this email.
Since this is our first email, we want to send it as soon as possible.
But you could play around with the time of the day & other options.
Don’t forget to save once you are done.
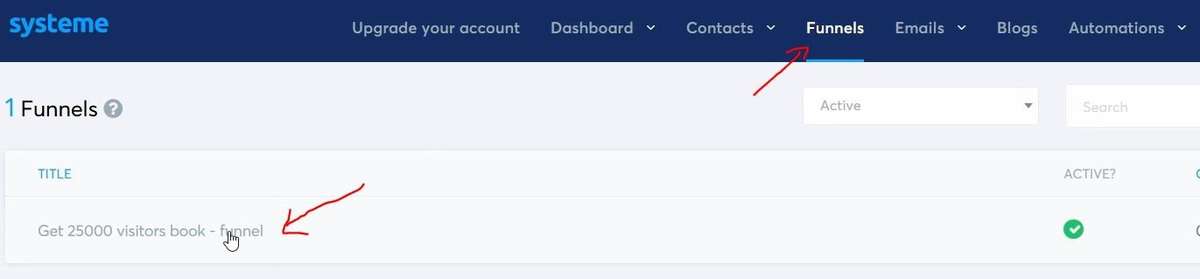
Next, we need to connect the email campaign with the opt-in page.
So head to the funnels section (in the navigation). And then click on the funnel you created earlier.
If you select the “Opt-in page” from the left. You will be able to choose the “Automation Rules” tab. Then click on “add rule.”

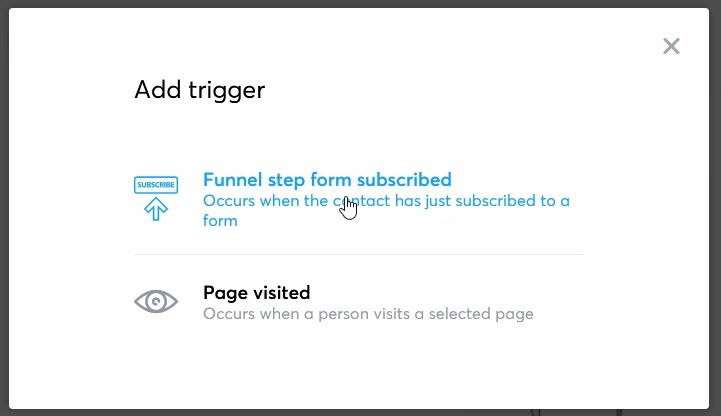
Next, you can select the trigger. In our case, we will choose the “Funnel step from subscribed.”
This just means when someone subscribes through our opt-in page. We will automatically send the email with the freebie.
After, click on the “Add action” button.
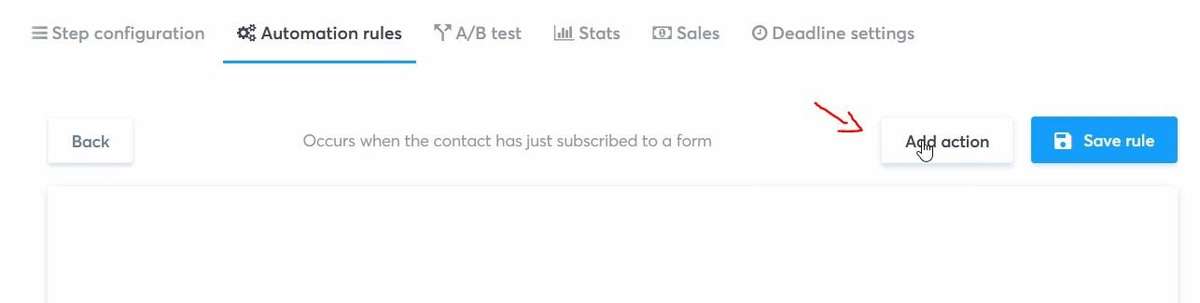
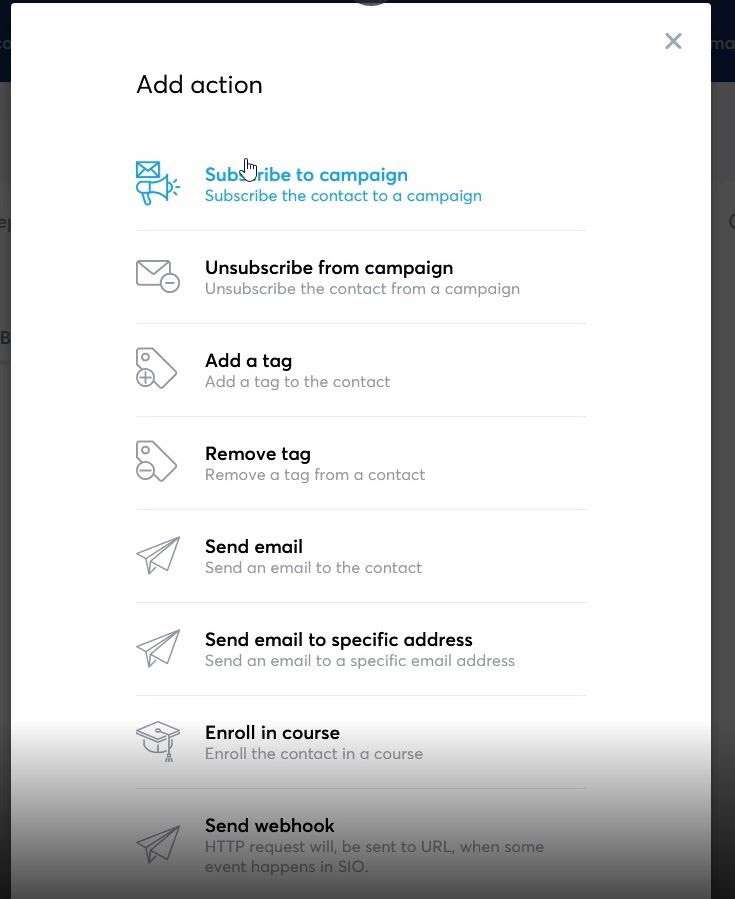
And now you can choose different actions.
Each action has a description so you can get familiar with all the options.
But for this tutorial, we need the “Subscriber to a campaign.”
Then choose the email campaign we create earlier.
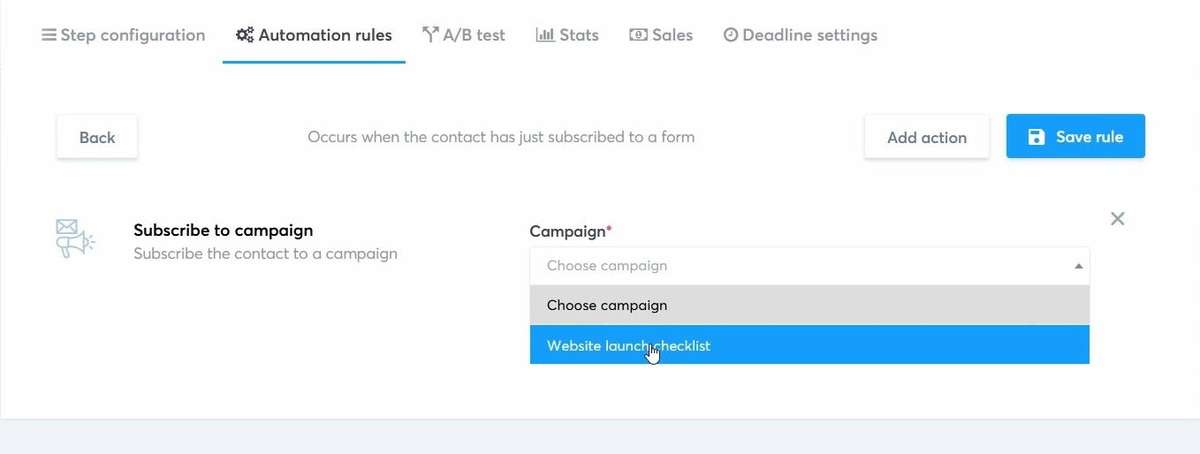
Don’t forget to save the changes! And VOILA! We now have a full working opt-in flow in Systeme.io.
Step 5: Test the opt-in flow
Never skip the next step, and that’s testing the whole flow. Also, preferably use an email that you didn’t use to signup for Systeme. Just to see how it works.
The easiest is to head to your funnel. Copy the opt-in page URL and paste it into your browser. 
Then just signup with your email and see how the email & thank you page look.
Remember to click on the download link in the email and check that you can download the freebie easily.
Step 6: Set up a sales page
Now it gets a bit more exciting, as we will set up the sales page. We will explain our offer and show that it will bring value to the potential buyer.
There are a million different types of sales pages, but when starting, just keep it simple.
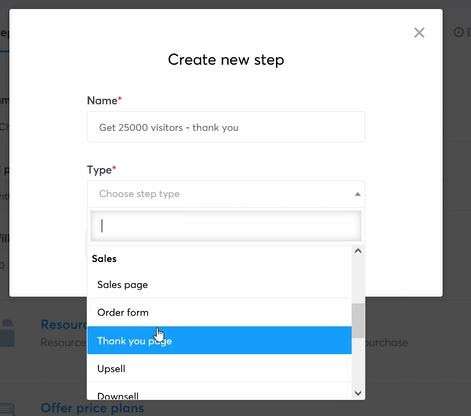
Inside your funnel page, create a new step.
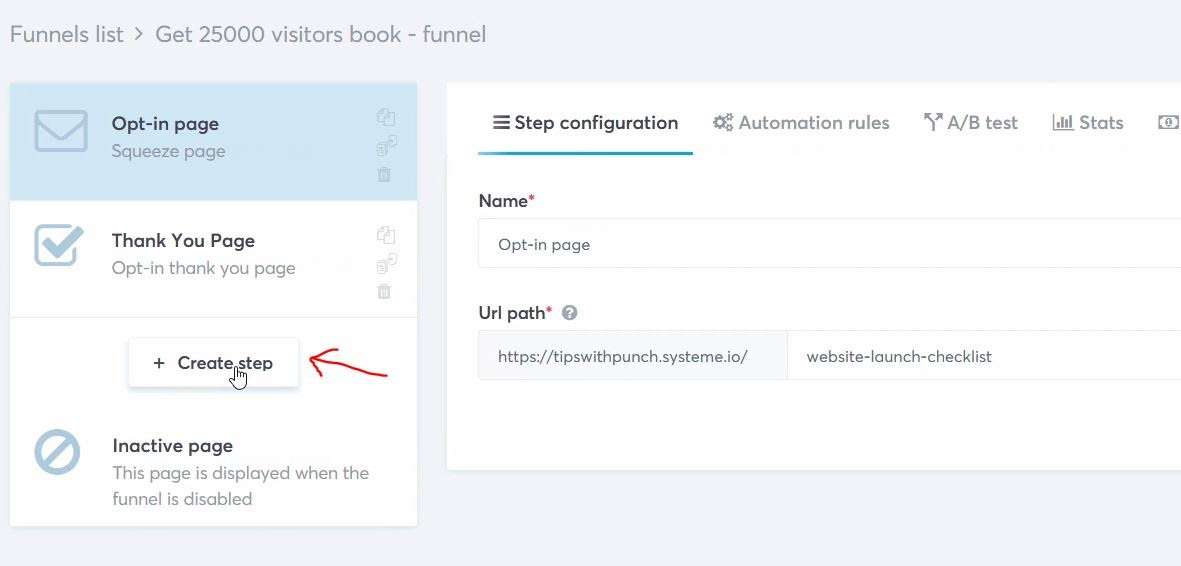
Give the sales page a name.
And select “Sales page” as the type.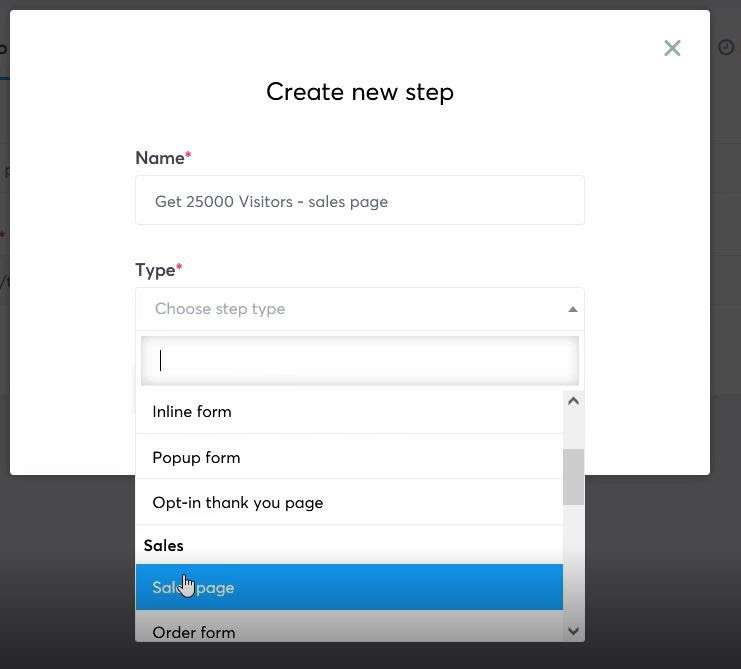
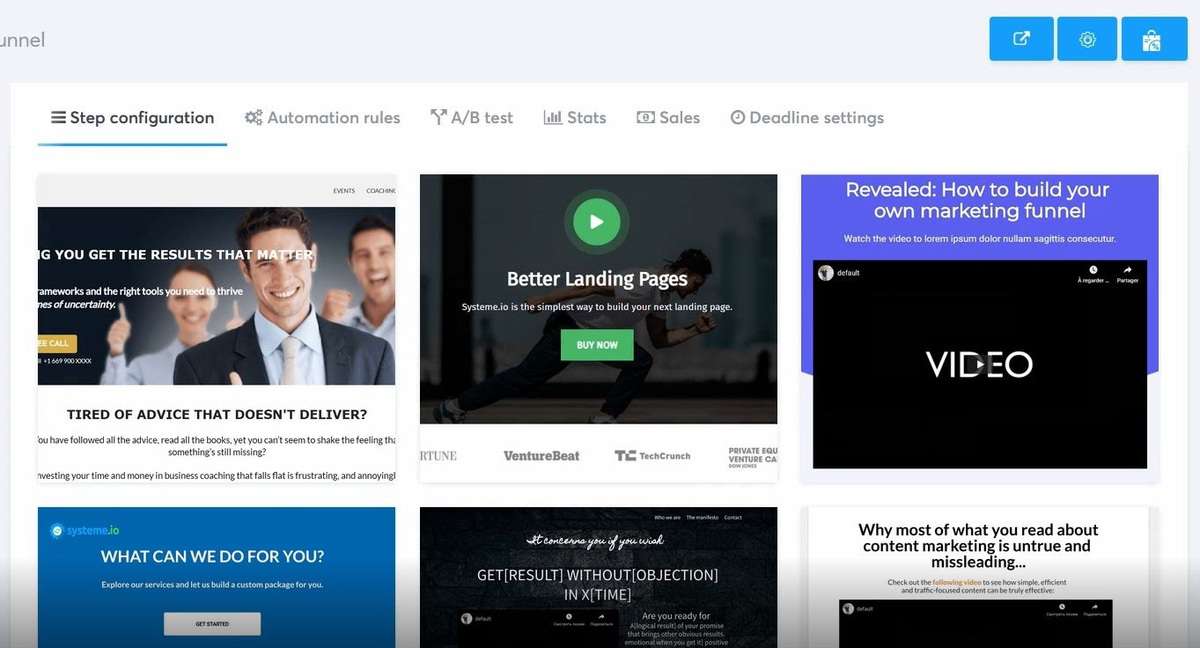
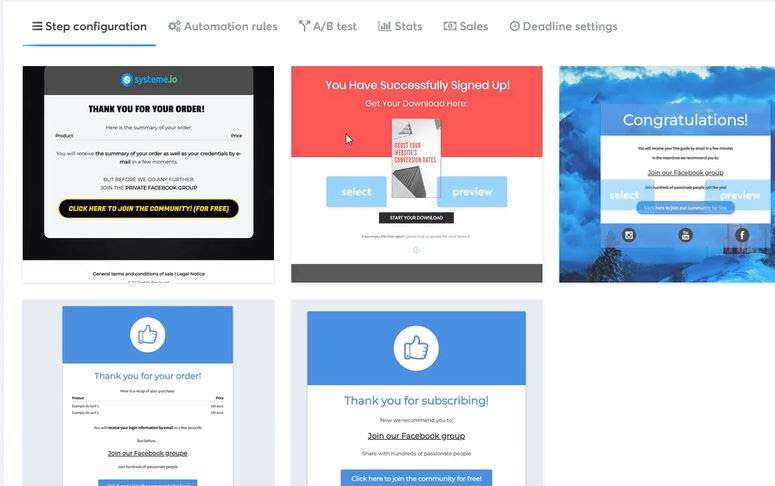
Then you will be able to select a template from a bunch of options. Again, you can preview the templates before using them.
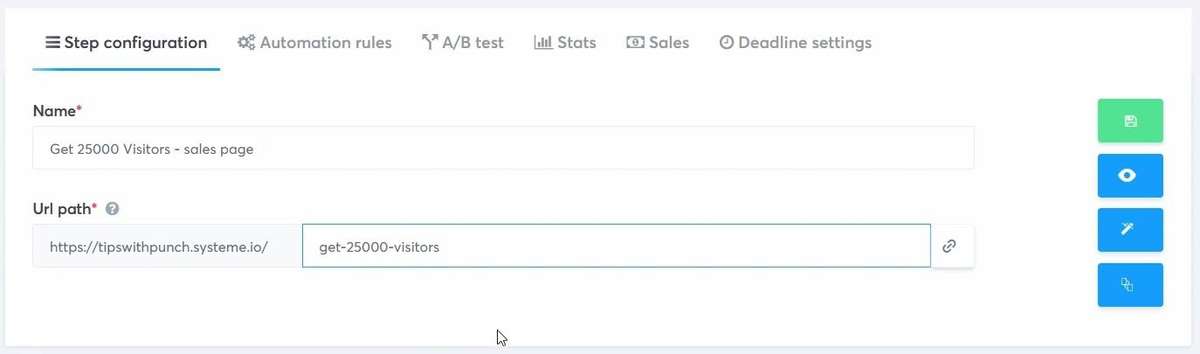
Then give the page a custom URL path and save it.
Click on the pen icon to edit the sales page template in Systeme.io.
From this point, you can edit your sales page as you want. Swap the text and elements where needed, and don’t forget to check the mobile version too.
I recommend watching the video tutorial for the exact customization steps.

Once you are happy with the result, save the changes and move on to the next step of this tutorial.
Connect a payment method
Before setting the checkout page, we need to connect payment gateways. The options are Stripe and PayPal.
I recommend connecting them both as Stripe enables credit card payments and PayPal… well, Paypal payments.
You will need to have an account to connect to them.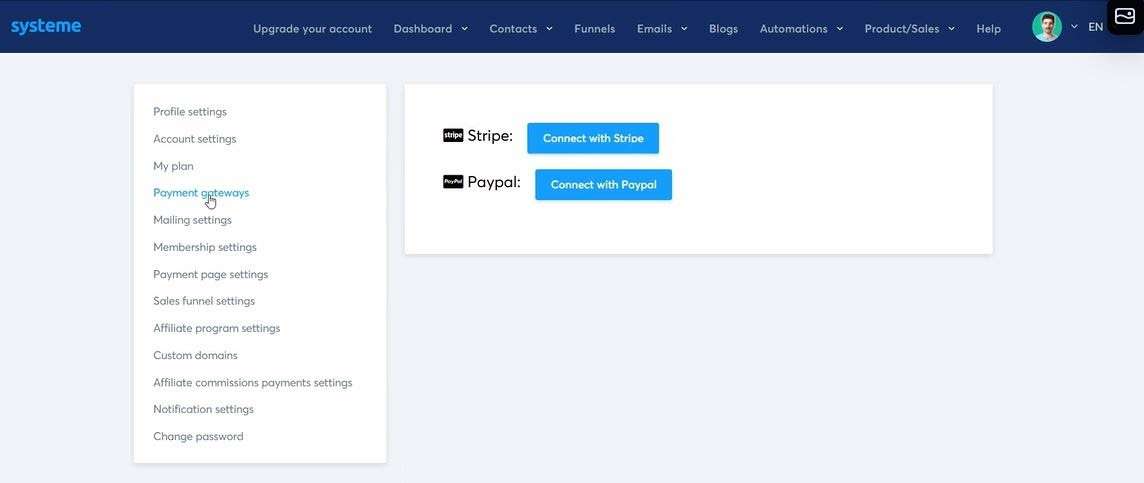
Step 7: Create a checkout page in Systeme
Are you ready for the next step?
You should be because we are going to set up the checkout flow!
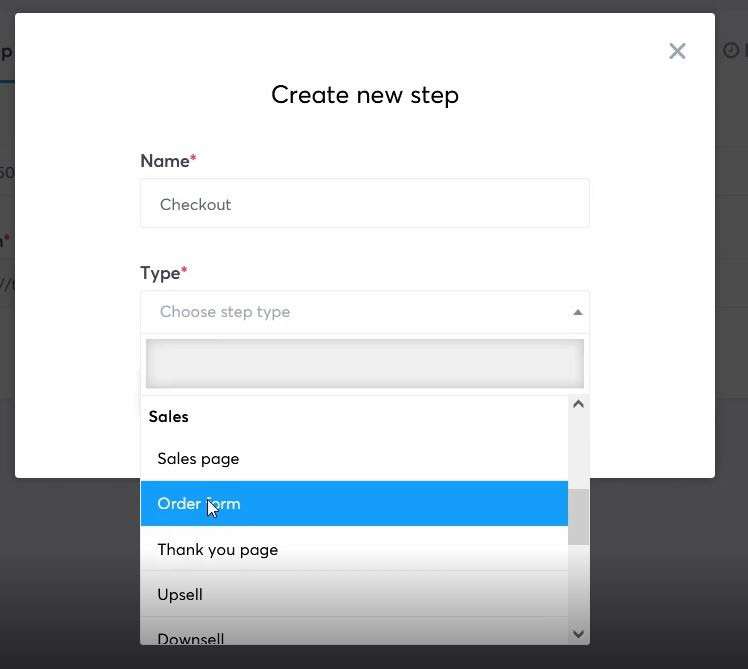
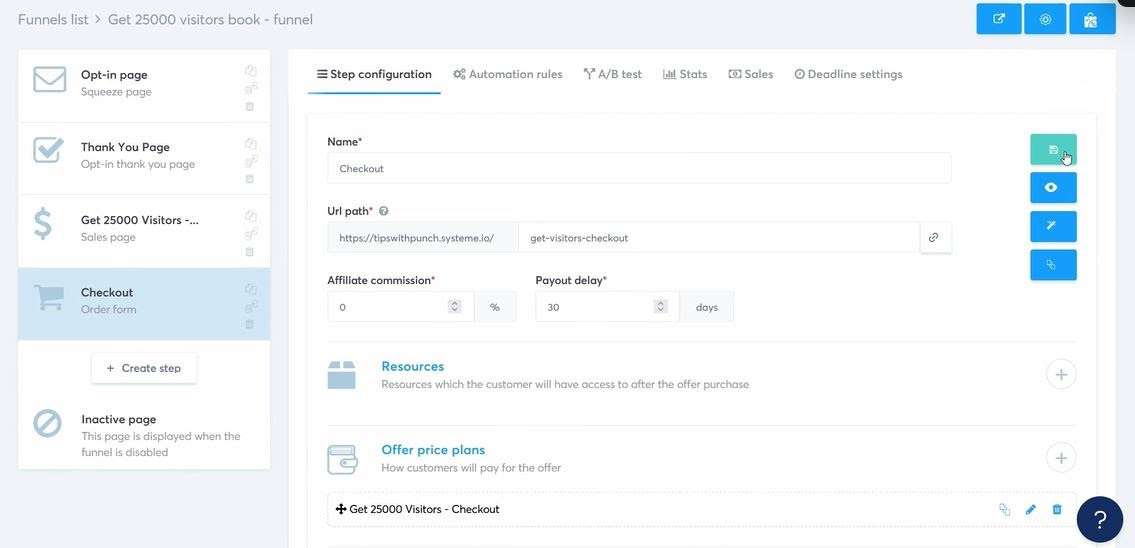
In the funnel overview, make a new step. 
Give the step a name and select “order form” as the page type.
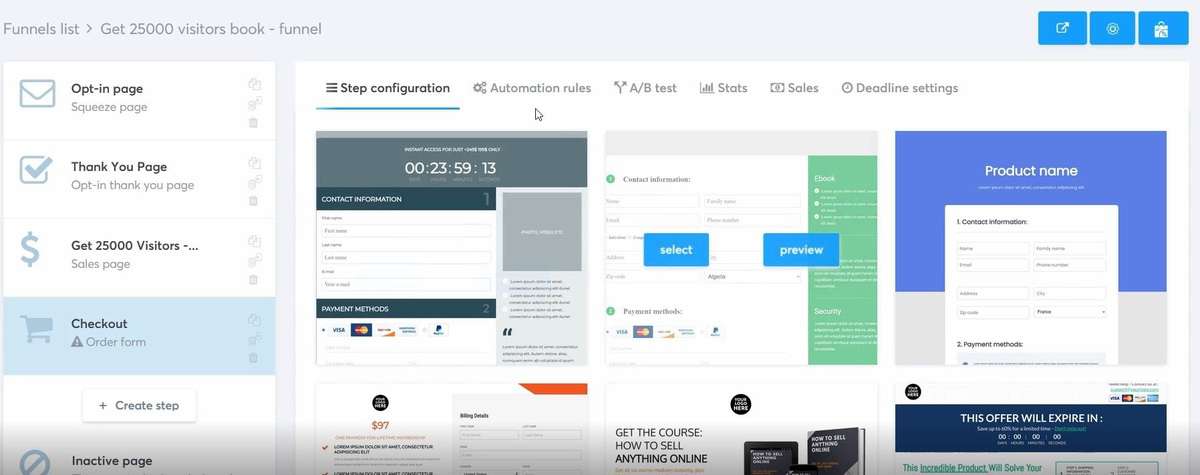
Then you can pick one of the Systeme’s checkout templates. Again keep it simple and ask for visitor detail only if it’s critical to deliver the product or service.
Then give the checkout page a URL path.
And you’ve probably noticed that checkout has a bunch of other options such as “Resources,” Offer price plans, “ and “Offer coupons.”
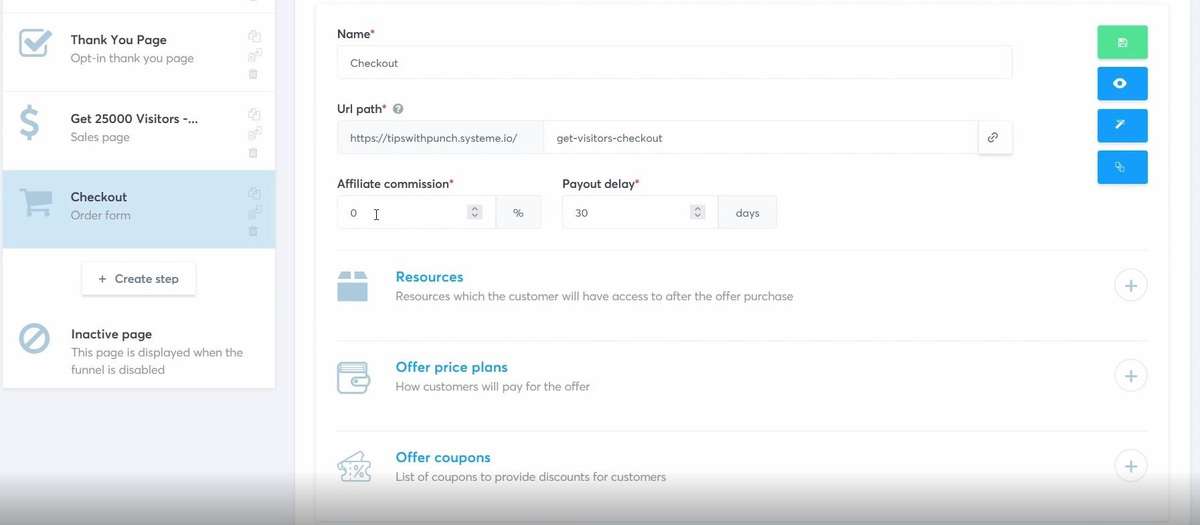
Under resources, you will find a few different options, which all exist on Systeme. So you can create a membership course. After people pay you, Systeme will grant them access to the course.
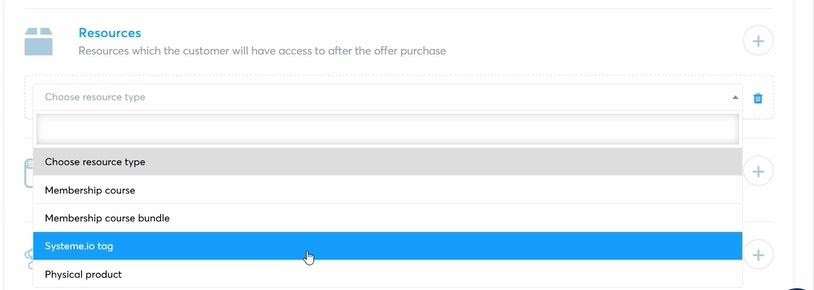
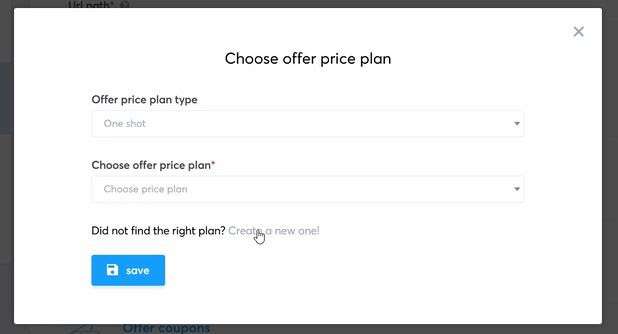
But for this tutorial, we need to choose “Choose offer price plan.”
Then select “One-shot” as the offer price plan.
And you will need to create a new price plan by clicking on the link (as shown below screenshot)
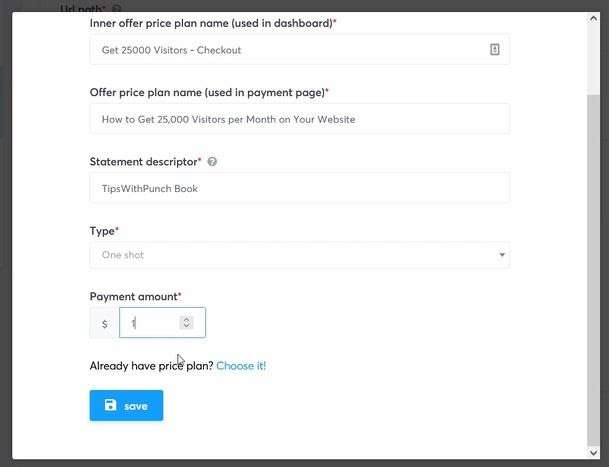
Here you can give the price plan an internal name (shown only to you) and the external name (what your customers will see).
“Statement descriptor” is something that will appear in a customer’s bank account, so make it short but descriptive.
And set the price for this one-time offer.
Once done, don’t forget to save the price plan.
Once you’ve connected a price plan to the checkout page, you will be back on the overview page. Just save the page and click on the pen icon to edit the template.
In the sales funnel builder, you can customize the page as you please.
I would add an image of the product and delete all the fields that I don’t need.
Don’t ask for people’s phone numbers unless you need them for delivery. You don’t want to create friction at this stage (remember, the customer is ready to pay!).
Step 8: Thank you page
So let’s now deliver on the promise and create a thank you page where a customer can download the product after making.” the purchase.
On the funnel overview page, add another step.

Give the step a name and then choose “Thank you page” under “Sales” as the page type.
Pick a thank you page template.
Give the page a URL path and save it.
Click on the pen icon to enter the sales funnel builder.

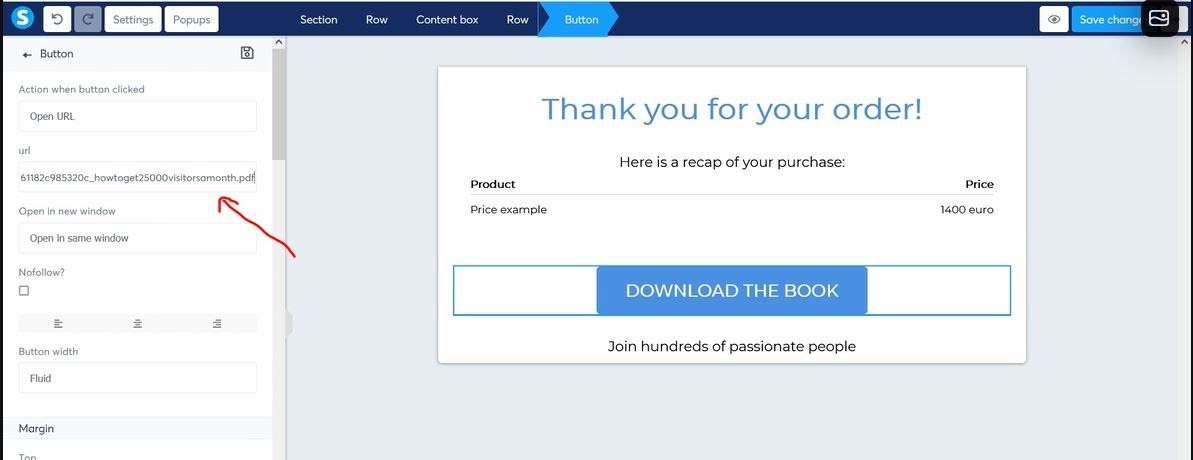
Again edit your thank you page. I would thank them for the purchase and make a short recap of what they bought. And then a big button to download their product.
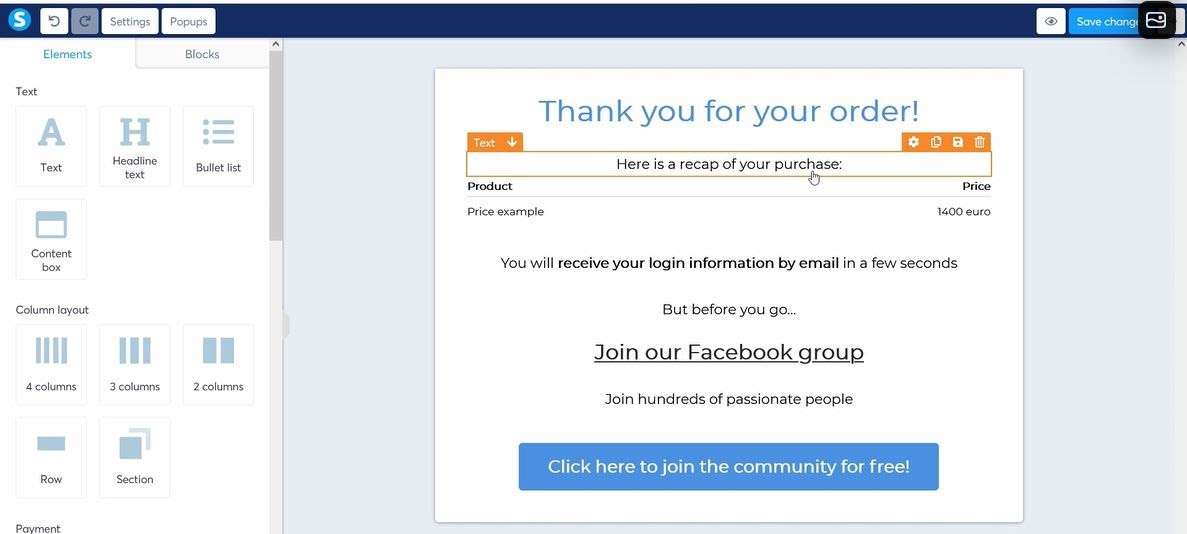
The button works the same way as a link in the opt-in email. You just upload a file to Systeme (by converting text to link) and then copy that link in the “URL” field of the button.
I would also make the URL open in a new window.
Deliver the digital product – Option 2 – Email the link
If you want to email the product, you need to use workflow to create a new email that will be sent once a customer has paid.
For more details, check the video tutorial at the top of this tutorial.
Step 9: Set up a sales email
We are almost ready, but we are still missing an email to drive your contacts to the sales page. In.” this tutorial, we will just create one email, but usually, you have one to three reach-out emails sent a few days apart.
In the navigation, go to emails and select campaigns.
Add a new email by clicking on the button on the right.
Give the email a subject line and pick “classic editor”.

Now you need to write the sales email. This is an art form by itself.
So here are a few helpful links on the topic:
- How to write a sales email
- Email copywriting course (with templates)
- How to write marketing emails (YouTube video)
Just remember to include a link to the sales funnel!
Once you are done, click on “save and publish”.

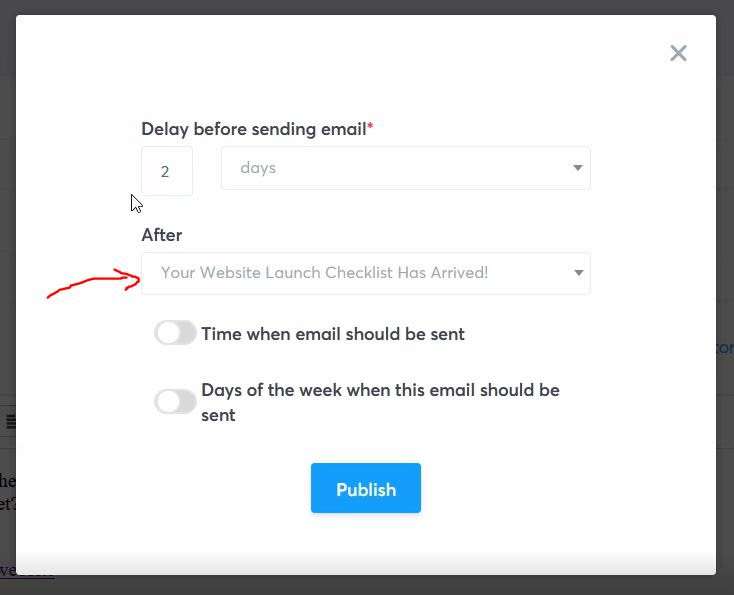
You will need to set the delay now. I would say one to two days after the email with the freebie was sent.
Make sure to select the “freebie email” from the “After” dropdown.
Once you are happy with the setup, just click on “Publish.”
And now your complete sales funnel is live and working!
Step 10: Test the sales funnel
Make sure you test the whole flow. Receive the sales email, then click on the link in the email to land on the sales page. Proceed to checkout and actually buy the product yourself! This is the only way for you to see what your customers will experience!

