
Hello Internet People,
In this tutorial, I’ll show you how to set up your Progressive Web App in WordPress (PWA) in few easy steps!
Progressive Web Apps have been around for a while now, and many websites made today are made to be PWAs as well. Before going further into this article, I’ll take a moment to explain what PWAs are.
What is a Progressive Web App?
While you might be hearing the term for the first time, you’ve probably come across a progressive web app or been asked to install one on your phone. If you’ve used the Twitter website before, you’re likely to have come across this.
A Progressive Web App is a type of web application made with web technologies (HTML, CSS, Javascript) like any other web app, but looks and behaves like native applications. PWAs run on your browsers but can be added to your phone’s home screen like a native app. It has an icon and a name, like any other native app on your device. And when launched, there are no apparent signs that it is a website.
When Should I Use a PWA Plugin?
Web applications have a vast reach as they can be accessed from a browser through their URL or discovered by a search query. But there are often lacking in the things they’re capable of doing. PWAs give you the best of both worlds (web and native apps) by increasing your website’s capabilities without sacrificing its reach.
Below are some of the advantages that come with making your website a PWA.
- They can work offline (to a certain extent).
- They can be accessed through a URL or discovered through a search engine.
- They allow you to send your users to push notifications.
- They are much faster and lightweight than regular web apps.
- They can be installed like regular apps and can even be distributed through the app store.
- They have access to several native features such as geolocation, camera, microphone, screen orientation, etc.
- They are always up-to-date as you do not have to update them from an app store.
If you discover that you need the above features in your WordPress website, consider installing a PWA plugin for WordPress.
How Do I Set Up a PWA in WordPress?
Now that you know what a PWA is and when it should be used, let’s see how to set it up in WordPress. There are three steps involved in doing that.
- Installing a PWA plugin for WordPress.
- Setting up the PWA WordPress app.
- Confirming that we successfully set it up.
Installing The WordPress PWA Plugin
To install the PWA plugin, make sure you’re signed in to your WordPress account, then go to your dashboard.
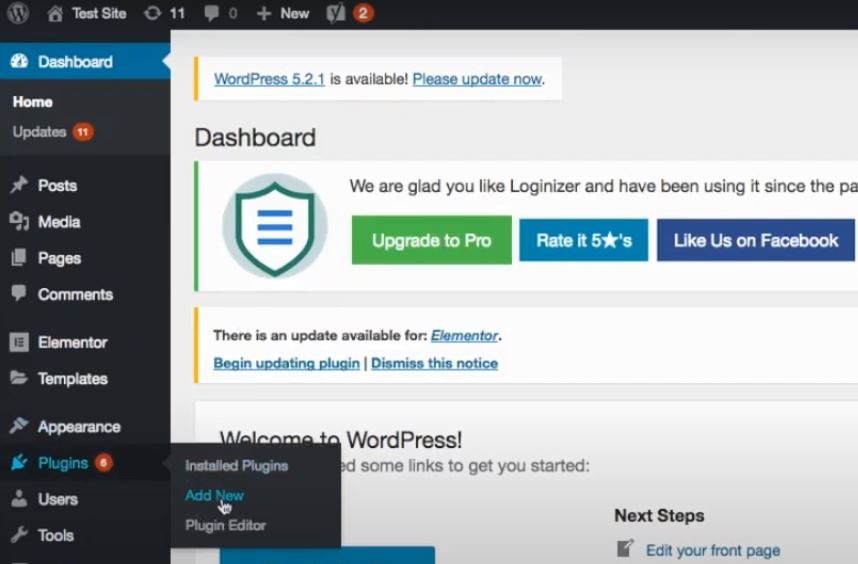
Now hover your cursor over Plugins on the left menu, and click on Add New from the popup menu by the right. This should take you to the Add Plugins page.
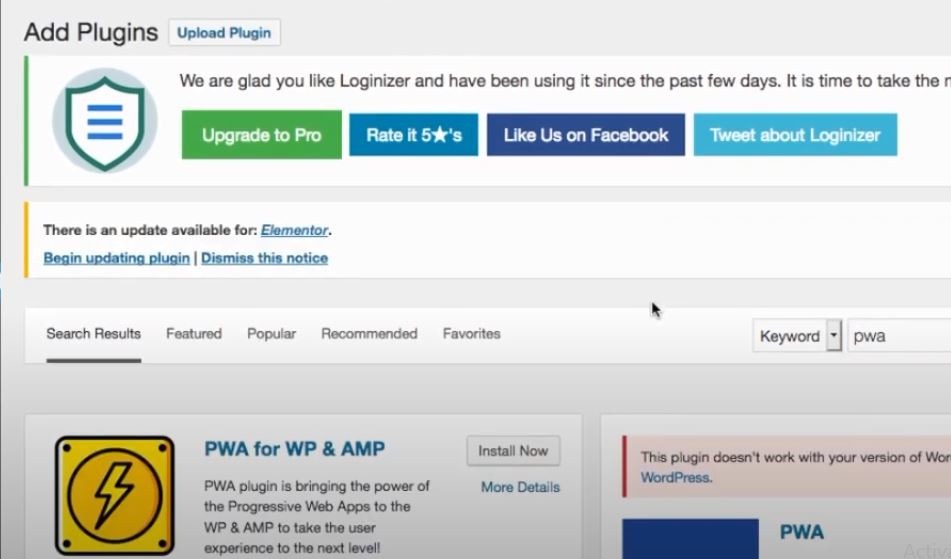
In the search bar on the Add Plugins page, type in “PWA.” You would be presented with a list of PWA plugins available. For this tutorial, we would be using PWA for WP & AMP. It’s a pretty good PWA plugin for WordPress and can be used with AMP websites.
Now click on the Install Now button. Once the plugin installs, you should see an Activate button. Click on it to enable the plugin.
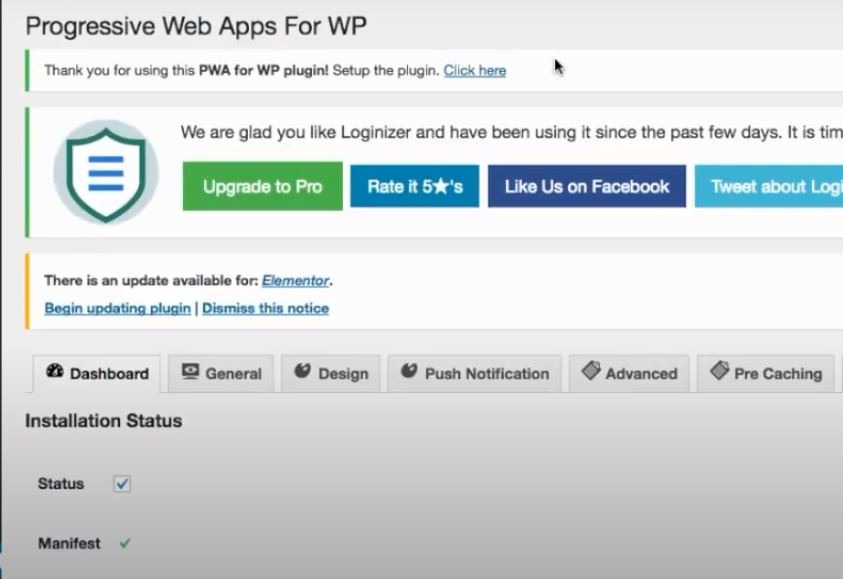
You should now be redirected to the PWA for WP & AMP plugin page. Now, let’s move on to setting up the plugin.
Setting Up the PWA WordPress App
Now that the plugin is installed let’s set it up. Click on the General tab from tabs on the page. This tab is where the basic settings for the PWA are located.
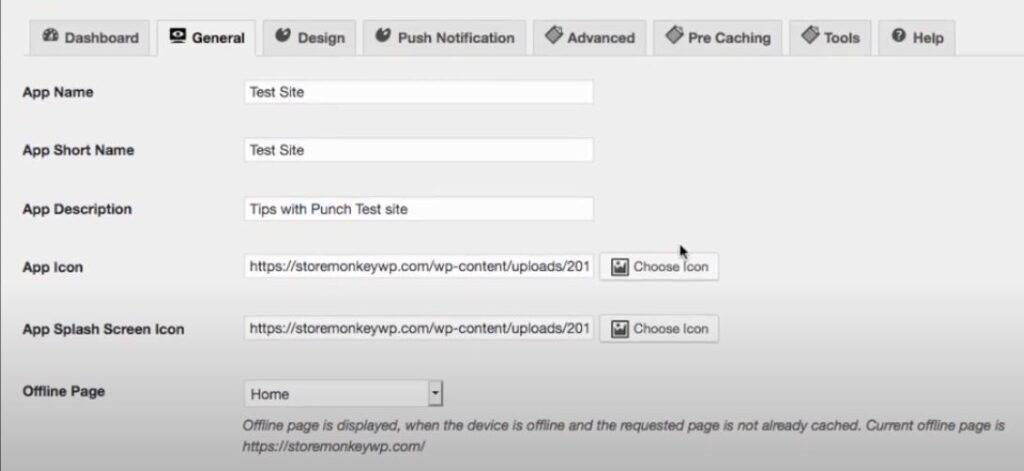
Set App Name and App Short Name to your web app’s name. Then give your app a short description using App Description. The App Icon and App Splash Screen Icon should be PNGs with 192 x 192 pixels and 512 x 512 pixels. To set the icons, click on the Choose Icon buttons beside the text fields.
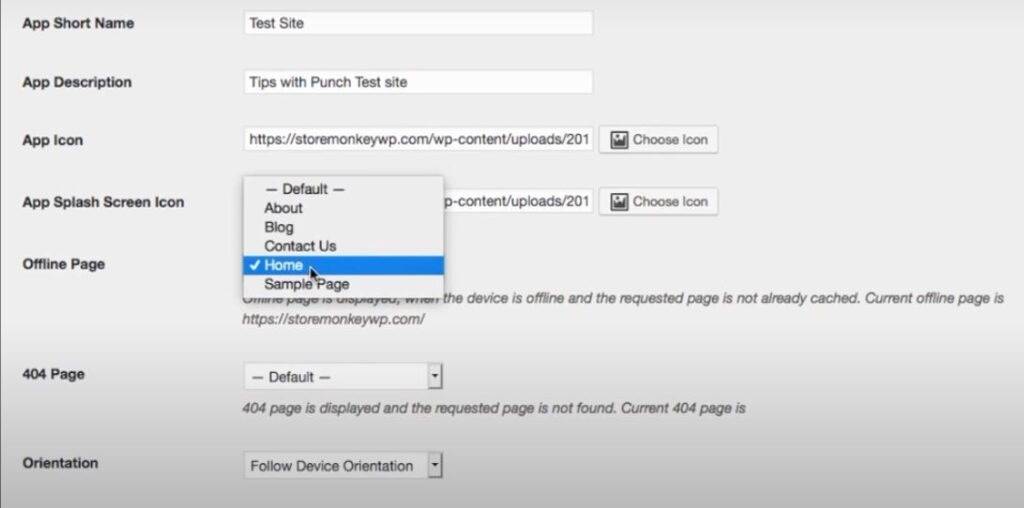
Offline Page determines the webpage that is displayed when a user is offline. When you click on the dropdown menu, you will see a list of webpages you can set for your offline page.
You can also create a webpage specifically for this scenario and have it say something like, “You’re currently offline. You won’t have access to certain features of the app.” Leave the remaining settings as they are. You can tweak them later as you see fit. Click on Save Settings at the bottom of the tab when you’re done.
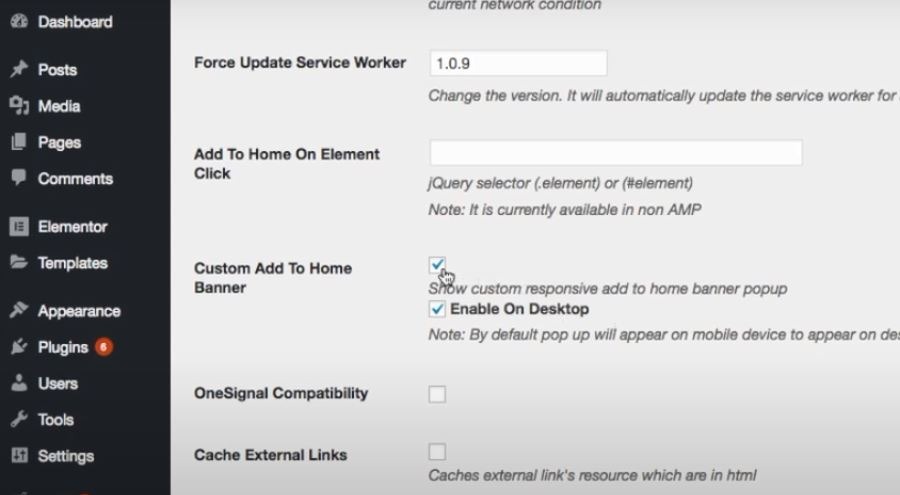
That’s all for the General tab. There’s one more item under the Advanced tab that we will be editing as well, though optional. Click on the Advanced tab and scroll down till you get to Custom Add To Home Banner.
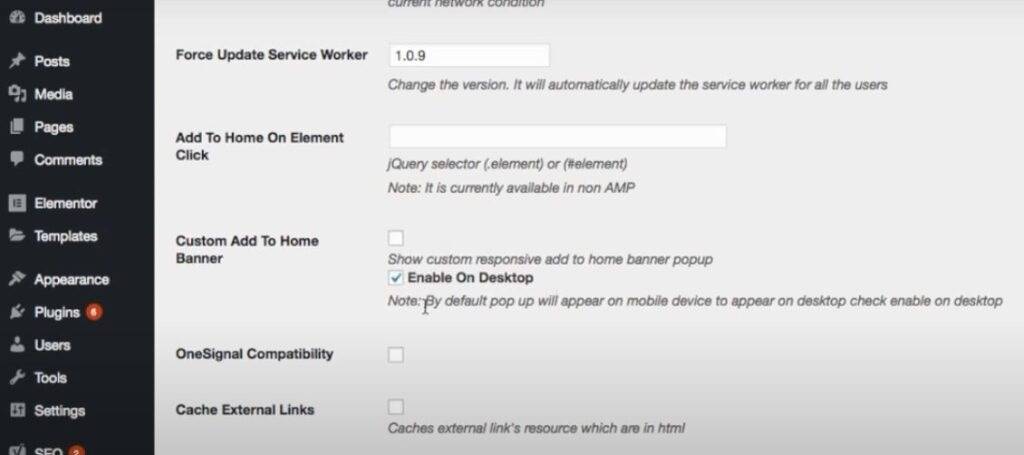
Uncheck “Show custom responsive add to home banner.” The banner isn’t customizable, and the default one doesn’t look good, which is why I prefer it disabled. But keep it enabled for desktop. Now click on Save Settings to save your changes. And that’s it! You’re done setting up your WordPress site as a PWA. We will now examine the website to make sure it was set up successfully.
Confirming the PWA Setup
There are two ways for you to check if your WordPress site is now a PWA. The first way is to inspect the website using your desktop browser developer tools.

Launch the website in your browser, and right-click on it. Click on Inspect Element or Inspect (depends on your browser). Now click on the Console tab. You should see a reference to “PWA” or “Service Worker.” Service Worker is a JavaScript file or script that powers most of a progressive web app’s functionality.
The second way to check if your WordPress site is now a PWA is to launch the website on your phone. If you’re on Android, you should get a popup at the bottom of your screen asking you to add the app to your home screen. Once you click on it, you get a dialog box to confirm your choice. Confirming it adds the app to the phone’s home screen.
For iOS, the process is a little less straightforward. iOS users don’t get asked automatically to “add to home screen” when they launch a PWA site. To install a PWA on an iOS phone, click on the share button at the bottom of the browser once the site has loaded. Now select Add to Home Screen from the list of options presented to you. You should now see the PWA on your home screen.
A lot of companies such as Uber, Instagram, Twitter, and Forbes now use PWAs. They’re great at reaching and engaging a lot more users than native apps. If this is important to you(as well as other reasons mentioned above), you should definitely make your WordPress website a PWA WordPress app.
That was it. Please leave me a comment if you have any question and I’ll answer ASAP. Till next time!
My picks and recommendations for you:
Free SSL Certificate Generator: http://punchsalad.com/ssl-certificate-generator
Hosting I’m using: Hostpapa (60% discount)
Where I get my domains: Name Cheap
See WP plugins I’m using here.
Some of the above links might be affiliate links.
Here’s a list of articles you may find interesting:
#sitemapforwordpress #digitalworld #punchsalad


This is something really new. Thanks you so much for sharing. Currently progressive web application are successful in lamp stack technology.
But thanks for sharing again. This will be of great help in all our WP websites
My pleasure! Glad it helpd you