Hello Internet People!
In this article, I will show you how to verify your website with Google Search Console (used to be called Webmaster Tools).
There are a few different ways to do it. But in my opinion, the best way right now is to use DNS verification, this way you can get one domain property, instead of having 4 separate URLs (http, https, www & non-www).
However, I also cover how to do it with HTML file & meta tags (no plugins needed), which are pretty easy too.
Check the table of contents below and see what you like the most.
- Verify Google Search Console for domain property (renamed from webmaster tools)
- Verify Google Search Console in WordPress with Meta Tags (No Plugin)
- Google Site Verification with HTML File Upload
Verify Google Search Console for domain property with DNS verification
Let me show you how to verify your WordPress website in Google Search Console. We’ll do it for all domain properties in one go.
To verify that you own the domain and all variations of it, Google requires DNS verification. It sounds complicated and techy, but it only takes a bit more time to set up than the other verification methods.
Doing this will be worthy because you’ll have all your domain variations like http and https under only one domain property, instead of having multiple domains (http, https, www & non-www).
Example of one domain property:
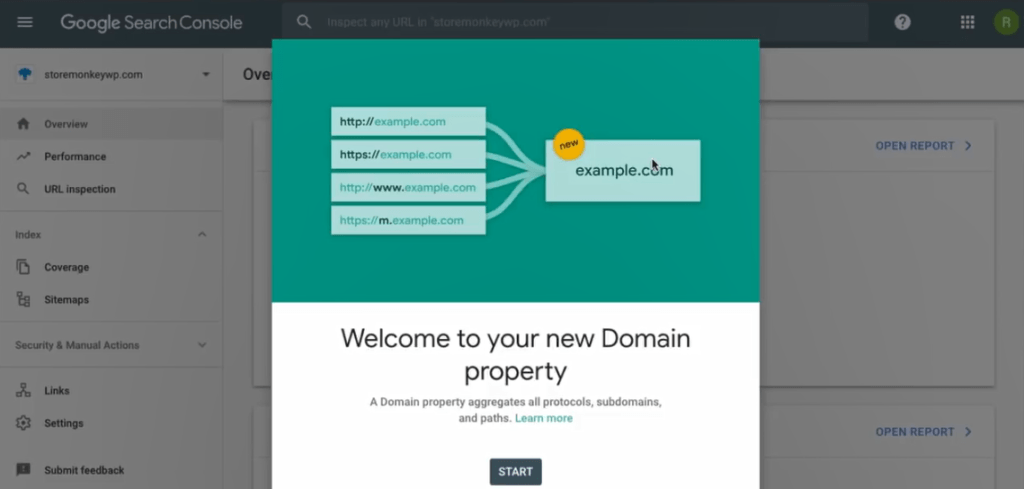
As you can see domain property includes all variations of your domain under one umbrella.
If you want to understand more about this, check out the following articles: Google Search Console experiments with domain properties
What you need to verify Domain Property in Google Search Console via DNS
Alright, for the DNS verification to work, you will need:
- A Google account.
- Access to domain DNS. So basically access to manage the domain’s DNS records. If you bought your domain from the same place as your hosting, then you are all set.
- Access to hosting dashboard such as cPanel.
In case this is too scary, and too much work, you could also verify ownership of your domain with meta tags, right from your WordPress dashboard. Here is a tutorial showing you how to add your WordPress Site to Google Search Console.
Although you can link and verify your WordPress site with meta tags, I do recommend you to use DNS instead as it will be less hassle in the long run.
Sign up for Search Console
Okay, Let’s get started…
1. Go to Google Search Console.

2. Click ‘Start now’ button.
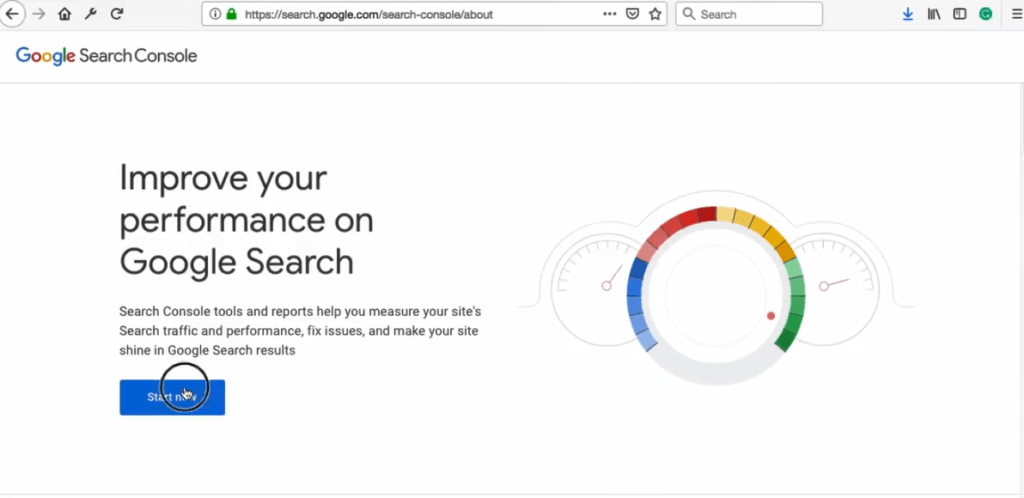
3. Now if you’ve never used Search Console, you will see this screen.

In my case, I’ve used Search Console before so I see a screen like this:

4. Now just below the Search Console logo, click on the dropdown and select “Add property type”.
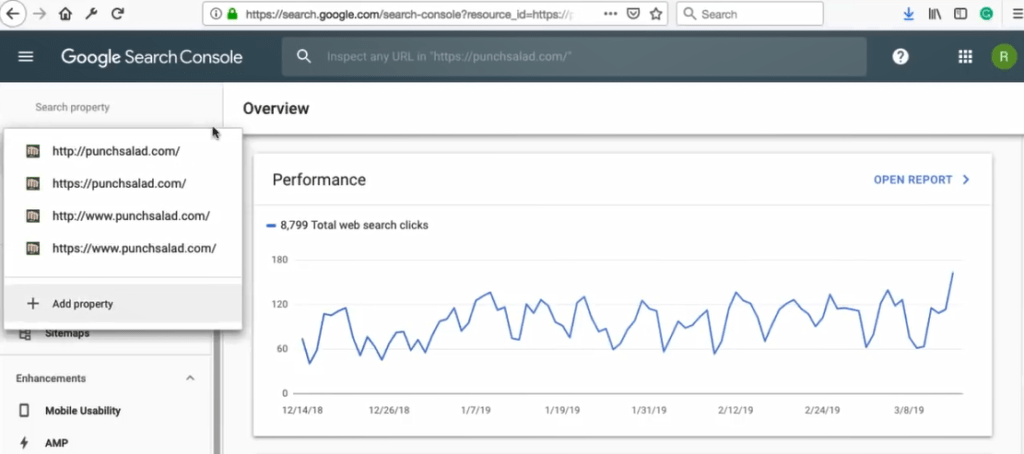
5. Now, going back to that Search Console initial page, we’ll have two options:
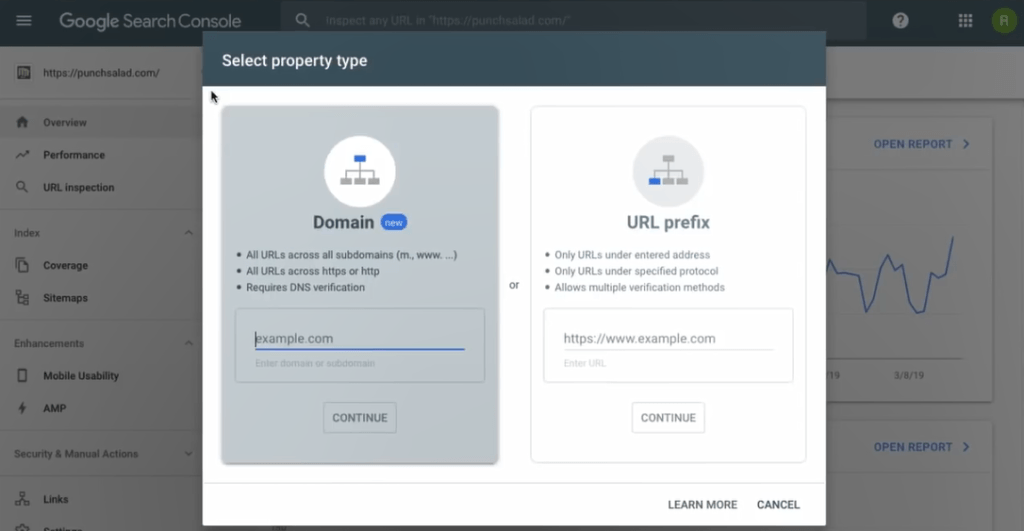
- The domain property type will combine all combinations of your domain under one property.
So, for example, all your subdomain and HTTP and HTTPS and the www and non-www. The benefit of this is that you won’t have 6 different properties but 1 combined one. - URL prefix property type allows only specific URLs, so you would need to set up http and https separately.
There’s an advantage in it though; it’s easier to set up and it’s useful in case you want to track your subdomain and domain separately.
Since we’re always thinking long-term, we’ll use the Domain Property type.
6. Type in your domain without http or www, so in my case, I’ll be using storemonkeywp.com domain.

7. In the next screen, Google provides instructions on how to verify.

8. Just click on “copy” to copy the verification code to your clipboard.

9. Now, go to the website where you’re hosting your website.
- If you bought the domain at another provider than your hosting provider. For example, you bought a domain at NameCheap but you are hosting the site on GoDaddy, you need to still go to the hosting provider’s cPanel.
10. I’m using HostPapa’s cPanel. Unfortunately, every hosting provider has a slightly different location where the DNS records are updated.

Adding TXT DNS record at web hosting
I’ll show you how it works on HostPapa & Godaddy – If you use another hosting, this is still useful to you. I’ll show you what to do with the DNS and how to add the verification code, this is exactly the same in all providers.
Here is an article where you can see how to do this on any hosting provider.
A. HostPapa
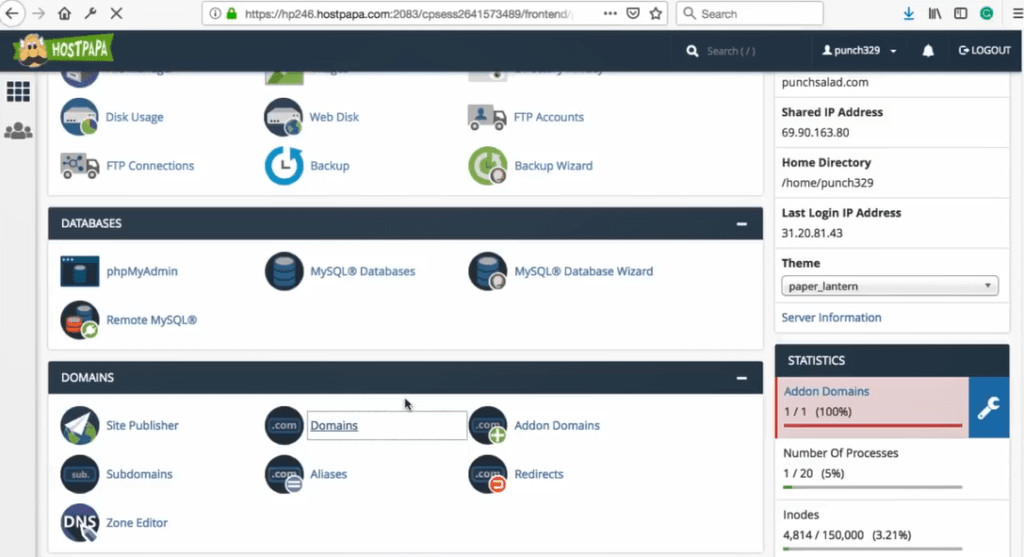
i. Okay, in cPanel, navigate to Domains section and click on “Domains”.
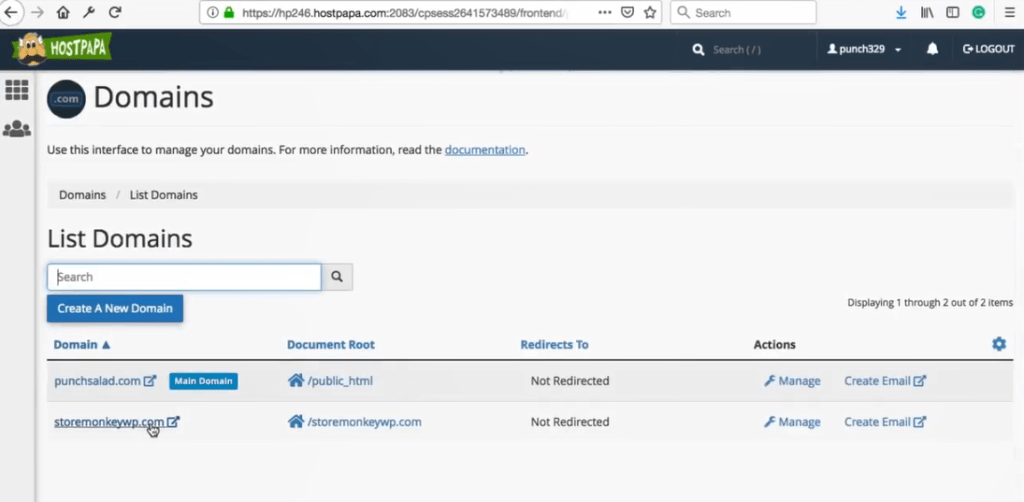
ii. Find the domain that you want to add to Search Console.
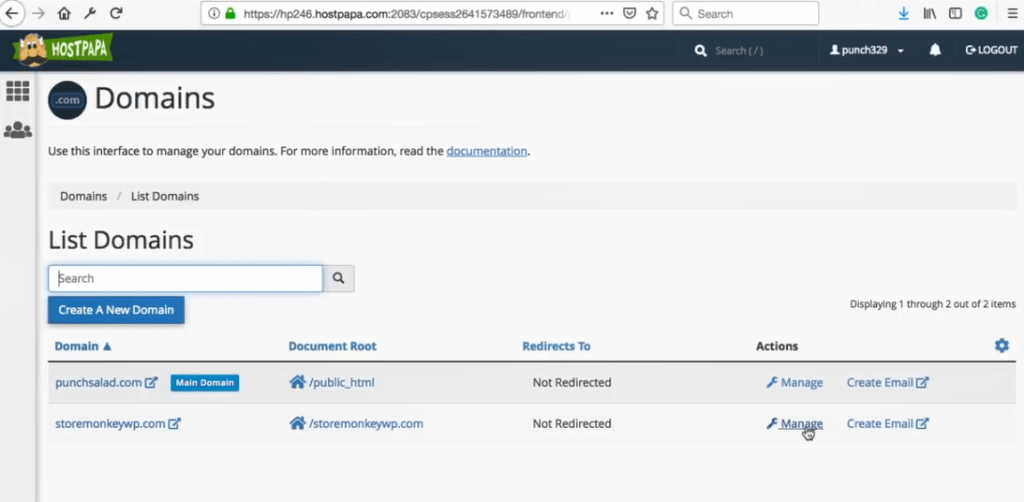
iii. Click on Manage.
iv. Click on Modify Zones.

v. At the top click on “Add Record”.
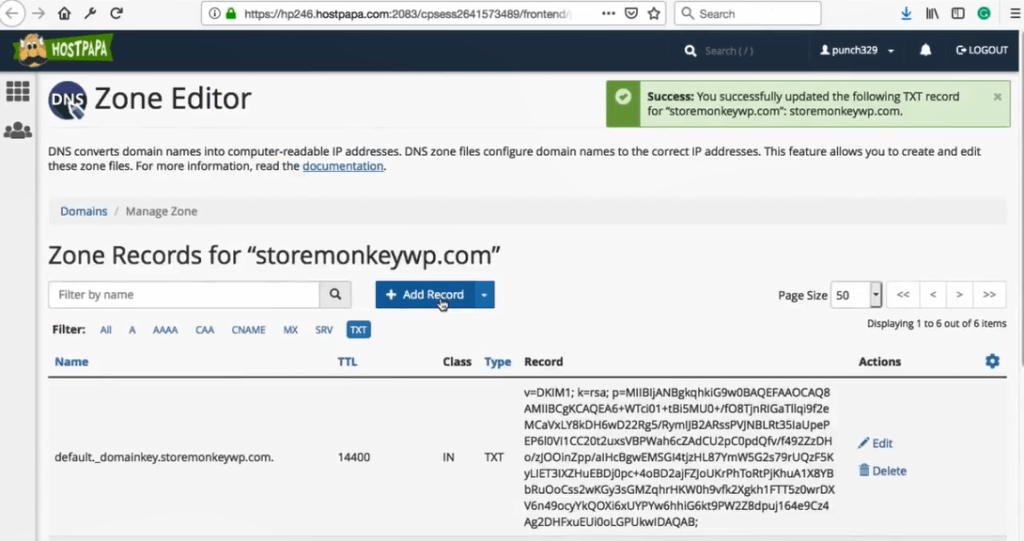
vi. In the name field type your domain name without the www. So in my case, it’s storemonkeywp.com.

vii. Change the type to TXT.

viii. Paste the verification code we copied from Search Console in the ‘Record’ field.
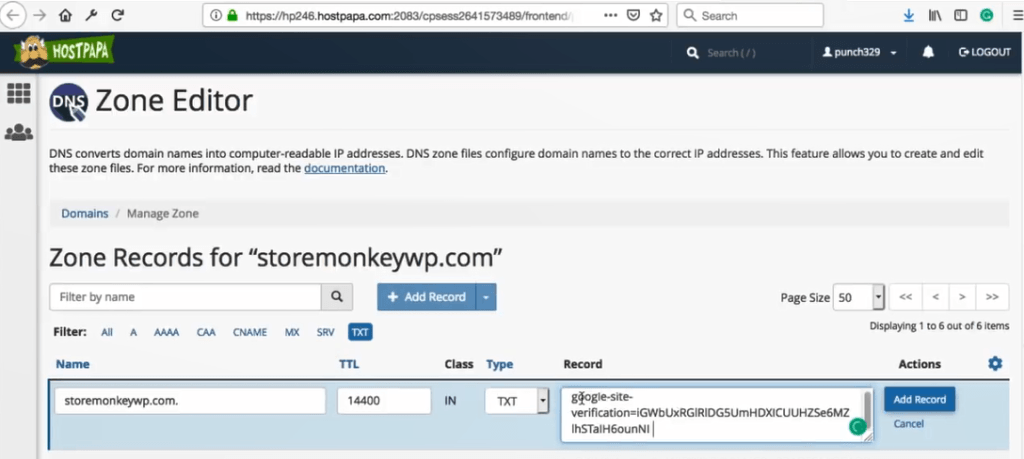
ix. Then click on ‘Add Record’.

B. GoDaddy
i. Login to GoDaddy and go to “My Products”.

ii. Under domains, select the domain you want to verify in Search Console and click on ‘DNS’.

iii. At the bottom of the list, click on ‘Add’.
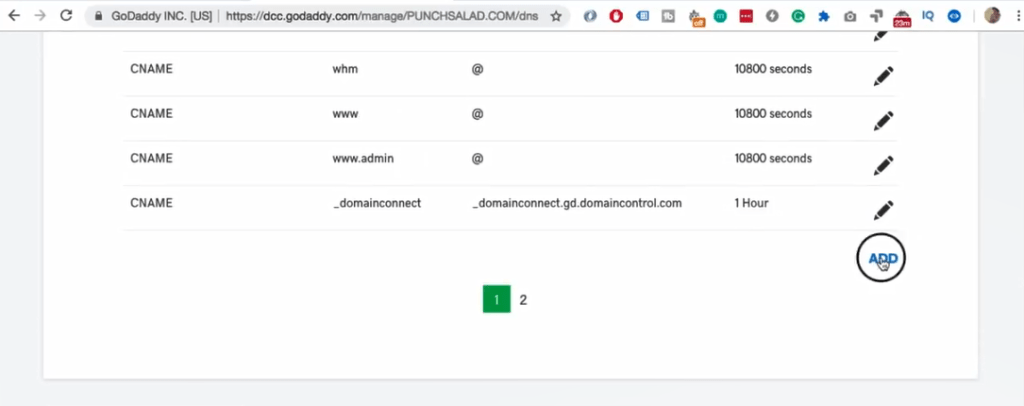
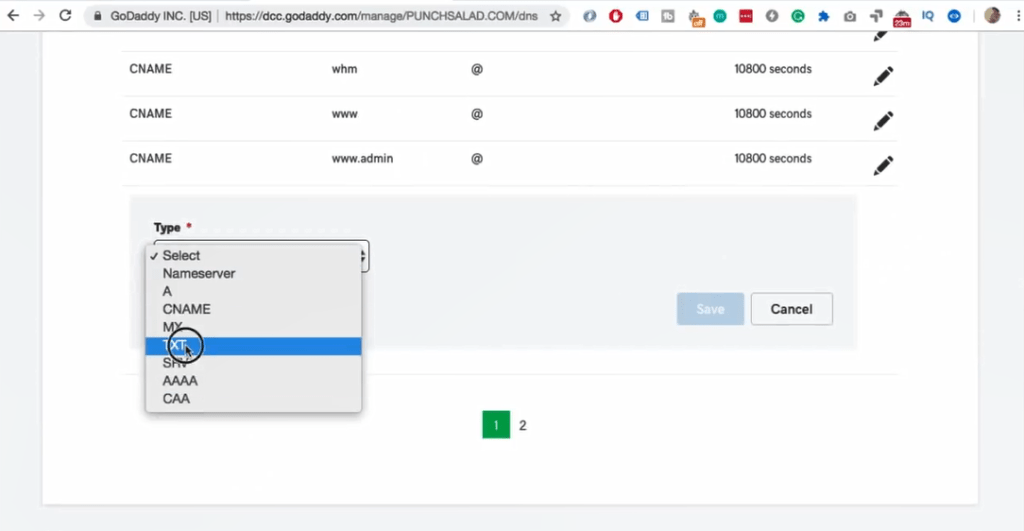
iv. Choose the type to be TXT.
v. In the host field type your domain, in my case it’s storemonkeywp.com.
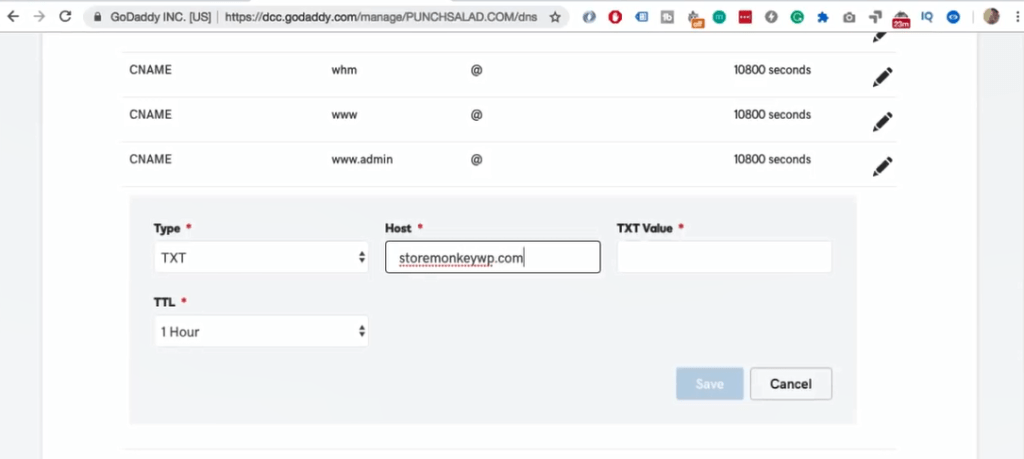
vi. And in the TXT value field paste the verification code that we copied from Search Console.

vii. TTL you can keep at the default.

viii. Click on ‘Save’.
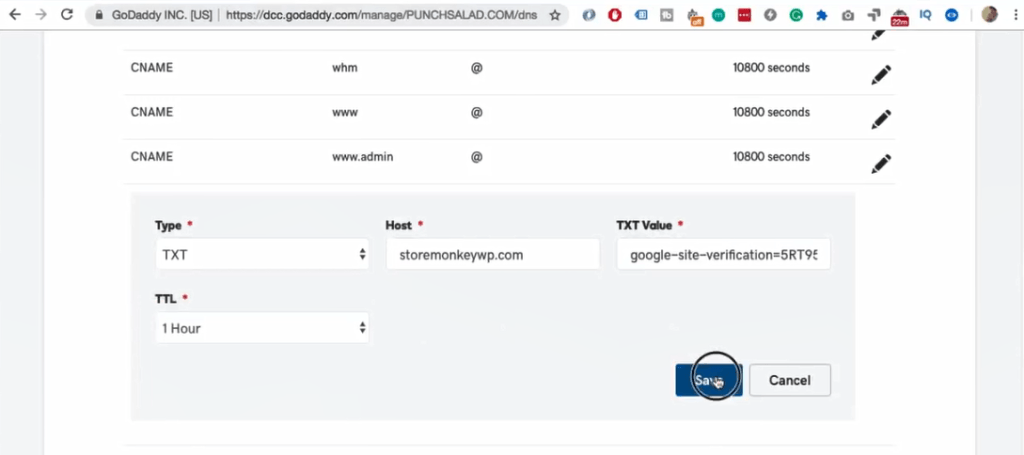
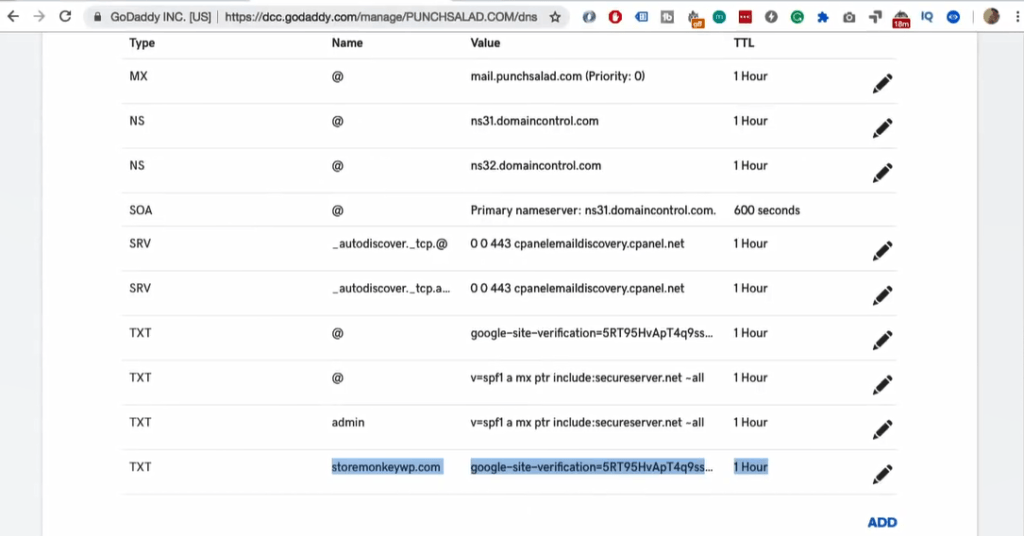
ix. Now the record is added.
C. Others hosting providers
i. You can find the link to this Google page in the description. It has a list of almost 100 hosting providers and where to add the TXT DNS record.
Verify ownership of the domain in search console
11. Now you can go back to Google Search Console and click on verify. For me it was immediate. However, it might occur an error like this:

This could happen because it might take up to 24h. So please wait for a day in case it doesn’t work right away.
12. Once you’re done, there will be a brief explanation of the new domain property, and then just click “Start”.

13. Now you might see an empty dashboard. It can take days or weeks before you will start seeing any data here.
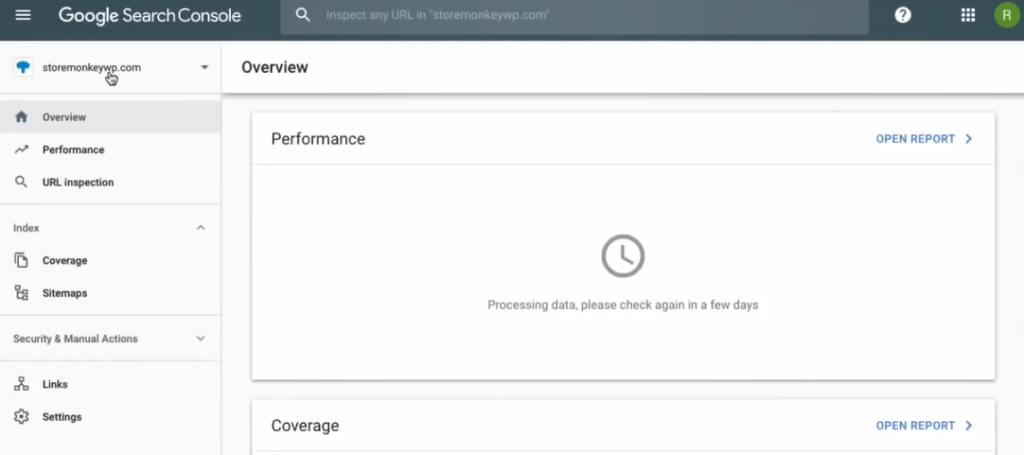
14. After some time you’ll see some data where you can search the words that bring you SEO traffic. You’ll also be able to notify Google that you have new pages on your website that needs crawling.
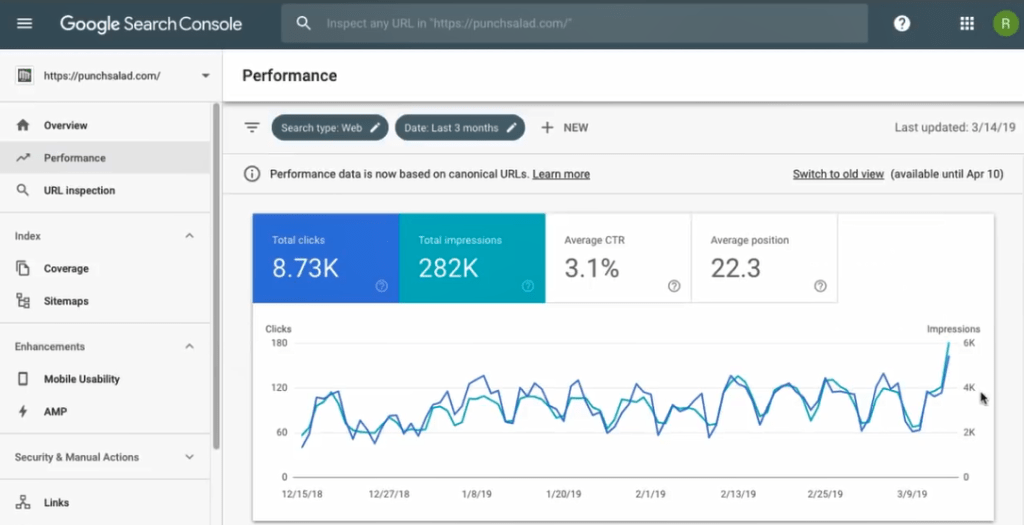
If you still need some more help with Google Search Console, please check out this video which gives a walkthrough Google Search Console with all its features.
Verify Google Search Console in WordPress with Meta Tags (No Plugin)
Next, let’s take a look at how to verify Google Search Console only by using the WordPress admin dashboard. We are going to insert a small code snippet into one file, so there is no need for plugins or access to your hosting provider. Awesome right?
Alright, before we start, I just want to mention that I think it’s better if you verify the whole all domain properties in one go using DNS verification.
The instructions are above, just scroll to top and see the table of contents, or I’ve made a video tutorial about this and you can access it by clicking here.
DNS verification is a bit more complicated and you need access to your hosting provider, but you will have all variations of your domain under one domain. Otherwise, you will end up with a bit of a mess.
Okay, Let’s get started!
1. Go to Google and search for “Google Search Console”.
2. Select the first option.

3. And on this page click on “Start now”.

4. Now if you’ve never used Search Console, then you will see this screen.
- In my case, I’ve used it before and I see a screen like this
- And maybe you ended up in the old view of webmaster tools, it looks like this.
- If you did, just click on the “Use new Search Console” and you will end up on the same screen as I am now.
- Now just below the Search Console logo, click on the dropdown and select “Add property type”
5. Now since I got everybody to see the same page. There are 2 options.
- The domain property type will combine all combinations of your domain under one property.
So, for example, all your subdomain and HTTP and HTTPS and the www and non-www. The benefit of this is that you won’t have 6 different properties but 1 combined one. - URL prefix property type allows only specific URLs, so you would need to set up http and https separately.
But the advantage is that it’s easier to set up and it is useful if you want to track your subdomain and domain separately.
So let’s go with URL prefix as it is super easy to set up directly in WordPress.
6. Start typing the URL that you want to add to the Search Console. So for example, I will be adding this subdomain: lazylemon.punchsalad.com, which is a landing page for a WordPress theme that I build.
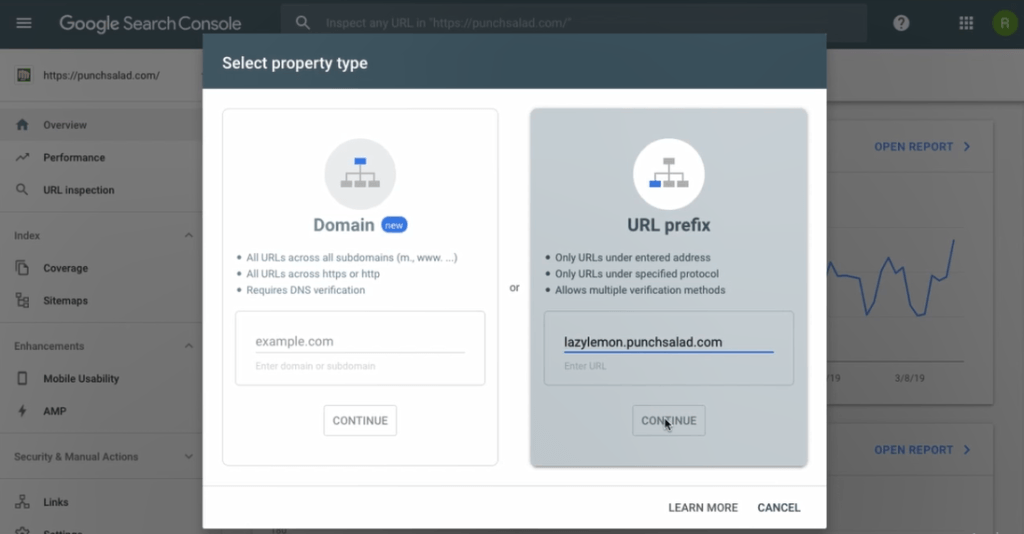
So as you can see, you really need to add the real URL, and not just the domain. In your case, it probably won’t be a subdomain. You will have to add www and later the non-www. And also one for http and another for https.

7. Then click on “Continue”.
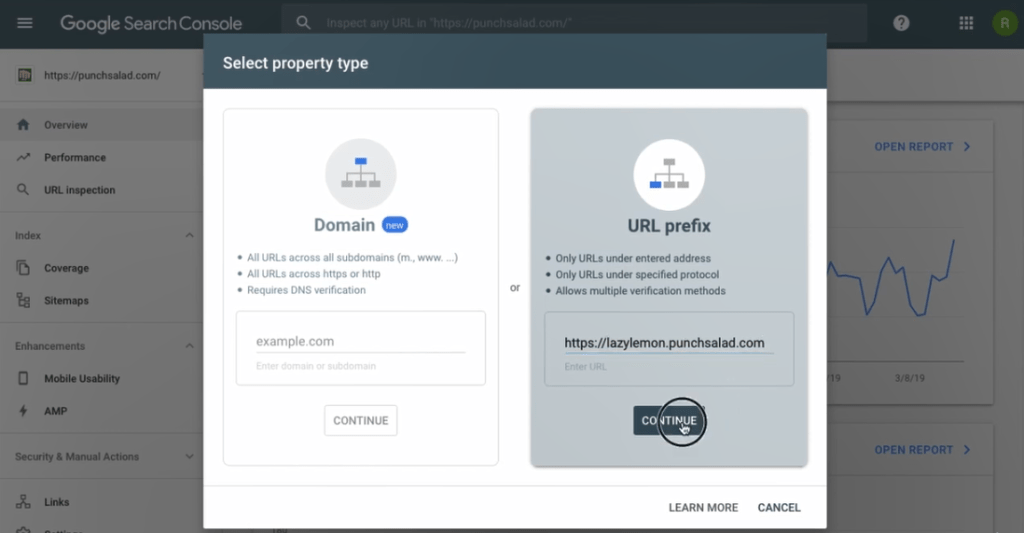
8. Google will give you 4 options of how to verify the domain. If you already have Google Analytics or Google Tag Manager installed, you can verify your website using them. But for me, this doesn’t always work, so let’s choose the HTML tag option.
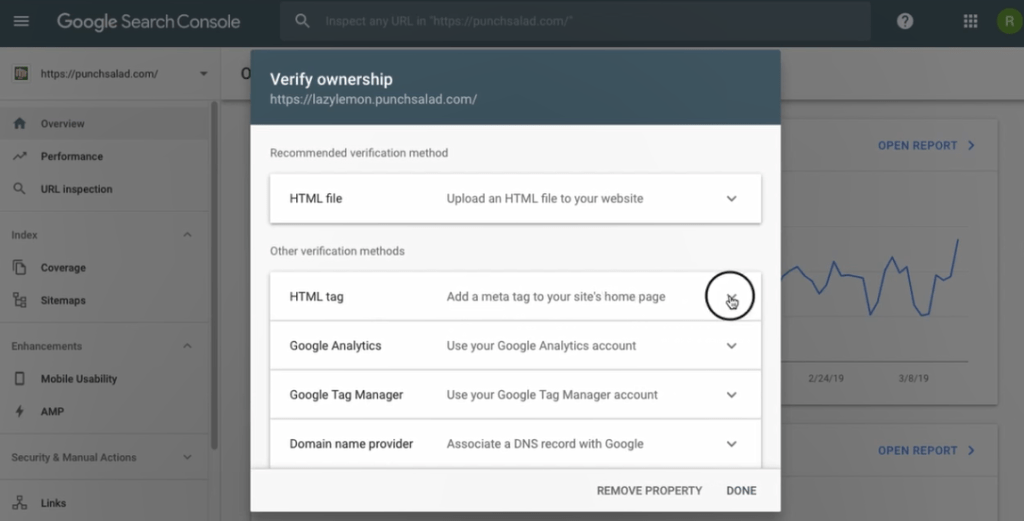
9. Copy the whole code, you will need it in a bit.
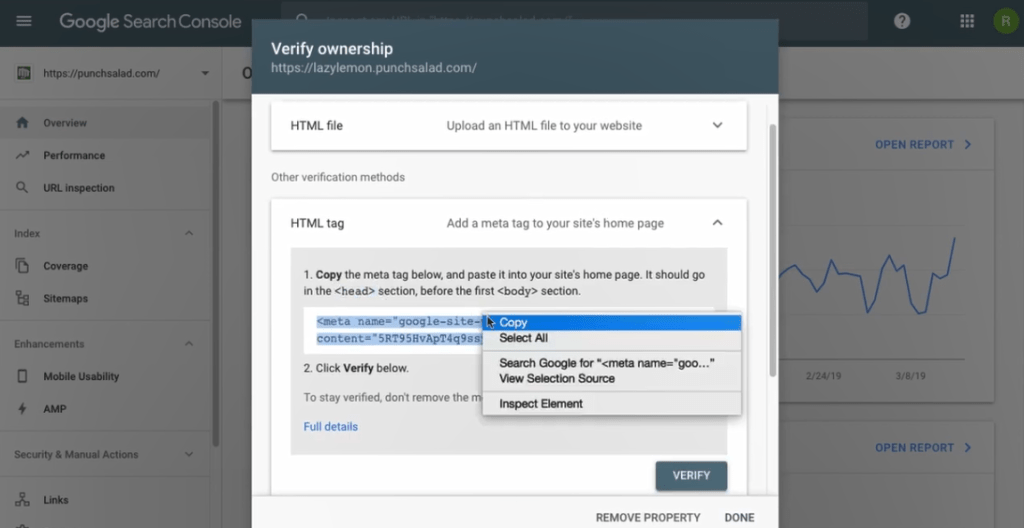
10. Okay, here is the PHP code you will need to add to your WordPress.
<?php //Add Google Search Console Meta Tags in Header function twp_add_meta_tags() { ?> <meta name="google-site-verification" content="YOUR_VERIFICATION_CODE" /> <?php } add_action('wp_head', 'twp_add_meta_tags');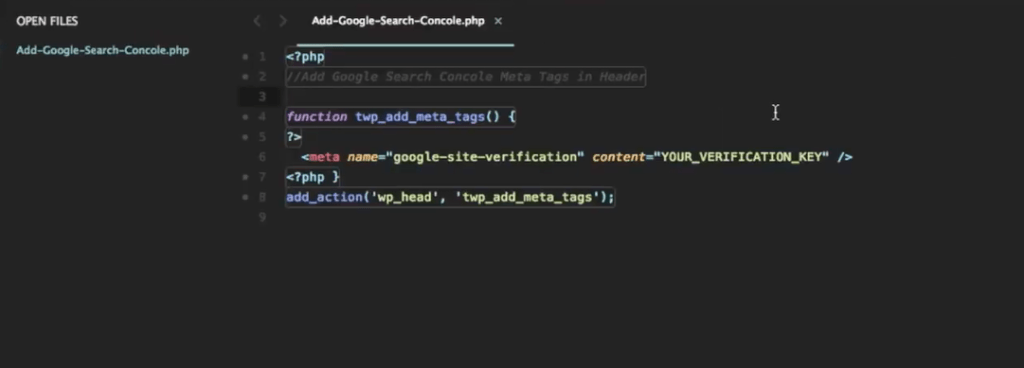
11. Just replace this bit, with the one you copied from Google Search Console.
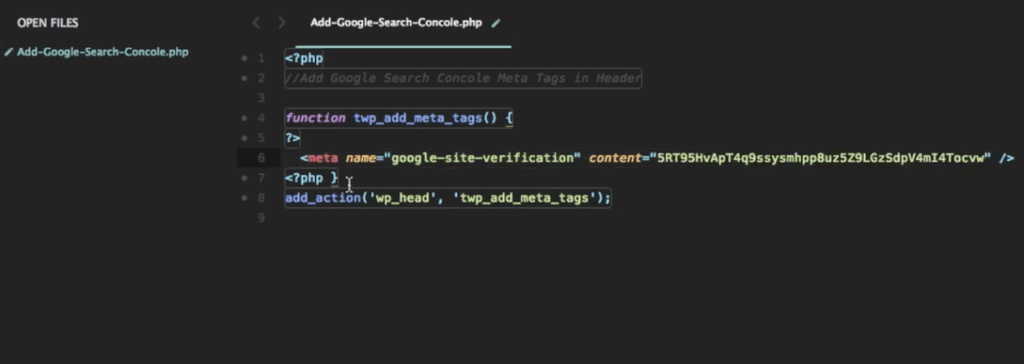
12. Then copy the whole code snippet and go to your WordPress dashboard.
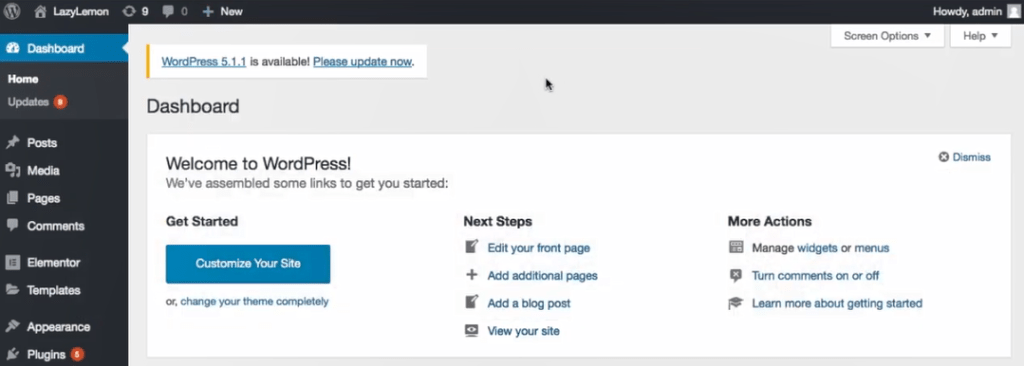
13. In your dashboard navigate to “Appearance” and select “Editor”.

14. Here on the right, you have a dropdown. It usually selects the correct one by default.
If you use a child theme, I recommend adding it there so your changes won’t get overwritten when you update your theme. In my case, this theme doesn’t have a child theme yet.
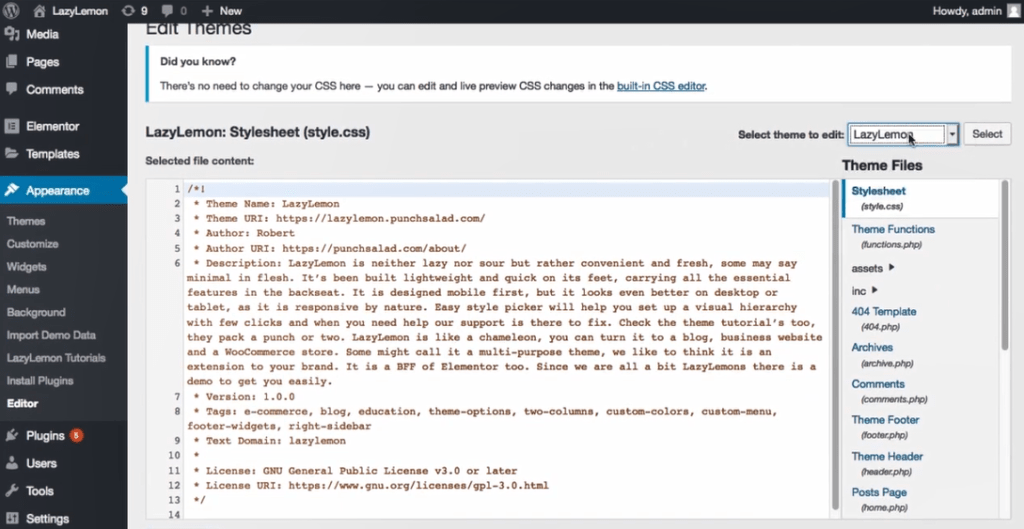
15. Below the dropdown, you have a file called Theme Functions, click on it. This will be also the case for Child Themes.

16. Then scroll to the very bottom of the file and see if you have “question mark and greater than signs”.
If you don’t, you need to add it like this.
If you do, do nothing!
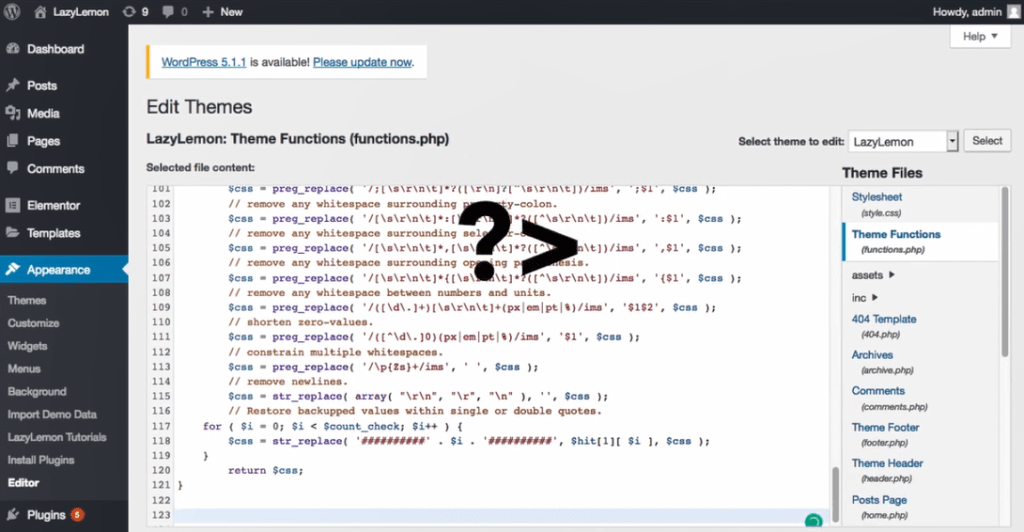
17. Okay, now just copy-paste the code I provided you, but with your verification code.
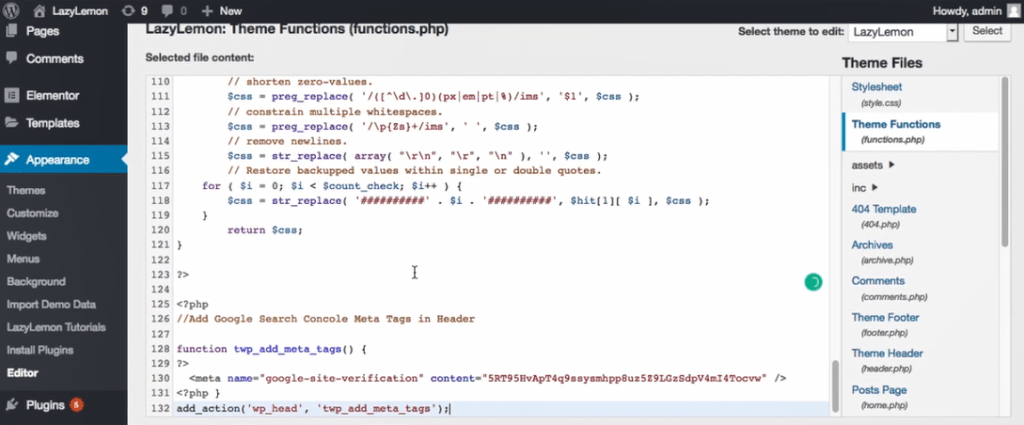
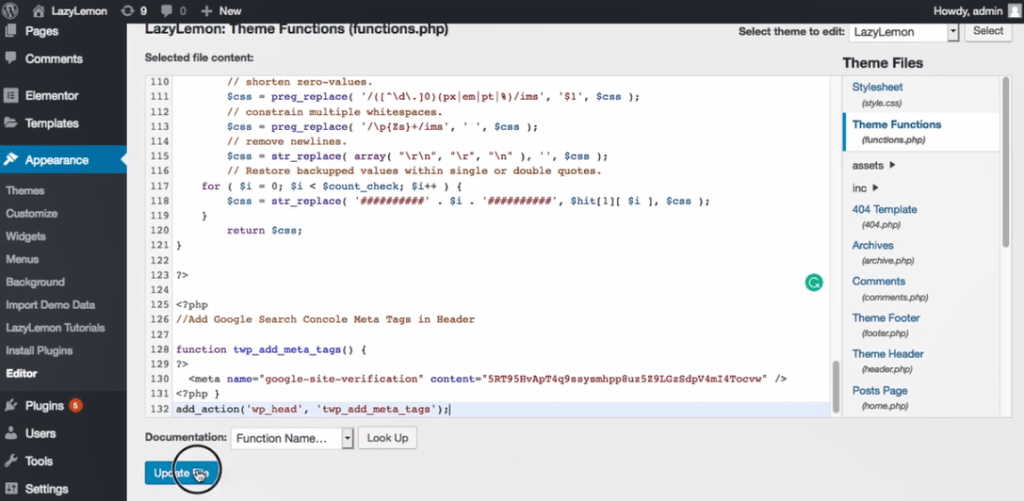
18. Click on the “Update file” at the bottom.
19. Now, let’s check that everything worked by going to the URL you’ve added to Search Console.

20. Refresh the page.

21. Then right-click anywhere on the website and select View Page Source.
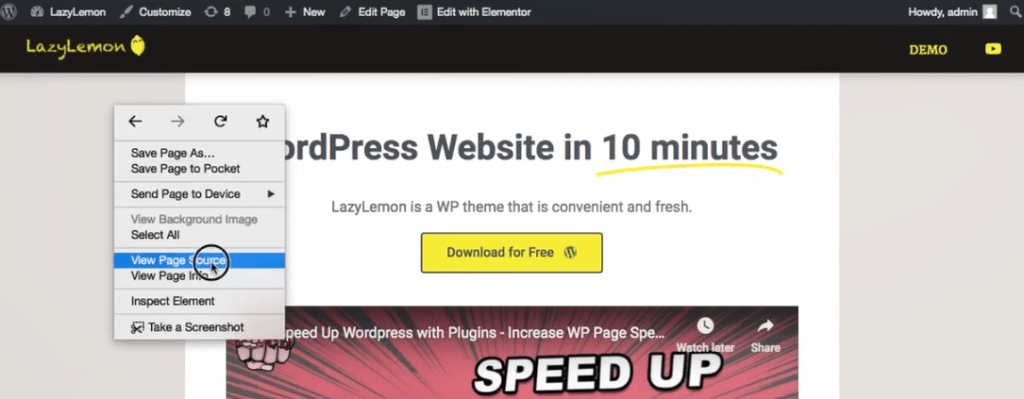
22. This is the code for your website and maybe this looks like the Matrix to you,
so just search for google-site. (You can do page search by pressing command + f on mac or control + f on windows).
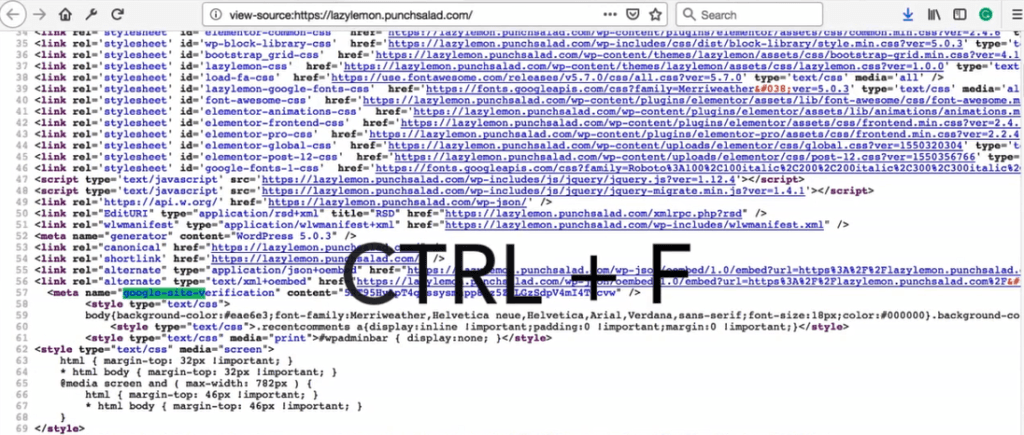
23. You should see the verification code like this one, but obviously with your verification code.

24. If you do, then you can go to the search console.
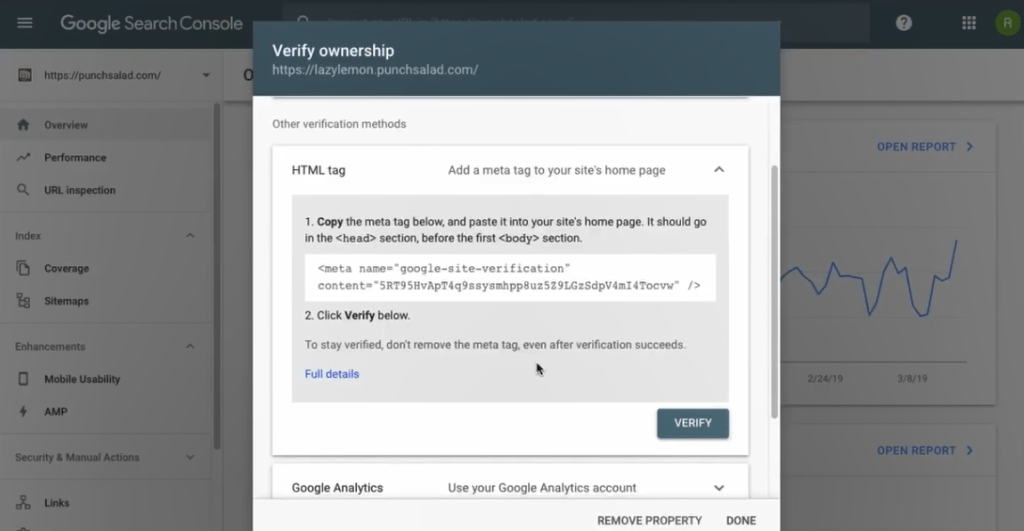
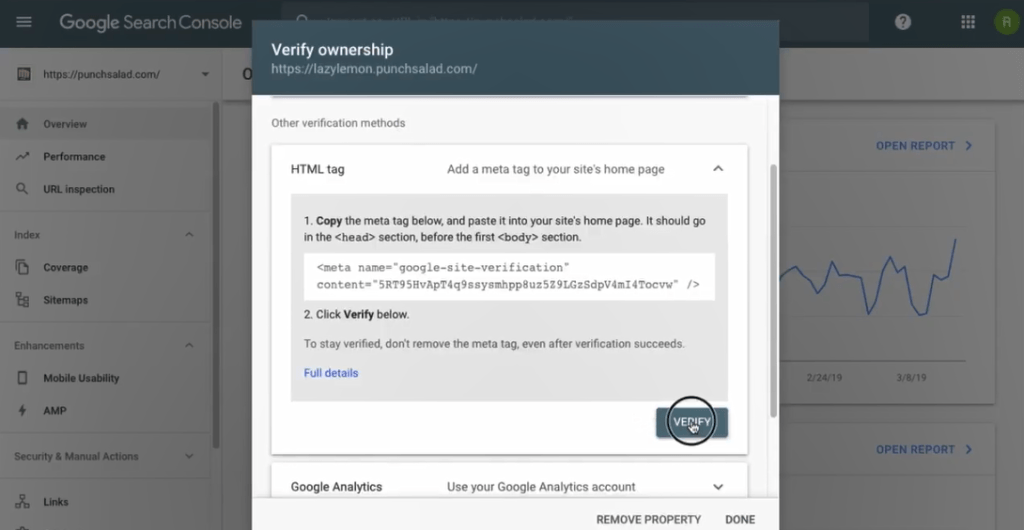
25. And click on verify.
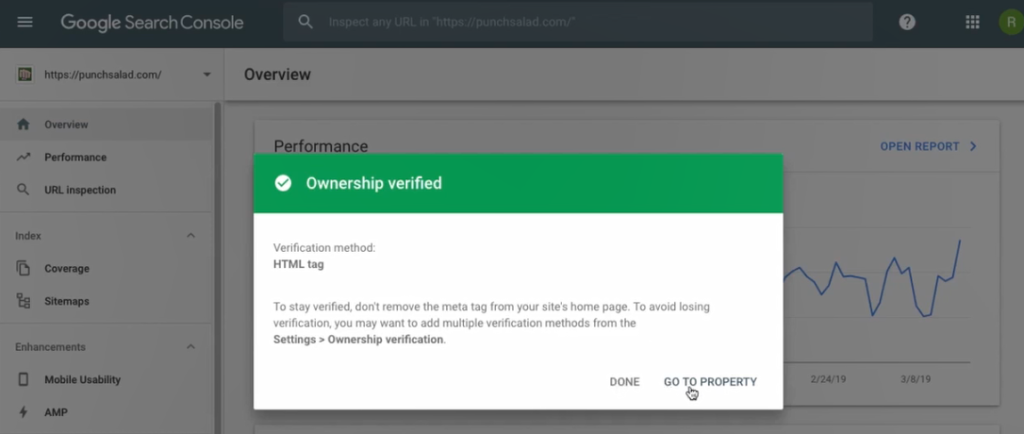
26. Now you should have your URL verified with Google. Google recommends that you do this verification process for http & https and for www and non-www version of your domain. Oh, and don’t remove this code. Google checks it from time to time.
Google Site Verification with HTML File Upload
Next, let’s see how to verify your website ownership in Google Search Console with an HTML file. We’re going to download an HTML from Search Console and then upload it to your website using cPanel’s File Manager.
Here is the piece of code you need:
Alright, as mentioned before we start, I want to mention that, I think it’s best if you verify all domain properties in one go using DNS verification.
It’s a bit more complicated, and you need access to your hosting provider, but you’ll have all domain variations under only one domain as you can see in the example below.

Here is a video tutorial that shows the step by step on how to add your website to Google Search Console without plugins using HTML tags in 2019.
Okay, Let’s get started…
1. Go to Google and search for “Google Search Console”.
2. Select the first option.
3. And on this page click on “Start now”.

4. Now if you’ve never used Search Console, then you will see this screen.
- In my case, I’ve used it before and I see a screen like this
- And maybe you ended up in the old view of webmaster tools, it looks like this.
- If you did, just click on the “Use new Search Console” and you will end up on the same screen as I am now.
- Now just below the Search Console logo, click on the dropdown and select “Add property type”
5. Now since I got everybody to see the same page. There are 2 options.
- The domain property type will combine all combinations of your domain under one property.
So, for example, all your subdomain and HTTP and HTTPS and the www and non-www. The benefit of this is that you won’t have 6 different properties but 1 combined one. - URL prefix property type allows only specific URLs, so you would need to set up http and https separately.
But the advantage is that it’s easier to set up and it is useful if you want to track your subdomain and domain separately.
Let’s start with the verification process by typing our domain URL into the right field.
6. I’ll be using a subdomain business.punchsalad.com, which is a demo page of a WordPress theme I’ve built recently. I’m going to use http but if you have HTTPS you probably want to start with that.
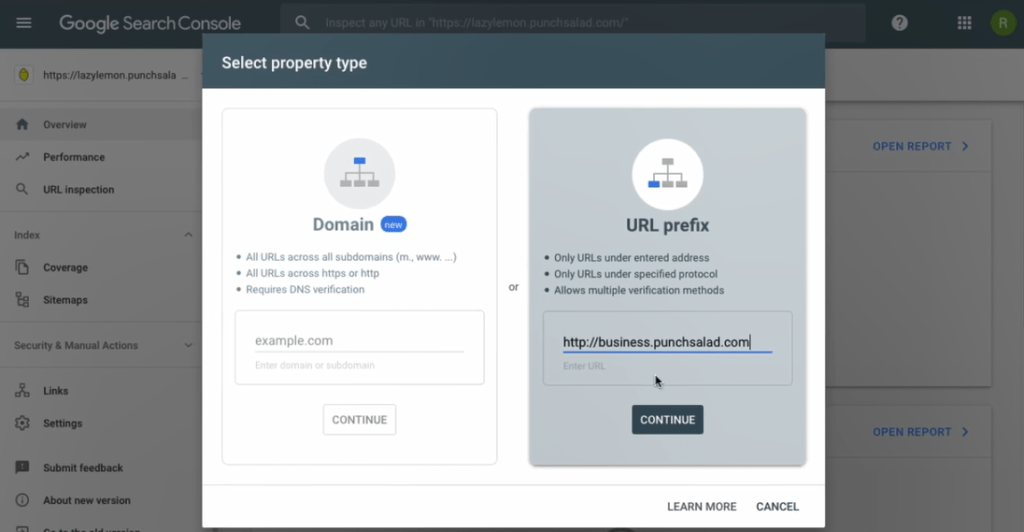
7. Then click on continue.

8. Google will give you 4 options on how to verify the domain. If you already have Google Analytics or Google Tag Manager installed, you can verify your website using them. But for me, this doesn’t always work, so let’s choose the HTML file option.
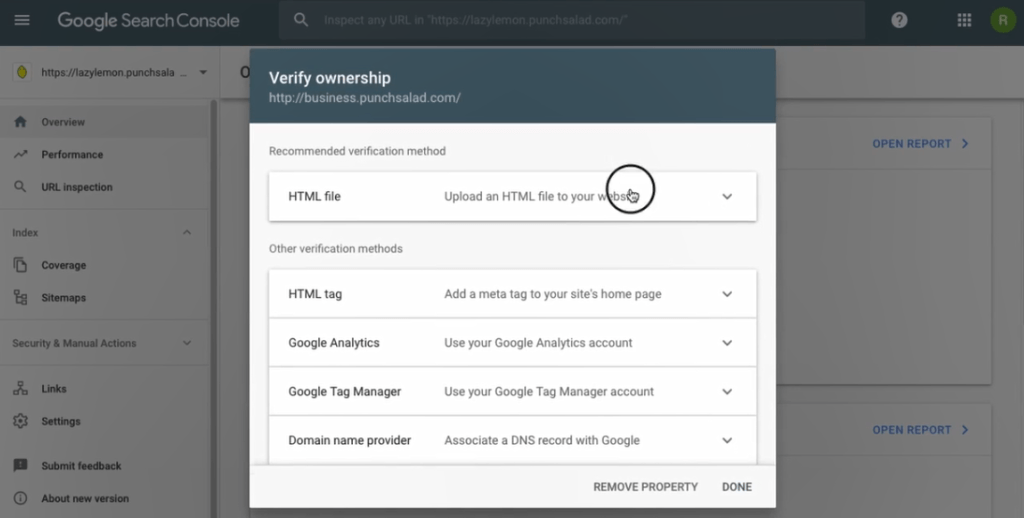
9. Then just click on the download button like this.
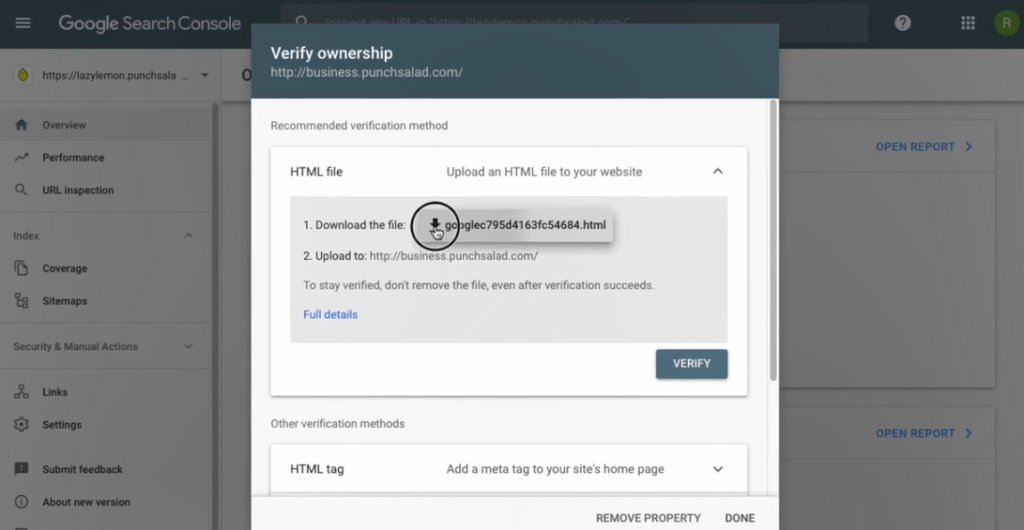
10. And save the file somewhere on your computer, you will need it soon.
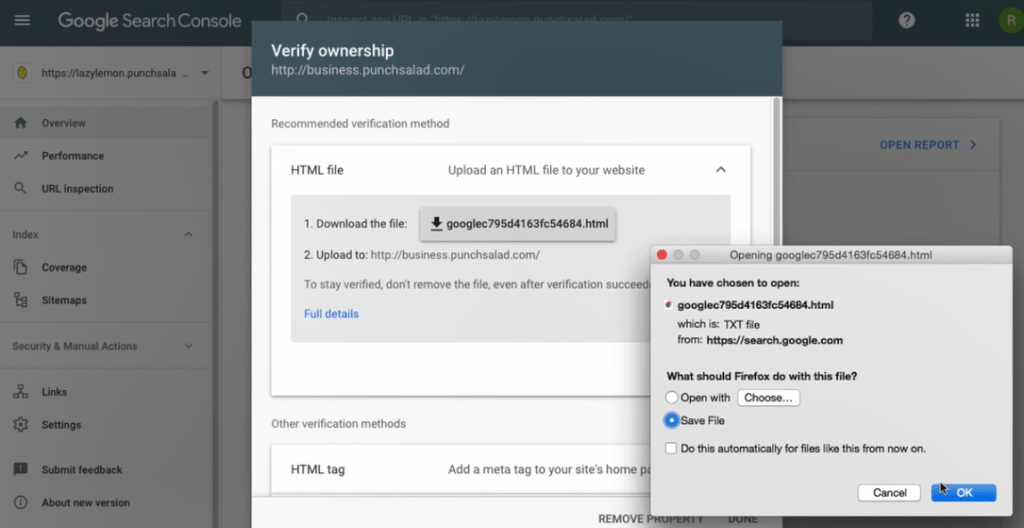
11. Google tells us to upload this file to the root of the domain, so basically the first level of your website folder structure.

12. Now we can use either File Manager in cPanel or just connect to your server with FTP software such as FileZilla and upload the file to our server. I’m going to use File Manager, but you can easily follow if you use FTP software.
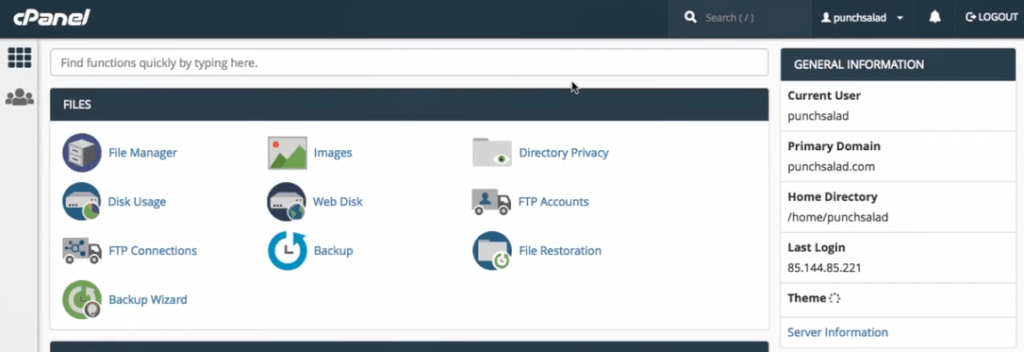
13. I’m on my cPanel dashboard if you don’t know how to get here, check the video that will appear on your screen now. So in cPanel, click on “File Manager”
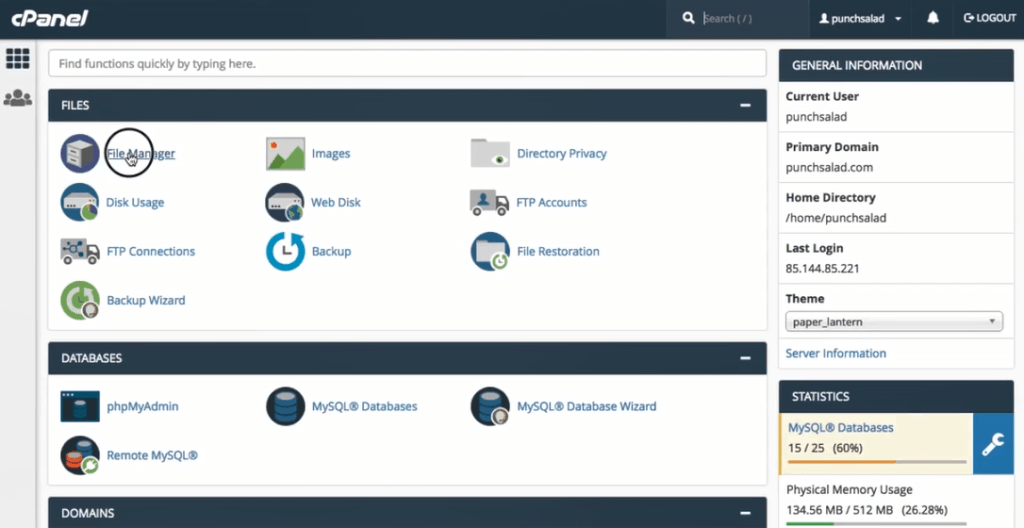
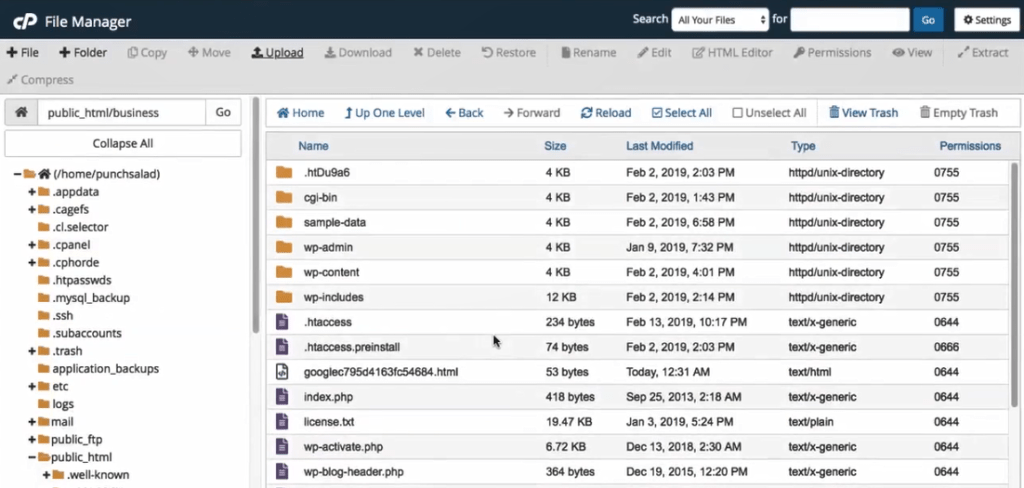
14. Then on the left, go to public_html
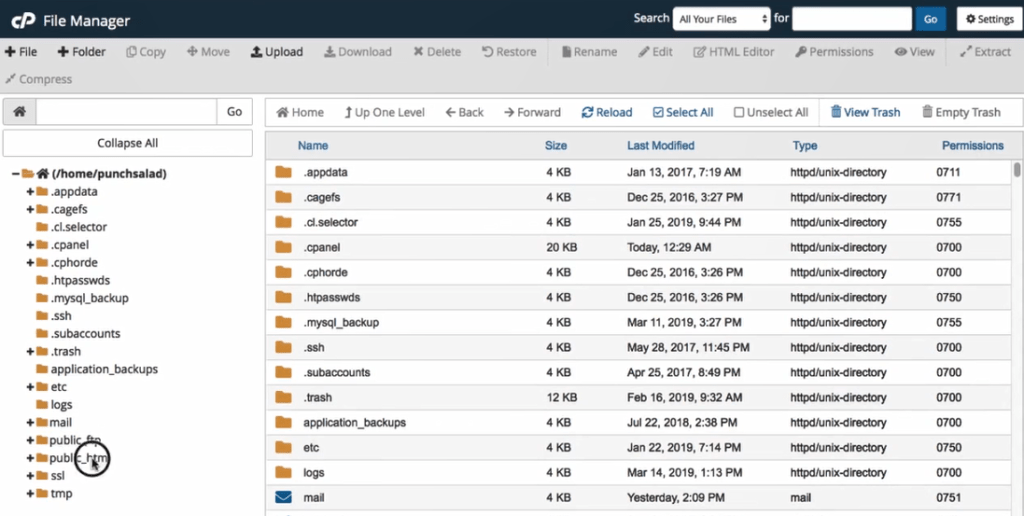
15. In my case, I need a folder called “Business”, as it’s a subdomain. But for example, if I was doing this for this befittyblog.com domain, I would go inside that folder first.
Oh yeah, if you only have one website on the hosting, then you would upload the file in the public_html folder
Just upload the file in the folder of the domain.
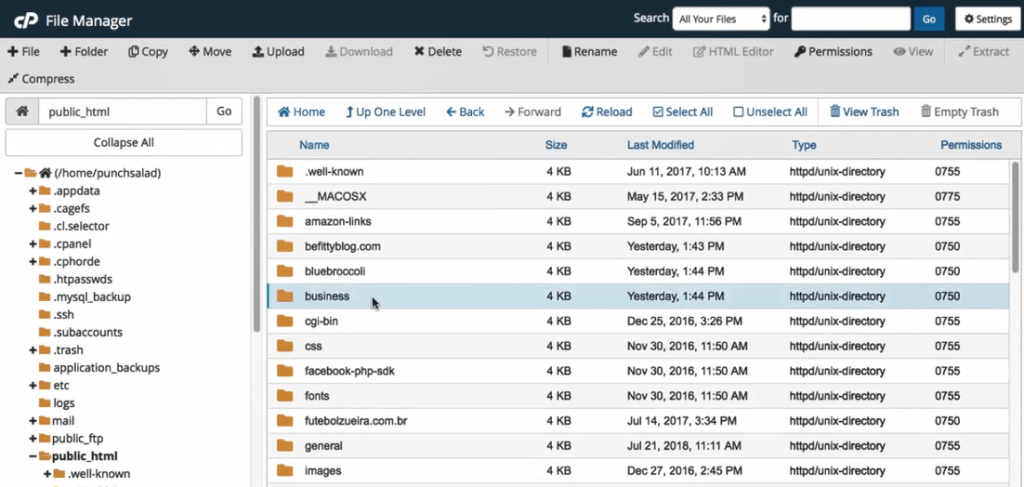
16. So inside the folder, click on upload and find the file you just downloaded.
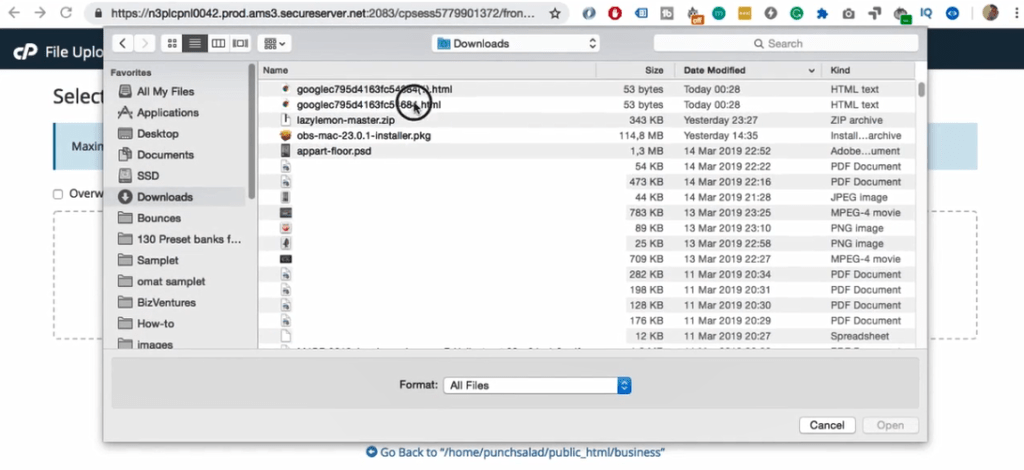
17. Now the file should be uploaded to your domain’s root folder.
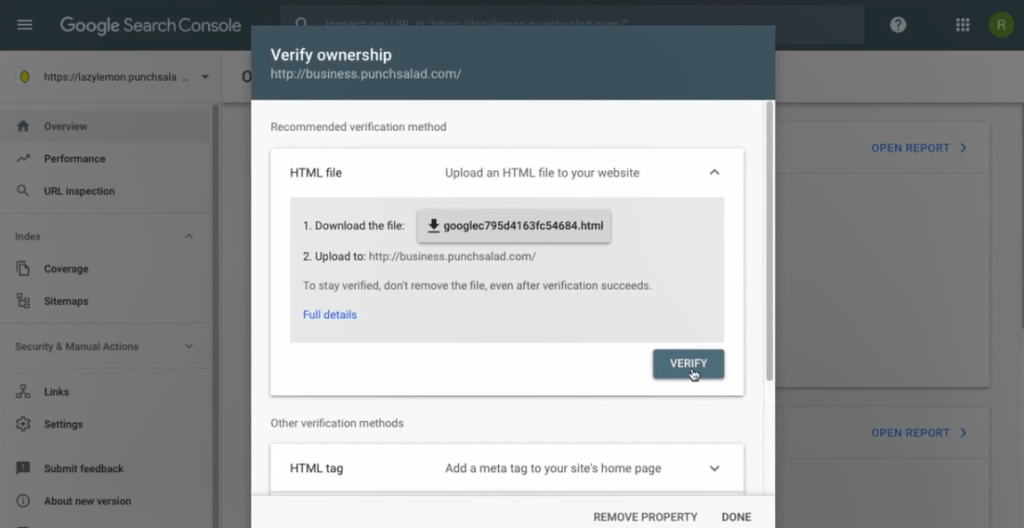
18. Now you can go back to the Search Console and click on ‘verify’.
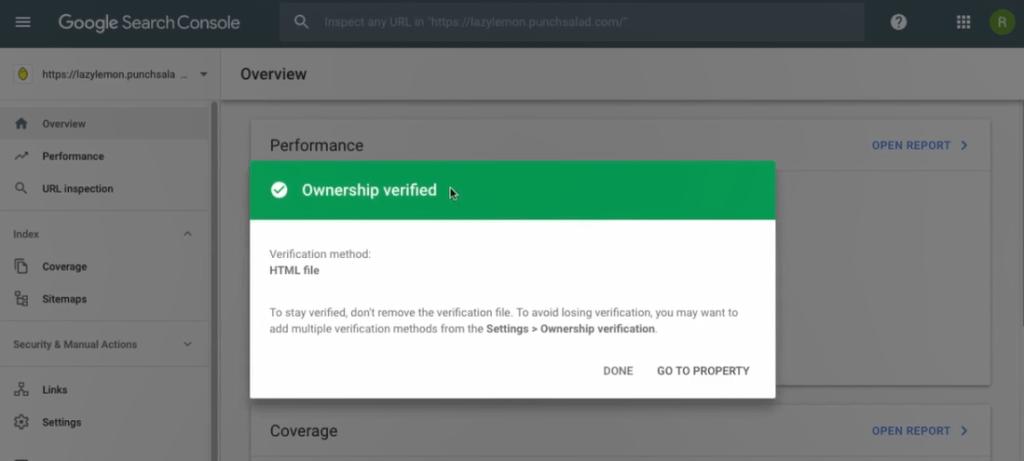
19. And your site should be verified now. That said Google recommends that you do this verification for all variations of your domain. So HTTP, HTTPS, www, and non-www variations, like you see here.
And you are done!


