
In this article, I’ll show you how to get a cheap SSL certificate for GoDaddy. You will be buying an SSL from Namecheap and then installing it in GoDaddy’s cPanel. Below is a video where I show you how to do this step-by-step. This is for you if you are tired of renewing Letsencrypt.
To get started, visit this page for an SSL certificate from Namecheap and click on play to watch the video. (The above link is an affiliate link so if you purchase something from the website I will get a small commission from NameCheap)
After this video, your website will have a green padlock 🔒 and you can get it for a very affordable price this way you can keep more money to yourself like this guy.

First, I’m going to show you how to buy an SSL from Namecheap, but if you already have an SSL from them or from other SSL certificate vendors like Comodo.
Then just watch the video or use the below table contents to get to the right place in the article.
- Buy cheap SSL certificate from Namecheap
- How to install an SSL certificate in GoDaddy
- Activate Namecheap SSL Certificate
- Create CSR in GoDaddy Cpanel
- Enter the CSR in NameCheap
- Download the domain verification HTML files and upload them to Godaddy
- Verify the SSL Certificate with GoDaddy.
- Receive an email from Comodo (Namecheap)
- Use the CRT to install the external SSL certificate in GoDaddy
- Create a redirect from http to https using .htaccess file in your file manager
Buy cheap SSL certificate from Namecheap
Alright, you are going to buy an SSL certificate from Namecheap. I like to use them because they have good service and they’re very affordable. I have all my domains with them, and I really recommend their service.
“Please note that if you have GoDaddy’s managed WordPress plan, this will not work and you need to use an SSL from Cloudflare.”
1. Compare Namecheap SSL certificates
Let’s take a look at the SSL certificates that Namecheap provides just click here to get to the comparison table (This is an affiliate link if you find this article useful and buy an SSL from Namecheap I get a small commission).
Once you land on the page, you can see that there’s a lot of different options.

Filter by 1 year or 2 years (depending on your preference) and you need to decide:

a. If you have just one domain
Select PostiveSSL.
b. If you have a domain with subdomains.
Then choose the PositiveSSL Wildcard. A wild card SSL certificate covers the subdomains and other variations of your domain.
c. If you have multiple domains that you need an SSL for.
Pick PositiveSSL Multi-Domain (Includes 3 domains.)
Within each above option, there are multiple types of SSL certificates. The biggest difference is that the more you pay the more warranty the SSL covers in case of security threats and also the more you pay the more “trust” worthy your SSL is.
For example with extended (EV) SSL, you used to get a green browser bar with your company name. For example, her is a comparison of domain level (DV), organization level (OV) and extended (EV) SSL certificate.
PLEASE NOTE! Ian pointed out an important thing to keep in mind with the multi-year SSL, using his words:
If you buy a multi-year SSL through Namecheap, you now have to renew it/update it every 12 months, as most web browsers won’t recognise a certificate that has been bought for more than a year. It doesn’t cost anything, but you still have to update through Namecheap and your CPanel every year. It’s a bit of a pain and takes a while – but it’s still great value overall.
Ian in comments
2. Namecheap vs GoDaddy 1 domain SSL certificate comparison
The below table compares GoDaddy to Let’s Encrypt and Namecheap, in terms of price and how many days the SSL certificate is valid.

As you can see from the table GoDaddy’s SSL is about $64 a year. That’s a difference of $55, how is that even possible!
So, if you go with Namecheap you’re going to save about $55 just right there.
You also notice that I included a free SSL by Let’s Encrypt in the comparison. I used to use them, but I got fed up with renewing it every 90 days, so I switched to Namecheap, where you can choose the certificate to be valid for 1 year or 2 years.
Learn how to install a free SSL on Goddady with my tutorial.
3. Namecheap vs GoDaddy Wildcard SSL Certificate
What about wildcard SSL, what are the main differences in costs? See in below table:

Then let’s look at the wild card SSL. As you can see at GoDaddy it is almost 300 bucks, whereas at Namecheap it was something like $72. So it’s much cheaper SSL and you can save a lot of money, just by researching which SSL provider you use.
4. Select an SSL certificate and purchase it
In my case, I just want the single domain and the price is about $9 (at the time of writing this article).
I’m going to add it to my basket.

It’s up to you if you want your SSL to be valid for 1 year or 2 years. The benefit of having 2 years, is obviously that you renew it every two years.
I’m going to just select one year because I don’t use this domain so much and the price is about nine dollars.
Once you’re ready, confirm the order.

and you have the option to choose the payment method (I have PayPal as default, so it’s already selected). Then double-check that all the details are correct and just complete the checkout with PayPal or MasterCard or whatever you’re using.

Then just purchase an SSL certificate.
Good job! This is the thank You page, so it means that you bought the SSL certificate.

How to install an SSL certificate in GoDaddy
In summary, to install the Namecheap SSL certificate on GoDaddy web hosting you will need 8 steps. This sounds and looks much more complicated than it actually is. Just make sure you have bought the SSL already. Let’s dive in!
1. Activate Namecheap SSL Certificate
Let’s start by getting the CSR from GoDaddy cPanel and place it on Namecheap.
Make sure you are logged in to Namecheap.
Then go to the main dashboard.

In the left menu, click on the “product list”.

As you can see, you have one positive SSL (or the SSL you bought in previous steps) which doesn’t have a domain yet.

Let’s activate by clicking on “activate”.

Now it is asking you for strange information like CSR or primary domain. Don’t worry, I’ll explain everything.

2. Create CSR in GoDaddy Cpanel
Next, you need to create a CSR, and this can be created on your web hosting provider like GoDaddy and just follow these steps and you’ll be fine it’s quite easy actually.
At this point, you need to log into your GoDaddy’s cPanel.

In the cPanel search box type in “SSL”.

And choose the first option.

next, you need to click on “generate, view or delete certificate signing requests”.

As you can see, I have one already here, but you need to create a new one.

Scroll down until you see the “domains” field.

In this field, you need to type in the domain you want the certificate to apply to.

In my case, I’ll type linktopus.net and www.linktopus.net.

and if you bought a wildcard certificate, then type “*.yourdomain.com”. The star tells the system that it will cover all the subdomains, like www and other variations, it’s all included!

and then fill the rest of the fields with your details.

The description field is just for you, so just type in something “liklinktopus.net CSR”.

And then click on generate.

3. Enter the CSR in NameCheap
Next copy the code from the field.

Now, go to Namecheap and paste the code in the first field. Include also the “— end of certificate —”. Just the whole thing.

It should automatically show a primary domain, for example, linktopus.net.

Then click on next.

Awesome! Now you need to choose, which kind of server you have. Since you are using GoDaddy and cPanel then it’s the second one. Just choose it and click on “Next.”

4. Download the domain verification HTML files and upload them to Godaddy
In this step, you need to choose the method you will verify this certificate.
I think the HTTP-based method the easiest. So select it.

In short, you’re going to download a file that you will place on your server and this way Comodo, will verify that you actually own the domain.
Comodo is a certificate issuer, Namecheap just resells it. So actually you are installing a Comodo positivessl certificate.
Then click on “Next”.

This is important! Check that the email you have in this field is an email you can actually access. This is where you will receive the cheaper SSL certificate for GoDaddy.

Then click “Next” again.

Phew 😅, you are at the last step of the certificate generation. Just double-check that you’ve entered everything correctly and click on “submit”.
5. Verify the SSL Certificate with GoDaddy.
Now you need to download the file that you will place on your server. This takes a bit of work.
As you have to scroll down and click on see “details” button.

on this page, you have “edit methods”, but you need to click on this arrow and select “download the file”.

Then click on “download file” ( it’s just a text file that you will upload to GoDaddy in a moment.

Finally, click on “done”.

Great, the file is now downloaded and you can go back to cPanel.
Click on the cPanel logo in the top left corner of your screen.
On the cPanel home page click on “file manager”.

In the file manager find the folder with your domain, in my case, this is an add-on domain so it’s inside the public_html folder and there I have a folder linktopus.net. But if this your only domain on GoDaddy. The public_html folder is the right place.
So, inside of the folder with your domain name (or public_html), create a new folder by clicking on the “+ Folder” button in the top left corner.

Create a new folder called “.well-known” (the dot is important). Then click on “create a new folder”.

A quick tip: If you already have that folder that’s fine. And if you don’t see it then close this “New folder” pop-up and click on “setting” in the top right corner. Scroll down until you see “Show hidden files”.
Then go inside the .well-known folder and create another folder called “pki-validation”.

Go inside of this folder and upload the file here (the file you just downloaded from Namecheap).

Click on upload in the top menu and select the TXT file.

Once it’s uploaded, go back to the pki-validation folder, where you will see that the txt file hangs out there.

Now you need to verify that the TXT file can be accessed by Namecheap.
Next, go back to Namecheap and scroll down until you see “edit methods”. Just click on it.

You can see that you can save changes or retry the method. Check that you have “HTTP-bases in the dropdown” and click on the button.

Okay, you should get a “Certificate activation successfully initiated” message. Woohoo!

6. Receive an email from Comodo (Namecheap)
In about 5-10 minutes, you should receive two emails from Namecheap or actually it’s going to come from Comodo. The email will include a zip file that you are going to unzip and then take the content out.
The first email will include the certificate. and the second one is just a notification that you can use a trust logo from Comodo. You just need the first email, which has also the zip file.

Save the zip file from your email and unzip it. Then go inside the unzipped folder.

Here you see there are two files, but actually you just need the CRT file. You are going to upload it to GoDaddy in just a second. (If you open the CRT file with text editors like notepad, then you will see it’s just this long chain of letters and numbers. so, basically gibberish).

7. Use the CRT to install the external SSL certificate in GoDaddy
In the seventh step, You are going to use the files from the zip file that you received from Namecheap and you are going to place that in GoDaddy’s cPanel.
Go back to GoDaddy’s cPanel and type “SSL” in the search field.

Choose the first option “SSL / TLS”.

Click on the link under Certificates (CRT).

Scroll down until you see “upload a new certificate”. And there is a section where you can upload the file with .crt extension.

Just upload the file and give it a description (this is just for you).

and click “upload certificate”.

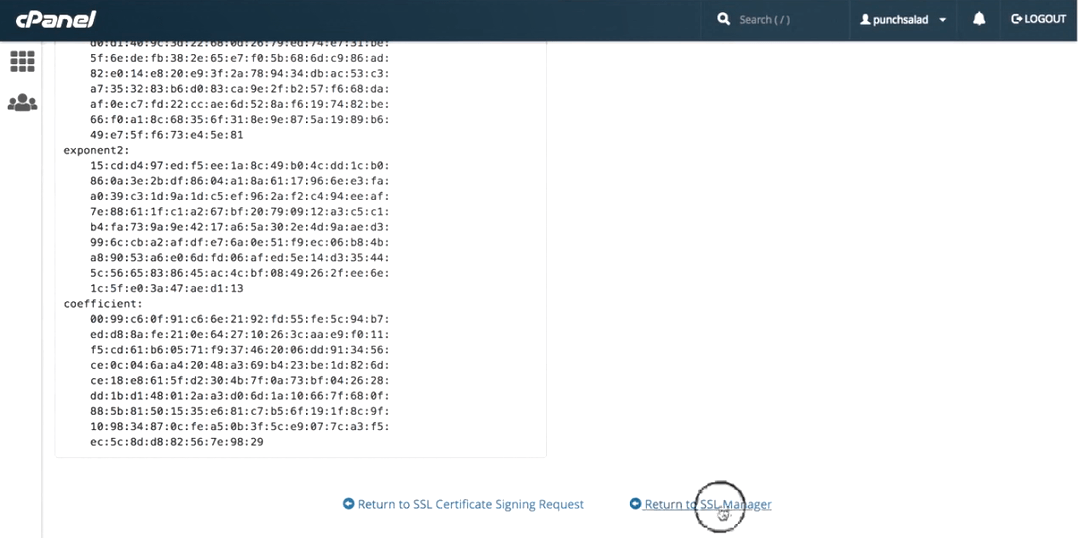
Once it’s uploaded, click on “Go back” and scroll down until bottom and click on “Return to SSL Manager”.

Next, under “install and manage SSL…, click on the “Manage SSL sites” link.

Scroll down until you see browser certificates and in the dropdown select the domain you want the SSL to apply to, in my case it’s linktopus.net

It should pre-fill all the other fields, so, all the details for the certificate. Then, just click on “install certificate”.
You should get a popup that “SSL Certificate successfully updated” and click on “Ok”.

If you scroll down you can see you have a new SSL certificate in the list. It’s valid for one year from the activation date and it covers these two domains.

Let’s see if it worked on the website. And click on the padlock in the URL bar, your site should have now “connection is secure” text. If you click on the “Certificate” text, you will be able to see until when this is valid.

So now your website went into a stealth mode! 🙂
If you still have this semi-closed lock (in Firefox it’s just the orange lock) that means you have mixed content warning. Learn more about how to fix the mixed content warnings.
8. Create a redirect from http to https using .htaccess file in your file manager
One thing I recommend you to do just type in your domain with http://yourdomain.com. You can see that it’s still not secure because you need to redirect all the traffic from http to https. Learn more about how you can create a redirect from http to https.
If you just need the redirect code, then here it is:
RewriteEngine On
RewriteCond %{HTTPS} off
RewriteRule ^(.*)$ https://%{HTTP_HOST}%{REQUEST_URI} [L,R=301]
It sounds complicated, but it’s really not, just keep your cPanel and file manager open and then your site is secure no matter how you enter the site!
If you made this far, congrats! It was a journey but you were victorious! Now you can forget all of this for at least a year 🙂


You sir.. are the king!
Thanks for kind words Mike, great to hear that it helped you!
Oh Yes ! Thank you very much, too easy with your tutorial.
Great to hear you liked it!
Thanks for taking the time to write a comment!
Robert
I did everything and when I check the domain it is still saying not secure/
ok, I figured it out. its the redirect. How can you do a redirect?
Hi Dennison,
Great to hear you were able to resolve it.
You can just follow the steps here: http://punchsalad.com/ssl-certificate/install-lets-encrypt-godaddy/#chapter3
I hope this helps.
Robert
Hi Robert,
I am Robert too from UK. Thank a ton for this superb detailed description. I am maintaining my church website and this content helped me to add ssl to my church website.
God Bless you buddy
Regards
Robert
Hi Robert,
I’m glad this helped you! if you get tired updating this every 90 days, you can go for Cloudflare SSL or buy and SSL from Namecheap (about $9 for 1year).
Have a great day!
Robert
Hi Rob, thanks for making these help videos!
I’ve just got myself a cpanel hosting with GoDaddy and I have 3 separate websites on the one hosting. Which product from Namecheap should I purchase and do you have a help video for how to install this for all the separate websites? Thanks!
Hi Soapy,
great to hear you’ve enjoyed the videos!
SSL is per domain.
Since you only have 3 websites you, you can either buy 3 separate SSLs or you can get multi-domain SSL.
To install them, just use same process as I show in this article. The multi-domain SSL, I think you will receive one email from namecheap for all 3 domains. But you still need to verify them separately.
I hope this helps,
Robert
you said it is free to download and when i tried to download it ask for a donation so what is the problem
GoDaddy is a ripoff. Purchase a month webhosting which came with SSL. I pay my month subscription and GoDaddy tells me my subscription was free only for the 1st month unless I paid for my webhosting for the entire year. I have a PHP program to post to Shopify which stop working immediately after the SSL expired. GoDaddy sold me a managed-SSL for almost $200 valid for 12 months. The GoDaddy rep said, the managed-SSL includes, setup and config and any programming. What programming?? GoDaddy act like they care about you and makes “Courtesy” calls but they are actually sales call to up-sale their services.
I recommend HostGator for webhosting. It comes with free SSL and they have developed a function to auto-renew the SSL every 90 days. Their CPanel is the same as GoDaddy so it makes it easy to transition over.
Thanks for the cheap SSL. Wish they allow a 5 to 10 SSL cert.
Hi Robert.
I have tried a lot to solve an issue. But I am failed. Can you help me?
Hi Arvind, sure thing. What’s the issue?
OMG! Thanks so much for this detailed screen by screen walkthrough. I was originally trying to get Let’s Encrypt to work but felt like such a hassle. This was so much easier. Thank you!
actually no worries it worked after 6 hours. all good
Glad to hear you were able to sort it out Anshul!
thanks, AGAIN
you are welcome Rick!
Your tutorials are amazing! Super-helpful. I’m stuck on this one though, because NameCheap hasn’t sent the emails with the zip files. Is there another way to get them? I tried Save Changes/Retry Alt DCV again, but nothing happened. It’s been about 30 minutes.
Does that work for Plesk also?
Hi Diego,
Hmm I think so, but I haven’t installed it on Plesk. I think you need to do some extra steps for Plesk.
If you are able to install the free SSL on plesk, you are able to install this one too.
Amazing tutorial
Hello, thank you so much for this! Your guide is pretty manageable. I have installed the certificate successfully and redirected the https. Though my site’s homepage is not displaying correctly. I contacted go daddy and i was told to wait for 24 hrs for all changes to take effect especially the redirection. If you may have suggestions about this, please let me know. Good job for helping us!
Hi Vinn, looks like you got this sorted already!
I pulled it off. Thanks for these detailed instructions !
Awesome, glad it worked!
hello,
I have a ssl cert that has to be renewed in 100 days. if I go through these steps, can they co-exist then I can “flip” to the new one? thanks
HI Dave, I would just buy & active thenew SSL few days before your old one expires. This way you get most value for your money.
Hi Robert,
Your videos and articles are the best and most informative on the web (and so much fun). I just wanted to let you know – if I’ve missed your words on this then I apologise – but it seems that if you buy a multi-year SSL through Namecheap, you now have to renew it/update it every 12 months, as most web browsers won’t recognise a certificate that has been bought for more than a year. It doesn’t cost anything, but you still have to update through Namecheap and your CPanel every year. It’s a bit of a pain and takes a while – but it’s still great value overall.
Wow Ian, great point! I’ve added this to the article… quoting your comment.
Thanks a lot for taking the time to write about this, I totally missed this point.
And I’m glad you find my videos / blog useful!
Thanks again,
Robert
Thank you sir!! Some of your documentation has changed for 2021 but it still worked like a charm. I cant believe Godaddy is charging a min. of $199 per year for a cert.
Glad this was helpful Adam! Yeah Godaddy is lagging behind, free SSL should be by default
Excellent tutorial. Just as a heads up, it’s slightly outdated. GoDaddy has slightly changed in a couple of areas and so has cPanel. I was able to get it to work by trial and error (I’m technical) but it took longer because of this. Thanks!
P.S. I purchased the certificate through your affiliate link.
Glad I could help Steve!
And thanks for the tip about the screenshots.
Indeed the article needs an update.
And I appreciate you supporting this channel buy buying the SSL! 🙂
Thanks again Robert,
I did this follow your instructions last year, but forgot most of it. Even though I did two of my sites.
Anyway, I’m glad I was able to find you in google search. #1 on page #2.
Anyway, saved your url to my text file with domain/hosting info etc. 🙂
Thanks Again,
Zac
Hi Robert
Thanks for your effort I just installed Let’s Encrypt on Godaddy shared host website, Can I know how to auto-renew it?
Hi Sara, unfortunately, the free SSL is not something you can automatically update.
If you bought the SSL, it also doesn’t have an auto-renew feature.
You could also install SSL by using Cloudflare’s free SSL: https://www.youtube.com/watch?v=XxlbH5xMucQ