Is it weird that you are trying to remove a link or URL from Google Search?
I mean, a lot of people pay loads of money to SEO specialists to get people to write articles for their blogs that would ensure that they get noticed on search engines.
So what could possibly prompt someone to want to remove a link from Google search?
Here are a few examples:
- Old website pages & outdated content are still being displayed in web search results.
- A scenario where a web page may have been leaked to the search engines before the actual launch or release.
- Persistence of old information on Google, despite being updated on the website or lack of use of the page.
Also, there are many blog posts that recommend removing badly performing content from your website, your rank will improve for other pages.
Learn more about on-page SEO to start writing content that ranks!
So how do you remove a link from Google Search?
There are few ways to go about this, and each one has an advantage over the other, coupled with disadvantages too.
Below is a video tutorial of the whole process. If you prefer to follow along with a text tutorial, then just keep reading.
Table of contents:
- By adding a code snippet to the meta tags of your website.
- Redirecting Traffic to 404 or a 410 page.
- Through the removal from Google Search Console (Not recommended).
METHOD 1: Use Of Meta Tags
This method will work for both WordPress and HTML websites.
Add “nofollow, noindex” meta tag with WordPress plugin
For WordPress, the easiest way to go about this is through the use of a plugin.
Most SEO plugins such as Yoast SEO plug-in or other well-known SEO plugins have this feature built-in. So, install Yoast if you don’t have it yet.
When you are on your post or page that you want to delete from Google, just scroll down until you see the “Yoast SEO” section.
Under “Advanced”, you have the possibility to remove this specific page or URL.

You will see a dropdown saying “Allow search engines to show the post in search results?”, and select “No”.
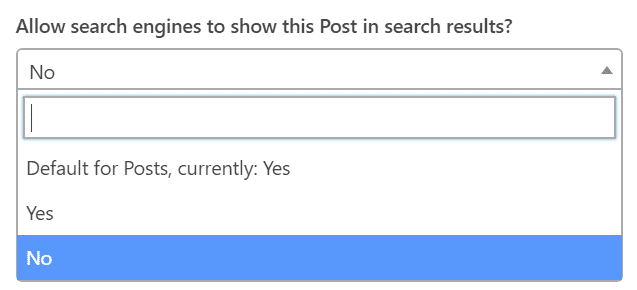
After doing that, all you then need to do is to click on the update button at the top-right corner of the page to save the changes.
By selecting “No”, it simply adds a meta tag in your posts code, it looks like this:
<meta name="robots" content="noindex, nofollow" />
what then happens is that this tells Google’s search engine crawlers and bots not to index the page, and typically most of the other search engines actually follow this protocol, so it’s quite a robust way to exclude your page from Google’s search index.
Add “nofollow, noindex” Meta Tag in HTML
For HTML websites, the noindex meta tag needs to be manually added to the website, if you have access to the HTML code.
<meta name="robots" content="noindex, nofollow" />
Just copy & paste the code from above to the <head> section of your HTML Code.
“Please note! Make sure this meta tag only appears for that specific page, otherwise, you will be removing your whole website from Google’s index.”

Maybe you noticed that online people say to use either “noindex, nofollow” or “noindex”, there’s really no big deal, they should have the same effects.
How to see if meta tags were installed correctly
If you want to confirm if the setup actually works, follow these steps.
First, make sure to clear your cache (mostly for WordPress users).

After that, just head to the post or the page you intend to hide from Google search.
Refresh the page and right-click anywhere on the page, and click on “Inspect Element”.

Click on “Inspector”.
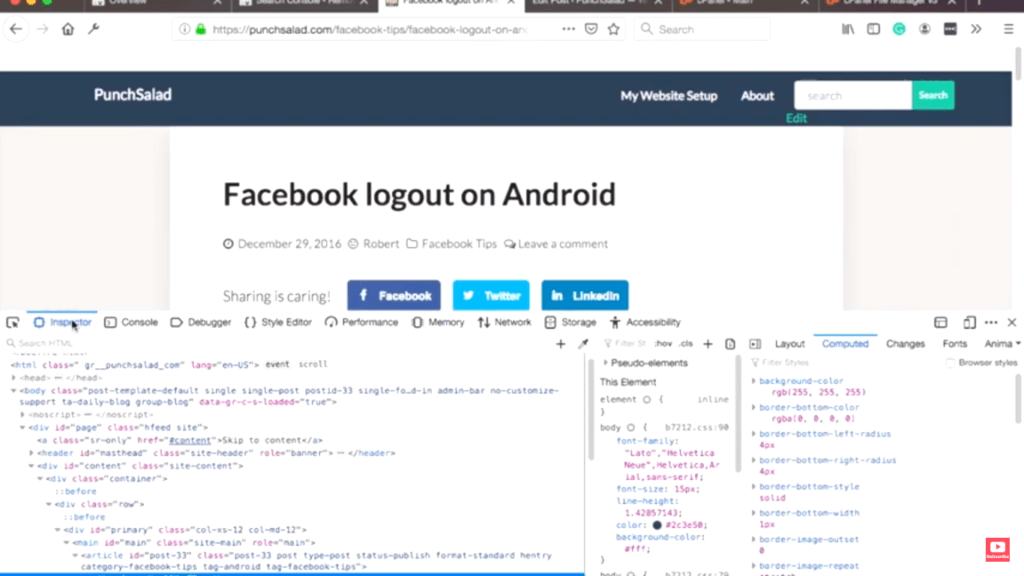
Click on any line of the code and then press “control + F” on Windows or “Command + F” on Mac, then type in “robots”.
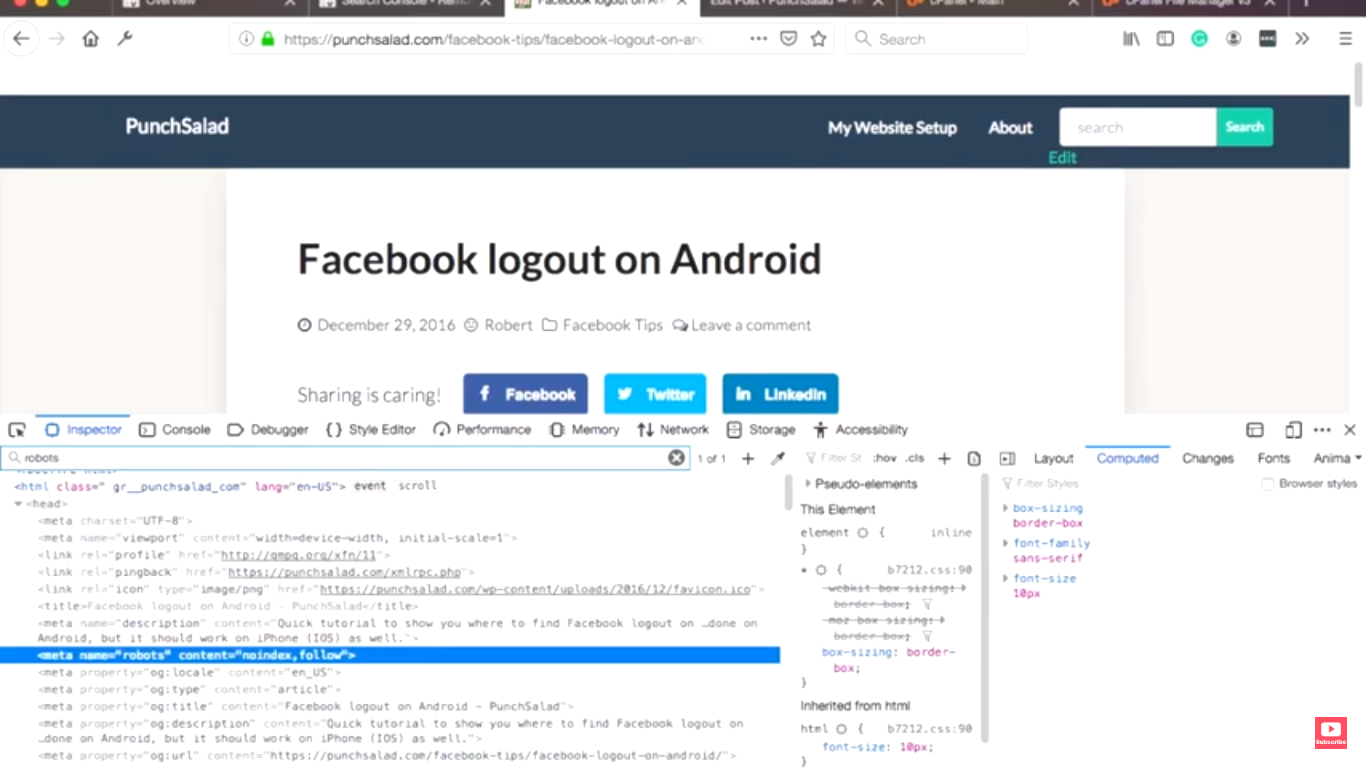
You will notice that the post now has this meta tag in the code, so that way, you can easily see if everything went well.

CONS OF USING THIS METHOD
You have to keep in mind that it might take some time for this to take effect, especially if your page is already indexed and there’s no way to tell when Google actually removes it.
If you misuse this method, you might end up removing the whole website from Google. Just be target specific pages with this!
METHOD 2: Redirecting Traffic to 404 or a 410 page
Next, let’s take a look at the redirection and how we can redirect your site to a 404 or 410 page so that Google knows that you are actually removing the page on purpose and that it doesn’t exist anymore.
How to make a 410 redirect in WordPress
As usual, for WordPress, the easiest way is to install a plugin. Let’s do that right now!
In your WordPress dashboard, just head to your “plugins” section, and add “new”.
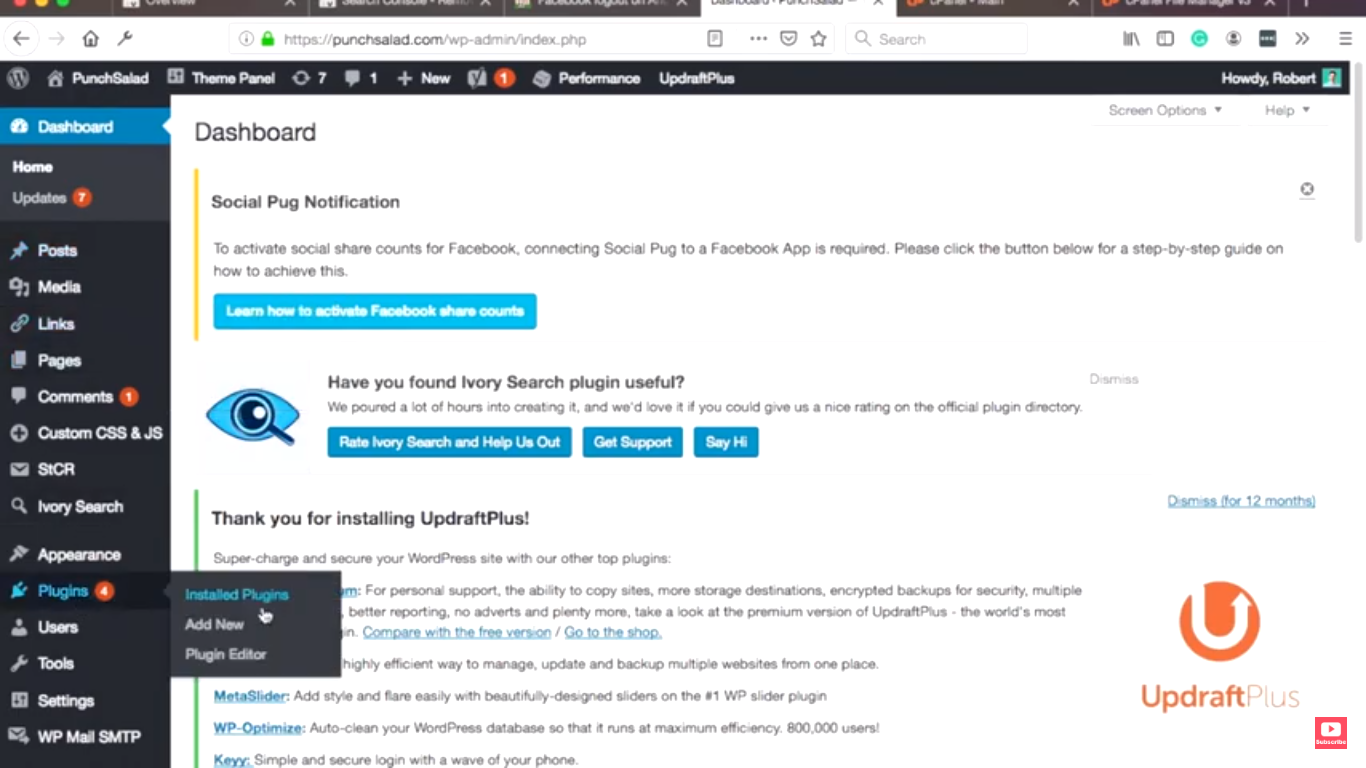
Then in the search box type in “Redirection”, it may end up bringing up different search results for the plugin, ensure you install the one with the name “Redirection” as name, with weird flowers and it was developed by John Godley.

After, install this plugin, and don’t forget to activate it.
Now let’s create a 410 redirection, by clicking on “Tools” in the left menu, and there you will see a new link “Redirection”. Click on it.
Then click on “Add new”.
In the “Source URL” field, add the URL of the post or page you want to remove.
Note that you have to use the relative URL (e.g.), so if the URL contains the domain. Remove it.
Relative URL: /tutorials/my-page-to-be-removed
Absolute URL: www.mywebsite.com/tutorials/my-page-to-be-removed

In the “query parameters”, there are three options;
- Exact match all parameters in any order.
- Ignore all parameters.
- Ignore & pass parameters to the target.
Select the second option, “ignore all parameters”..

Then type in the “Target URL” field: /
This will redirect everybody from the source URL to the home page.
Next, you click on the “cogwheel” below “groups” dropdown.
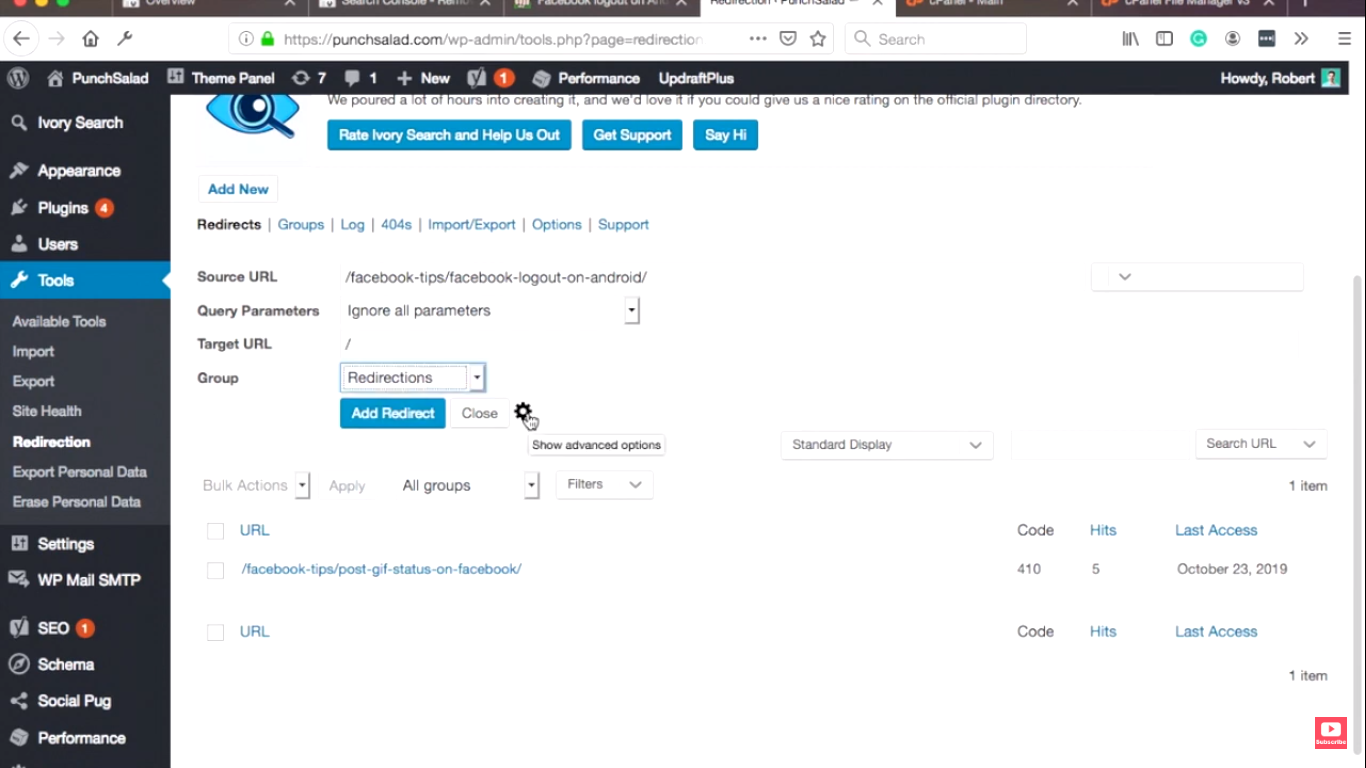
This will reveal more options like “When matched” and “with HTTP code”.
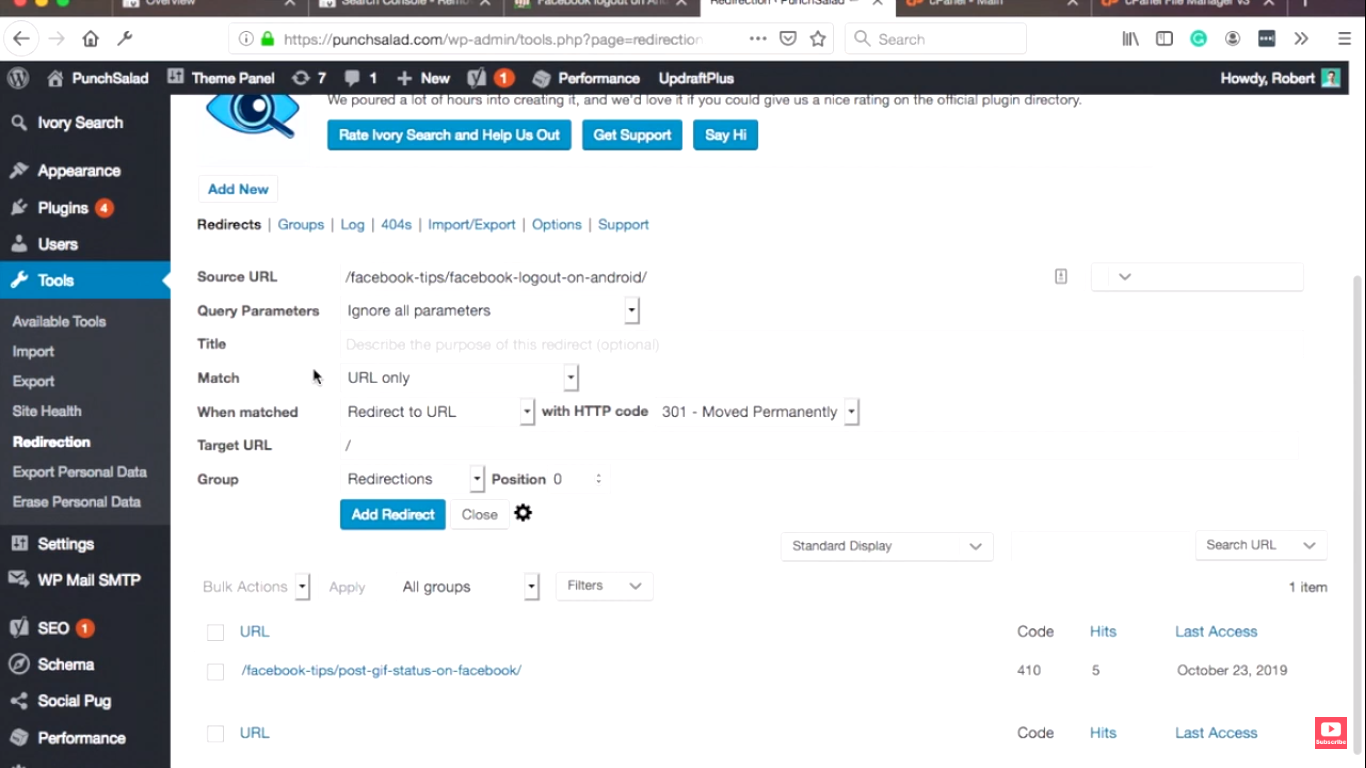
Next, select “When matched”, you’ll see a variety of options, such as “Redirect to URL”, “Redirect to random post”, “Pass through”, “Error 404”, and “Do nothing (ignore)”.
Just click on “Error 404”.

Next thing you have to do is click on “with HTTP code”, there are about 12 options and commands to choose from.
Each one of them serves various specific functions.
They are:
- 400 – Bad Request
- 401 – Unauthorized
- 403 – Forbidden
- 404 – Not Found
- 410 – Gone
- 418 – I’m a teapot
- 451 – Unavailable For Legal Reasons
- 500 – Internal Server Error
- 501 – Not Implemented
- 502 – Bad Gateway
- 503 – Service Unavailable
- 504 – Gateway Timeout
You need to use “410 – Gone” because it actually informs the search engines that this page is deleted and the action was done on purpose, so it notes that it is not just an error page but it was actually deleted on purpose.

You can also give it a group or position if you want but it does not really matter in this case.
Then click on the “Add Redirect” button, and it adds a redirect to your URL.

Make a 410 redirection without a plugin (Works on HTML & WordPress sites)
If you don’t want to use a plugin and you would rather do it yourself.
Then navigate to your web hosts cPanel.
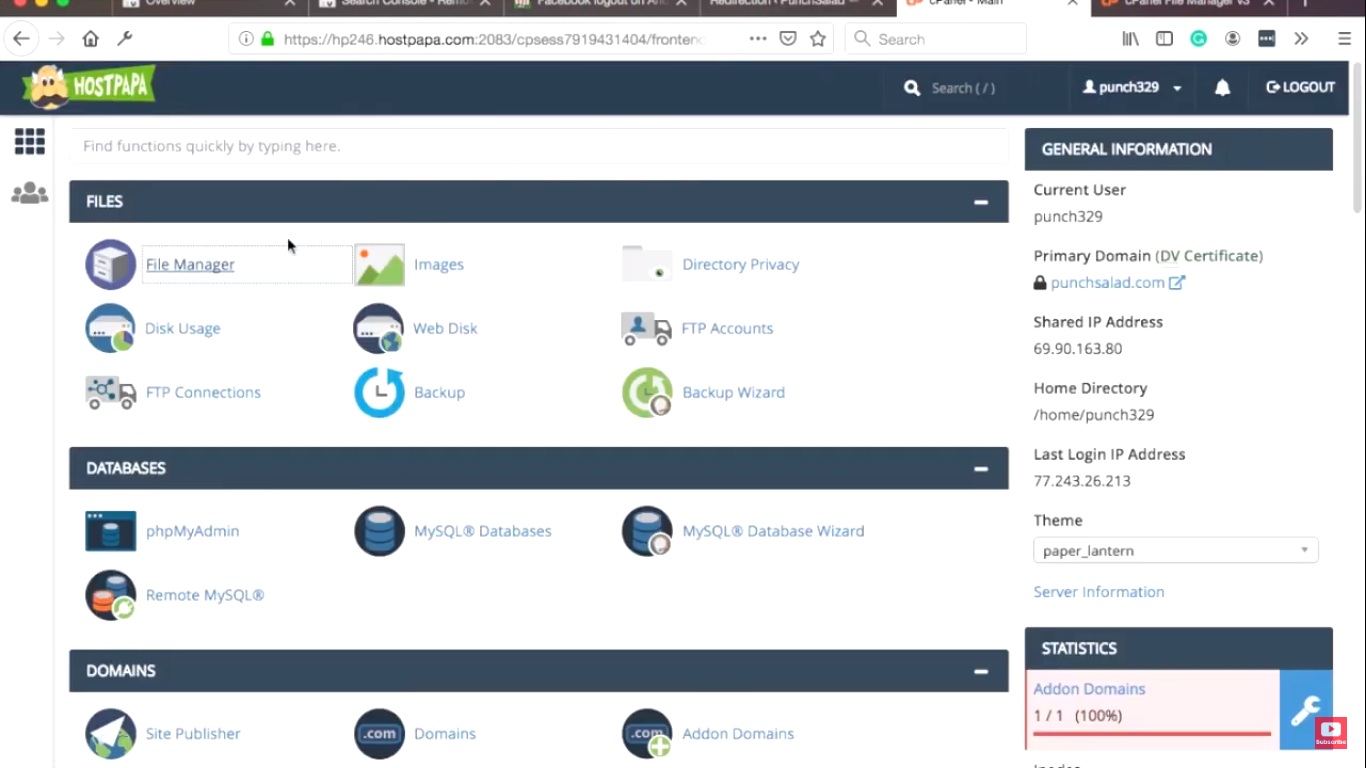
After opening the cPanel, click on “File Manager”, then let it refresh and find your root folder for the domain. In my case, it’s a “public_html” folder, but yours might be named differently for example “yourdomain.com.”
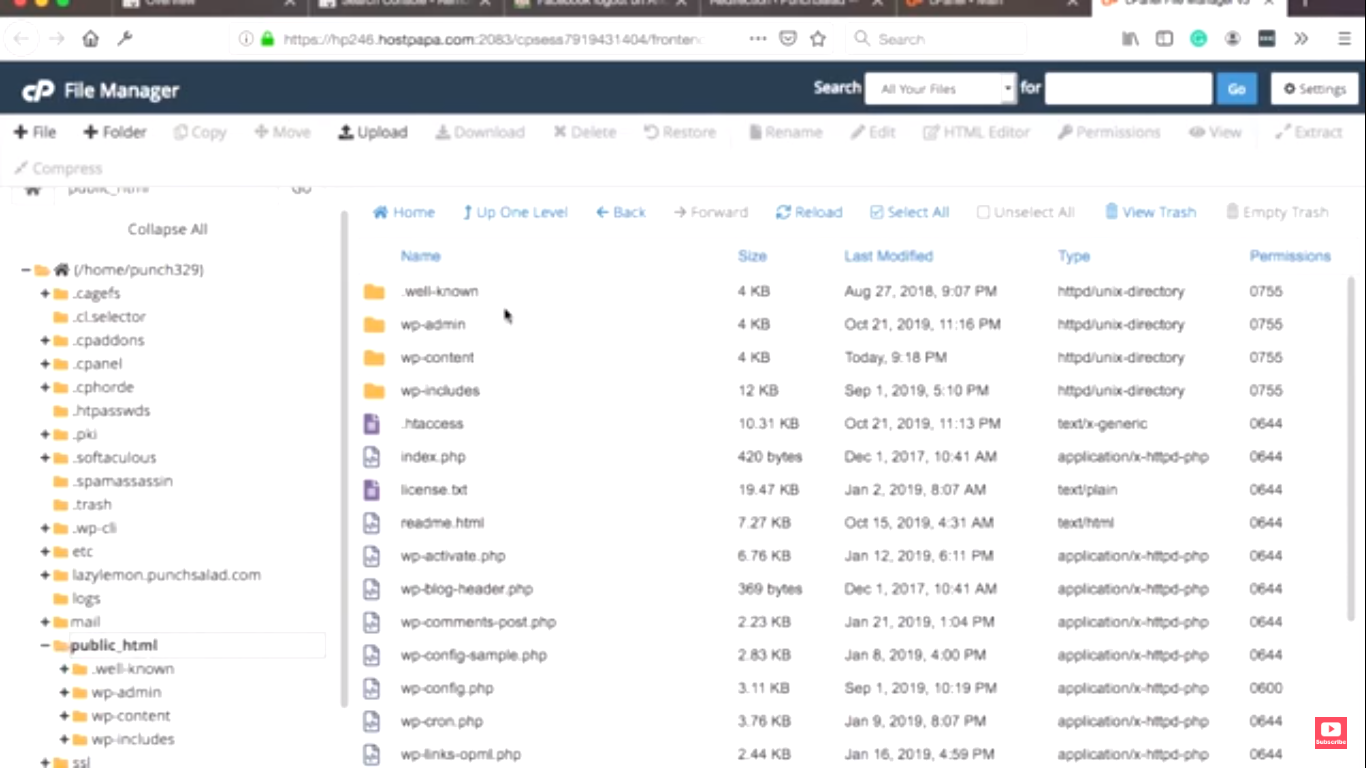
Open the root folder, and find a file named .htaccess.
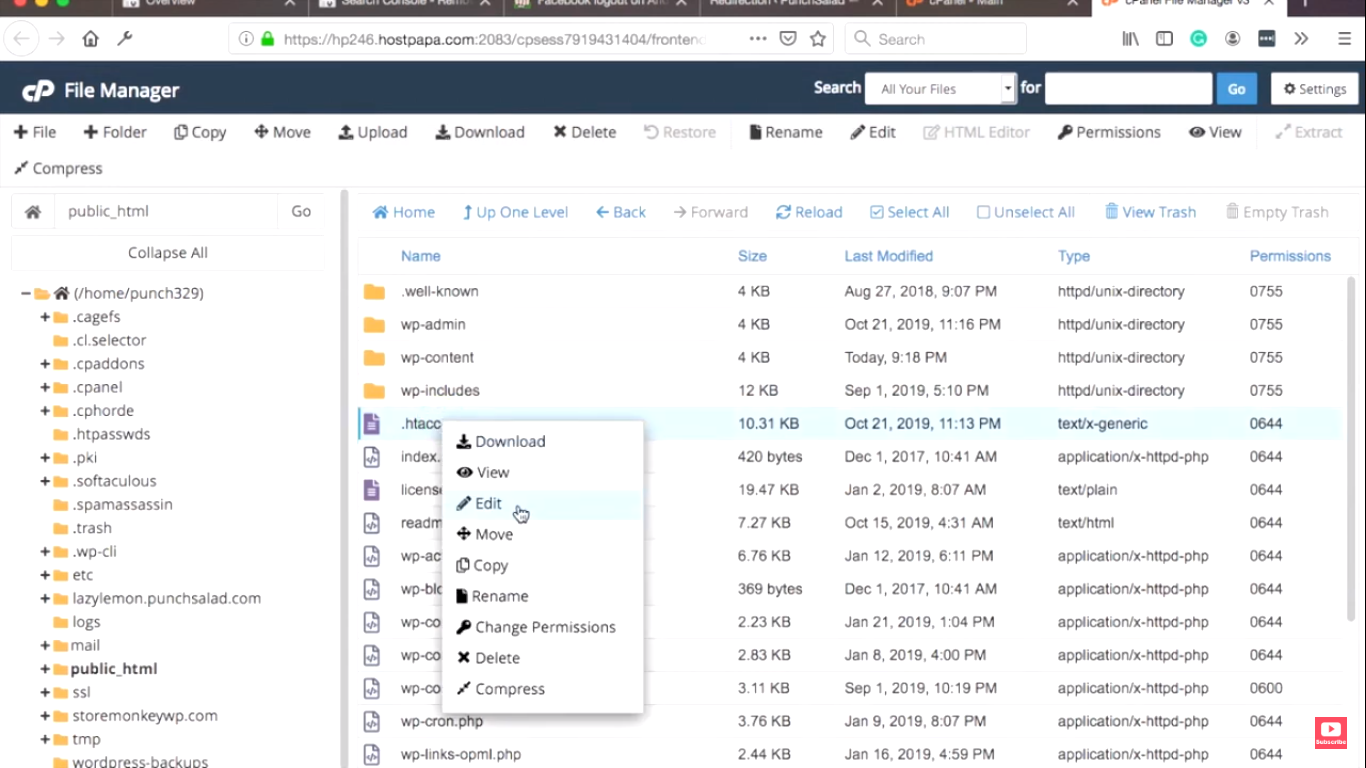
“If for some reason you don’t see it, check that your settings are allowing you to display hidden files, if it isn’t, just click on“Show Hidden Files” and save it.”

The next step is to click on the .htaccess file and choose the “edit” option, it may bring up a prompt, just click on edit and continue.
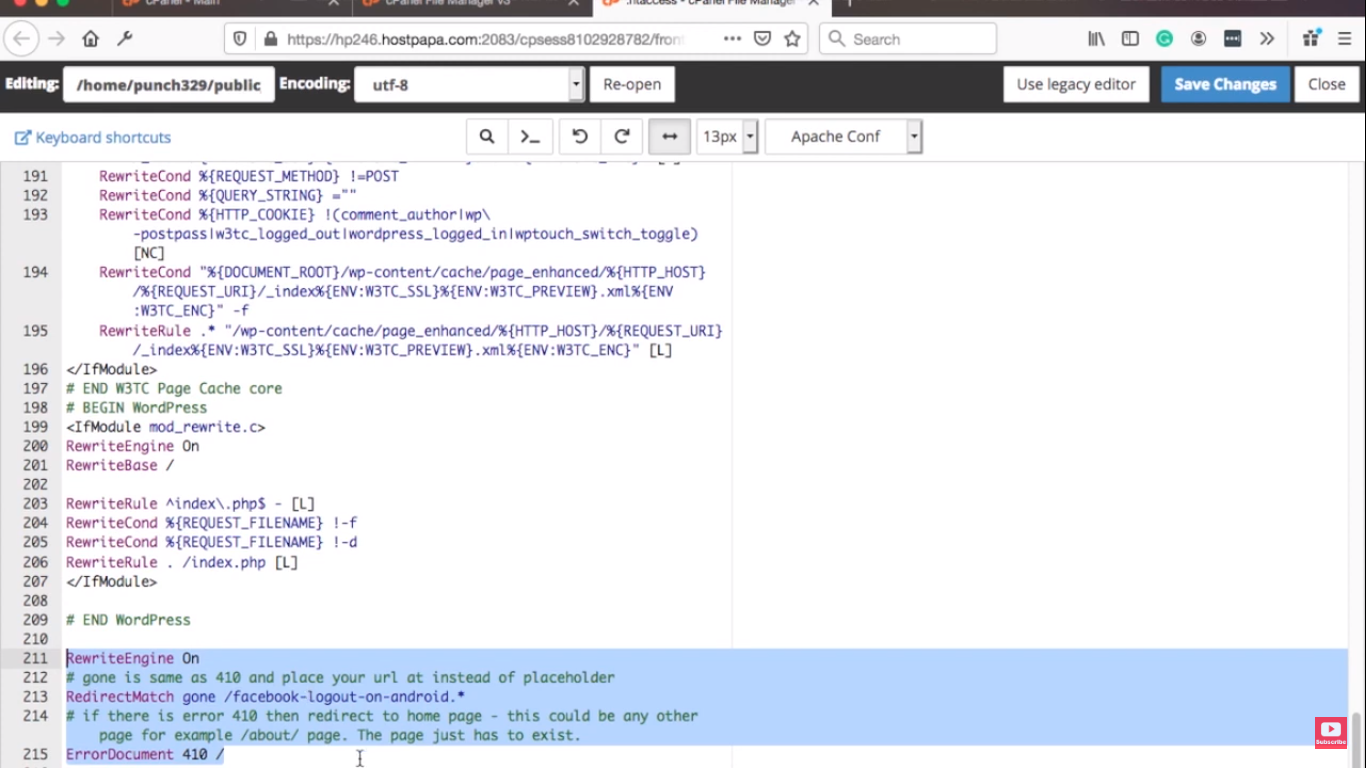
You might see a lot of code, just scroll to the bottom, and add the code below. Make sure you change the parts in red to your own URL (but keep the *) after your URL.
RewriteEngine On
RedirectMatch gone /your-url*
ErrorDocument 410 /
The code will redirect all traffic from relative URL “/your-url” to “/”, which is the home page.
How to test .htaccess 410 redirect
In order to check if this actually worked, just copy the URL, and then open a private/incognito window in your browser.
Before we paste the link and go, right-click anywhere on the page and click on inspect element.
Then click on the Network tab.

Reload the page and you can see that you have the 410 requests and then it goes to the home page.

This way you can confirm that the redirection worked and the website is actually going to be removed from Google quite quickly.
This is because Google doesn’t want any web pages that have been removed and they don’t want to index anything that they don’t actually need to.
CONS OF USING THIS METHOD
If you are the type that has limited time, this would not be the best solution as it isn’t as simple as using the Yoast plugin, and this involves many more steps.
On the other hand, it’s harder to make a mistake with this method, as you target specific URLs.
METHOD 3: Remove a URL with Google Search Console
If you have a domain property installed, you can’t remove a URL by using Google Search Console. Just skip to the next method. This is a shame, and I hope this feature eventually gets added, but for now, it’s not possible, so we have to focus on the URL property.
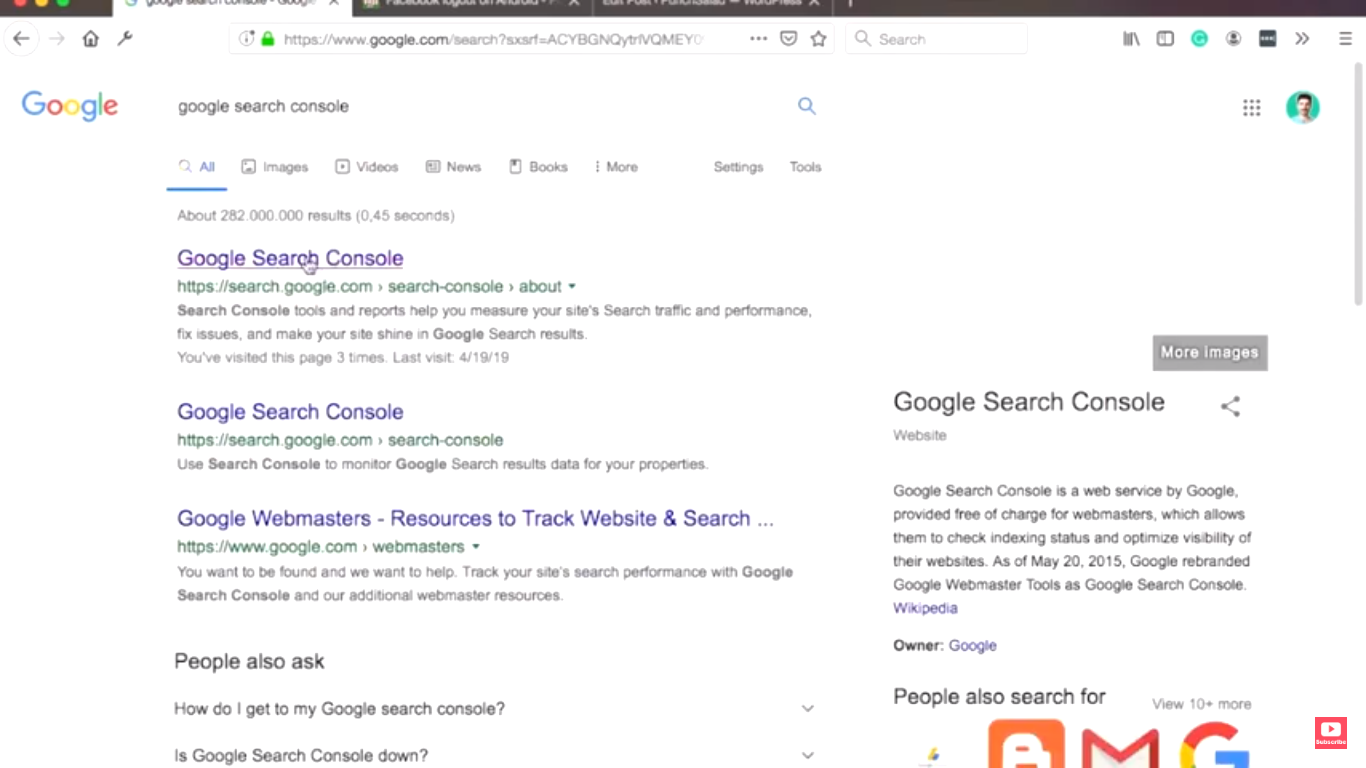
Firstly, What is a Google Search console?
Google Search Console (previously called Google Webmaster Tools) is a free web service that allows you (the webmaster) to see how your website is performing on Google Search.
The main usage is to see how many times your website appears in Google, how many people clicked, and what is the average position of your web site for certain keywords. Also, the search console has other interesting stuff such as sitemaps, AMP errors, website speed monitoring, etc.
For more information, check this video tutorial that explains everything you need to know about Search Console.
Ok, enough of blabla, let’s get started!
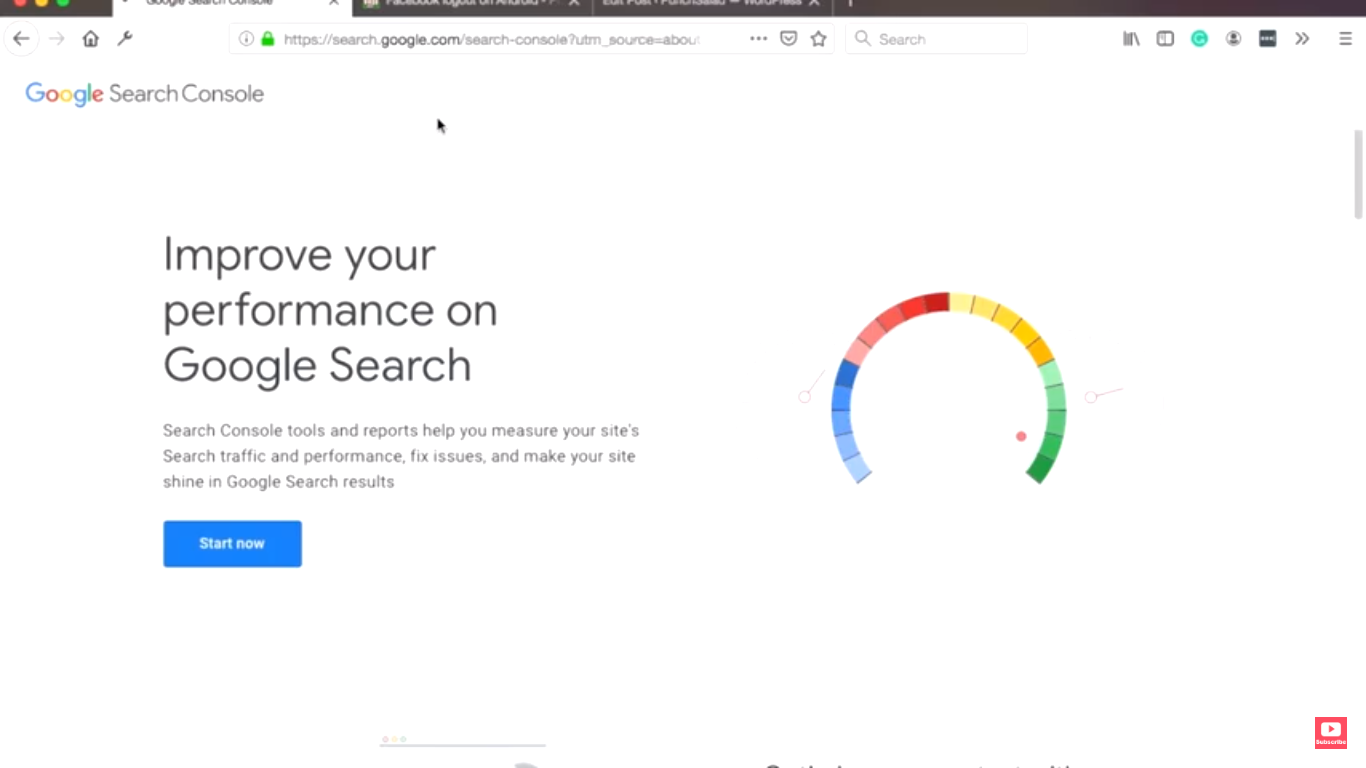
Basically, the first step in removing the URL is just simply going to Google, and type in “Google Search Console”, click on the first link in the search results.
Then just click on “Start now”.
Or if you already have a Google Search Console account. You will get a view or interface like the one below.
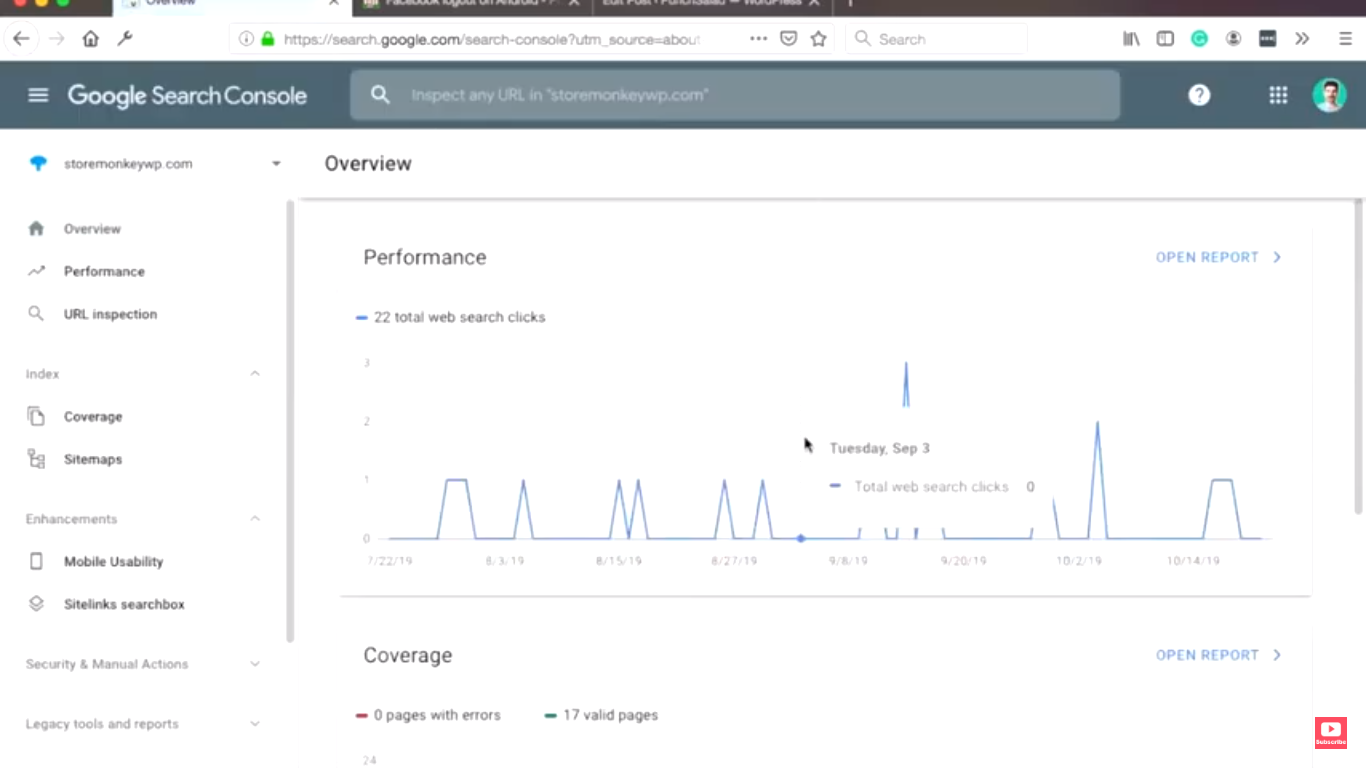
If your interface does not look like the one above, you are seeing the old view, there is a toggle button around the search bar that will allow you to switch to the type of view above.

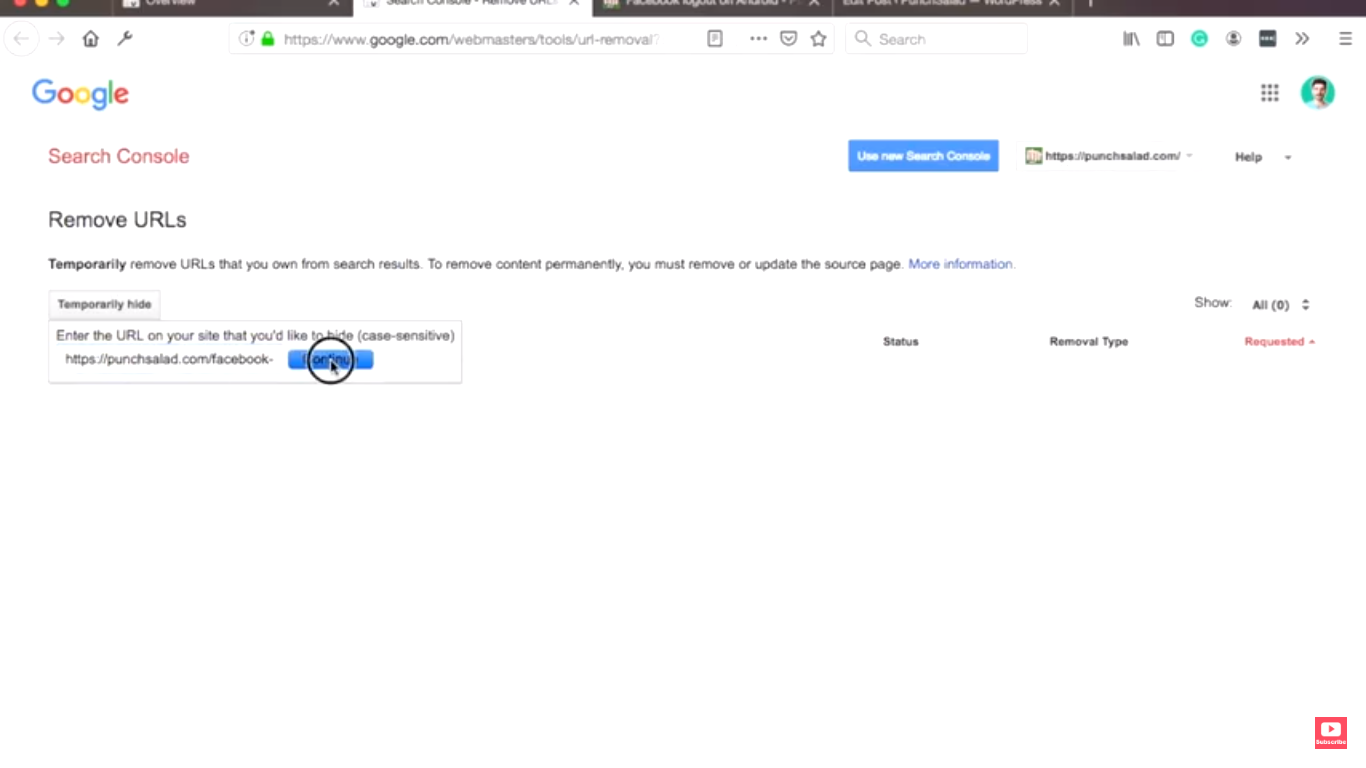
So, if you’ve set up the URL property, then you are good to go. Select the URL, scroll down to the bottom left corner of your screen, you’ll see the “Legacy Tools” section.

Under it you see a “removal” link, click on it and it’ll redirect you to the removal page.

It currently looks old school, but not to bother, just click on “temporarily hide” and then grab the URL from wherever you saved it, or you may just copy the link directly from opened tabs on browsers.
Paste the link and click on “continue”, it will then display three options in the request type:
- Clear URL from the cache and temporarily remove it from the search.
- Clear URL from cache only. E.g. if you updated it.
- Clear URL and temporarily hide all URLs beginning with ….
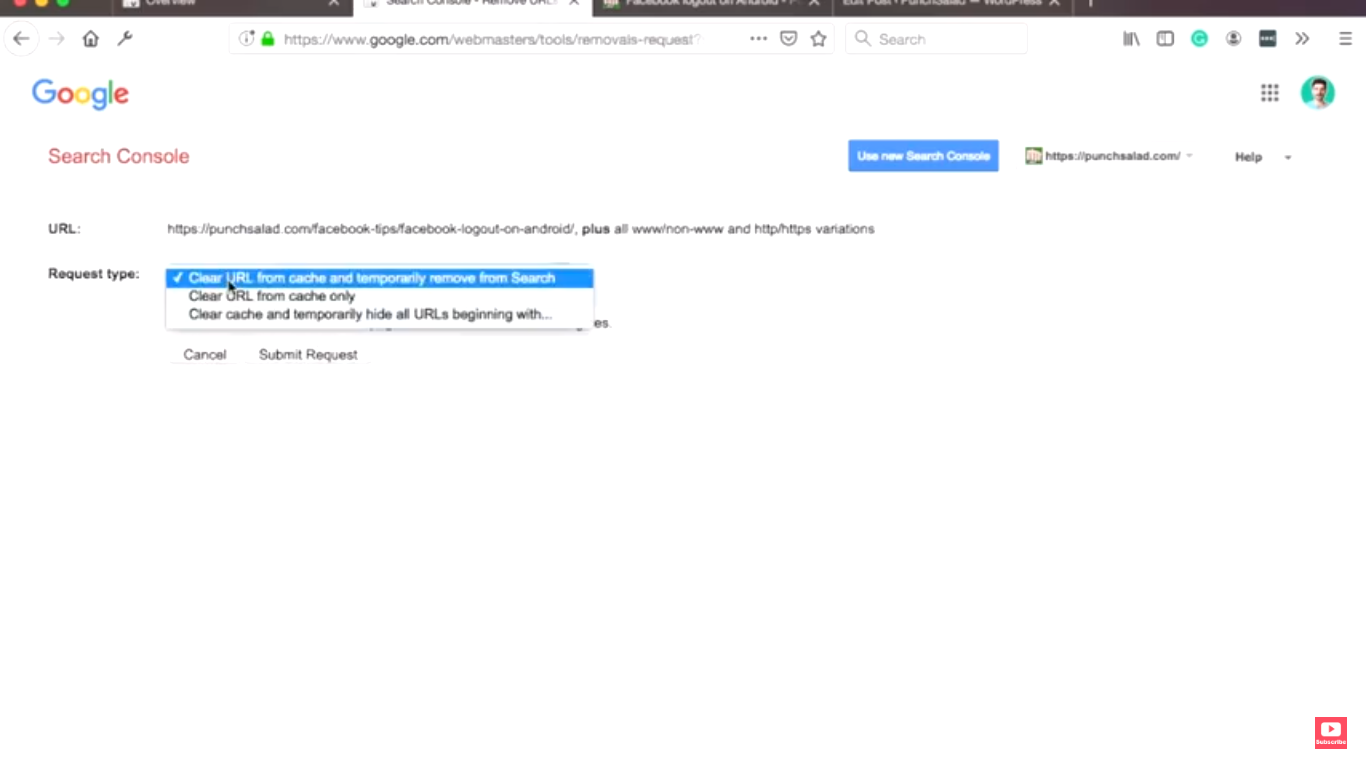
In our case, we will stick with the first one, the next step is to “submit the request”, then the task is done.
CONS OF USING THIS METHOD
- The problem with the approach is that it actually just removes it for 90 days, and within the 90 days it might appear again just because the request for it to be removed was temporarily and not permanently.
- There is also a slight probability that the URL may eventually be reintroduced into the Google index. If the URL still has accessibility and there are still links all over the internet that still point to it.
- The submitted request may take up to 24 hours to be processed, yet there is still no guarantee that it will be accepted.
If you change your mind after following the above steps, you can just cancel your initial request by simply clicking “Cancel.”
In order to permanently delete the URLs, let us check out the other methods.
Conclusion
I’ve just shown you 3 ways of how to remove a URL from search engines. Personally I like to use Yoast plugin to hide my pages. I find this the quickest and easiest way. If that’s not an option for you, then I would go with the redirection.
If you made it this far in the post, you are a champ! Great job! Even I barely made it here 🙂