Hello Internet people!
Did you know that if you regularly backup your WordPress site, it will save you from feeling like this?

In this article, I’ll show you 3 ways you can backup WordPress site.
Here is how to restore a backup, if that’s what you are looking for.
- Use free WordPress plugin called Updraftplus, which will backup automatically.
- Utilize cPanel’s own backup feature, which is a manual process, unless you pay.
- Use File Manager and phpMyAdmin in cPanel. This is also a manual process.
This tutorial should work on any hosting provider that uses cPanel, I’ll be using GoDaddy.
Here is a video that covers most of this article.
Plugins to backup WordPress site
There are multiple good and safe backup plugins for WordPress. They are quite similar in terms of features and they all can store your backup files on your server, Google Drive, DropBox and so on.
1. Install UpdraftPlus WordPress backup plugin
The first way is to use UpdraftPlus WordPress backup plugin.
Let’s get started with the installation:
- Go to the WordPress Dashboard.
- Then navigate to plugins and choose “Add new”.
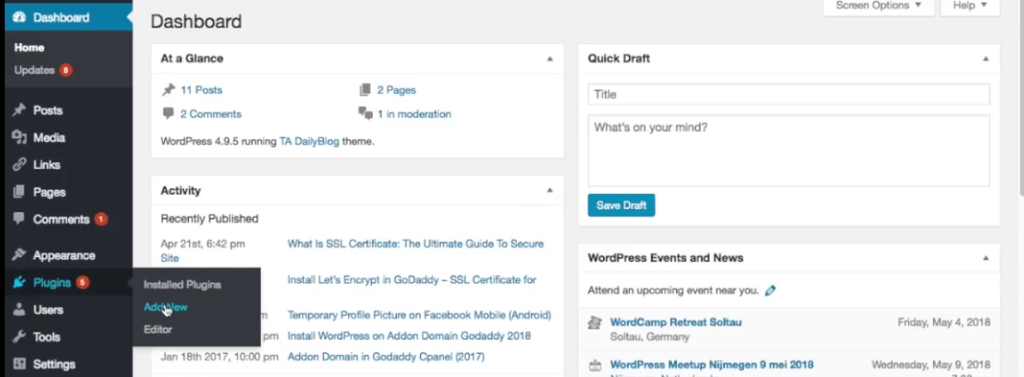
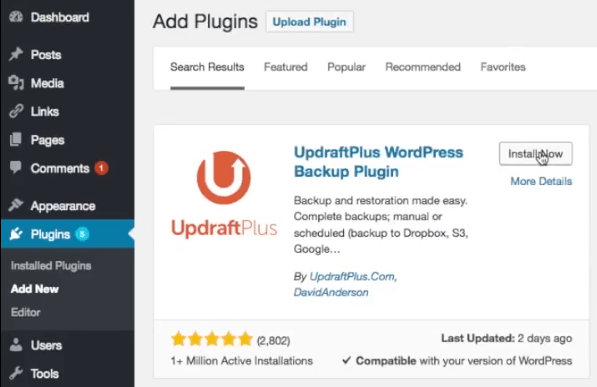
- Now in the search box type “updraft”.

- And click on “install now” on the UpdraftPlus plugin, which should be the first item in the list
- The installation might take some time.
- Once it’s done, make sure you activate the plugin by clicking on the blue activate button like this.

- Then go to your plugins list and find updraft at the bottom of the list, and click on settings.

- This page is UpdraftPlus dashboard, where you can control your backups.

- If you click on “backup now” button, you are going to store a file directly on your server.
It should now start downloading the file and once it’s done it appears under existing plugins.
However, it’s much safer to save it somewhere else as your server might get wiped out due to a malware or screw up.
2. Set up UpdraftPlus to store backups to external drive (Google Drive or DropBox)
So let’s set up the tool for this.
Go to the settings tab in UpdraftPlus plugin.
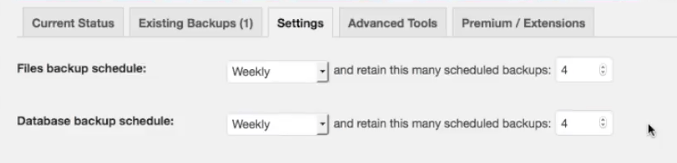
- First, you set up the files backup schedule, which means all your theme files and other files that help running WordPress. The frequency will really depend on how often you update your website and how much work you are willing to lose in worst case scenario.
- I don’t update my site layout and plugins too often, so I’ll set this to weekly. The downside of setting this to more frequent intervals is that you lose some space.
- Next dropdown means that the tool removes the older files and you can specify how many back-ups it will keep at a time. I’ll set this to 4 backups. This way I have backups from at least past month.

- For the Database backup schedule, you can make this more frequent than the files backup as this is where your pages, posts, comments, and so on are stored. However, since I only release few posts a month, I’ll set this to weekly, but you can choose more frequent one.
- For the 2nd drop down I’ll set it to 4, for same reasons as for files backup.
- Next, you are going to choose where to backup your files.
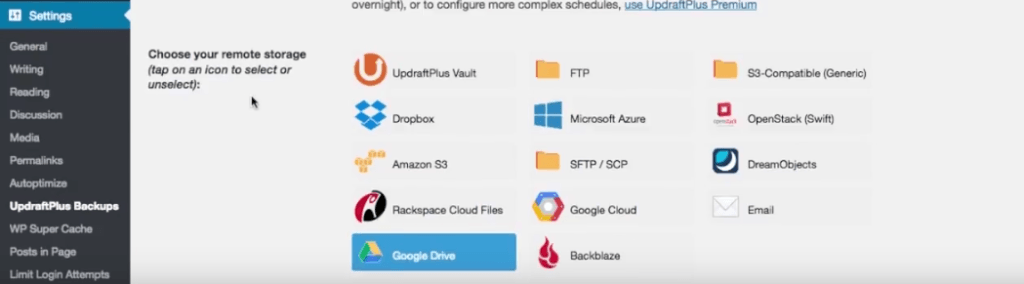
- Now there are many options and you can choose your favorite way, they are all fairly easy to install.
- I find the most convenient is to store it on google drive so I’ll select it.
- On Next step, you are able to choose what to backup, I would check everything and keep them just in case.

- Then below you can encrypt the database backup at a small fee
- Below that you can also send a basic report to your email. I don’t really need it, so I’m going to skip it.
- And then click on “Save Changes” at the bottom of the pages. This is getting pretty intense, Arnie tell them how you feel

- A popup will appear, asking you to confirm that updraft can access your google drive. Just click on the link and select the account you want to use.

- In next window click on “Allow”
- And then on “Complete setup” As you can see at the top, the updraft has been successfully connected to Google Drive and how much space you have there.
- Let’s click on “backup now” and see what we get.

- So this will take a bit of time. But once done, you should see 5 files in Google drive.
- The DB backup – this where your post and comments hang out
- Others – some other WordPress stuff
- Plugins
- Themes – and any child themes you’ve set up
- Uploads – mostly your media files, like images and documents

- In addition, if we go to the UpdraftPlus’s existing backups pannel, you’ll see that you have a backup done on google drive. You are also able to download everything to your computer, by clicking for example on “database”.

That’s it, now you should see new backup files every week in your google drive
Backup WordPress from cPanel
The second way to backup everything is through cPanel. In this case, the backup will include all the files associated with your WordPress and files that go on your cPanel like SSL certificate and other settings.
Some hosting providers will provide free automatic backups, however, I’m using GoDaddy and the automatic is a paid feature. But let me show you how to do it manually.
- Go to your cPanel and click on “Backup”.

- Here you will have an option to do a full back up or partial backup of your home directory and databases and also emails.
- Let’s do a full backup by clicking on this button.

- On next page, select “Home Directory” in the first drop-down and add an email if you want to receive a message when the backup is done.

- And click on “Generate Backup”
- Once it’s done. You will be able to see a full backup when you go back to full backup page.
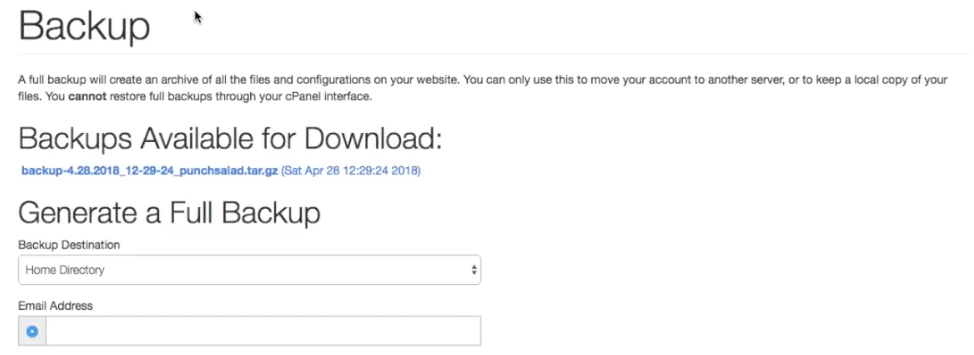
- And if you click on the link, you will be able to download the files on your computer.
- That’s it, you have now backed up your website and you can relax, even if you get hacked by Ze North Koreans!

Backup WordPress site manually
The third way to backup your website is to use the file manager to backup up themes and plugins and phpMyAdmin to backup database manually. This process is manual.
Backup WordPress with FTP or cPanel’s File manager
Let’s start with backing up the themes and plugins and so on.
- Go to cPanel
- Click on file manager.

- The easiest way to backup is to find your public_html folder, you might need to first click on home in the left menu.

- “Right-click” on it. Select “Compress”, and select the compression format.
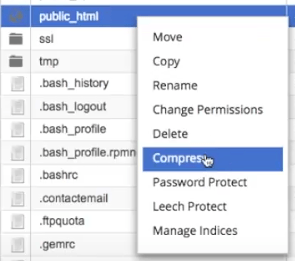
- I’ll choose .zip. And it will start compressing everything.
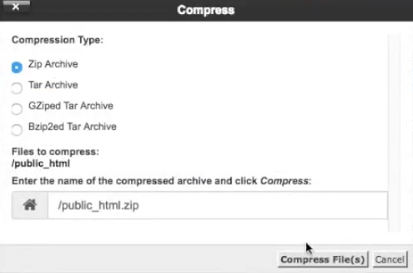
- This will create a compressed file in your file manager.
- Find the zip file and right-click it, and choose “Download”.
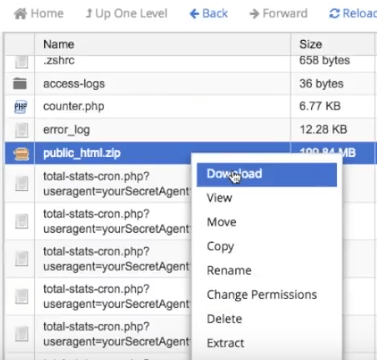
If you have multiple domains on your hosting, you are able also to backup individual websites by compressing and downloading the folder in the public_html folder, like this one.
Backup WordPress Database with phpMyAdmin
The WordPress database contains all the posts, information on pages, comments and other content. Without it, your site will be very empty. So make sure you back it up regularly.
- Go to cPanel
- Scroll down until you see phpMyAdmin and click on it.

- This is where all your databases hang out.
- To download all the information in database go to “Export” tab at the top of the page.

- Just make sure your format is SQL and then click on “Go” (It should start downloading a .sql file).

Just as a reminder, if you want to backup a specific database, then just select the database here on the left. And then go to “export” tab and export in SQL format.